

Atlas Screws Locations Destiny 2
Destiny 2's Atlas Skews are part of the Tracing the Stars questline, where yous'll be exploring the Dreaming City in search for them.
Debuting in Season of the Lost, this is one of the commencement quests you can activate and start progressing through during your visits to the Dreaming Metropolis. The primary objective is to find five Atlas Skews around the map.
This also leads to a secondary quest that you must complete to finish Tracing the Stars. Equally a advantage for your troubles, you lot'll commonly obtain a new weapon also as Parallax Trajectory.
This page explains where to find Atlas Skews and how to complete Tracing the Stars, all which build towards helping you unlock the Ager'southward Scepter Exotic.
Explainers:
- How the Tracing the Stars quests in Destiny two work
Divalian Mists locations (equally role of Tracing the Stars I):
- Divalian-Rheasilvia Path, Lower Cliffside Atlas Skew location
- Divalian-Cimmerian Path, Key Cave Atlas Skew location
- Drowned Bay Alcove Atlas Skew location
- Spine Oracle Orrery Atlas Skew location
- Distant Spine Island Tree Atlas Skew location
The Strand locations (equally part of Tracing the Stars Ii):
- Strand Towering Statue Atlas Skew location
- Strand Gazebo Statue Atlas Skew location
- Garden Waterfall Atlas Skew location
- Garden Span Tree Atlas Skew location
- Aphelion Brazier Atlas Skew location
Rheasilvia locations (every bit part of Tracing the Stars 3):
- Rheasilvia Secluded Statue Atlas Skew location
- Rheasilvia Lower Level Atlas Skew location
- Rheasilvia Temple Overlook Atlas Skew location
- Harbinger Sidehall Statue Atlas Skew location
- Straw Ahamkara Skulls Atlas Skew location
The Confluence locations (as role of Ager'southward Scepter'south A Hollow Coronation):
- How to observe The Confluence location explained
- Harbinger Cathedral Atlas Skew location
- Confluence Tree Triad Atlas Skew location
- Confluence Throne Portal Atlas Skew location
- Confluence Giant Crystal Atlas Skew location
- Garden Entry Statue Atlas Skew location
How the Tracing the Stars quests in Destiny 2 work
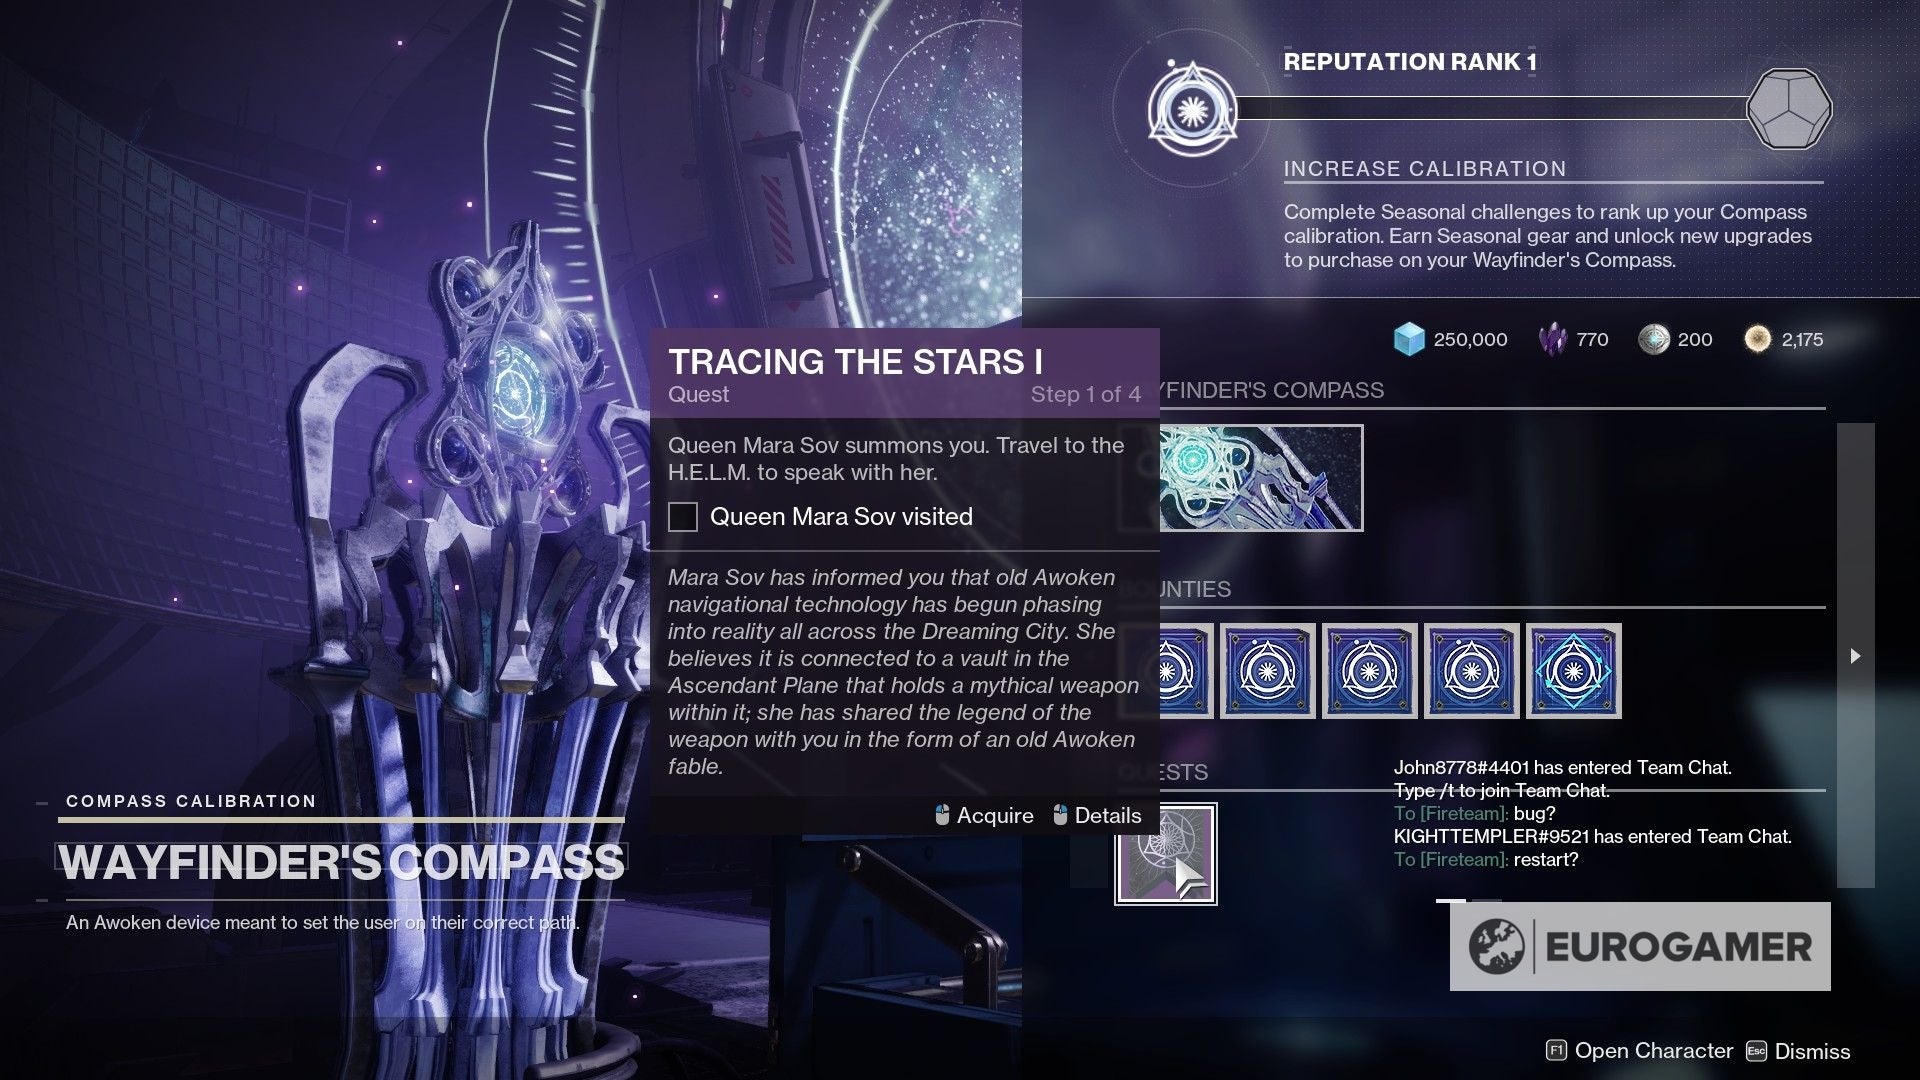
Tracing the Stars is a seasonal questline in Season of the Lost, and requires for you to follow and complete the steps in social club to progress.
If you're just starting with the seasonal content, kickstarting the questline is super easy. After completing the first full step of Wayfinder's Voyage - which involves completing a run of Astral Alignment - Tracing the Stars I will become available from the Wayfinder'southward Compass in the H.E.L.M. correct after y'all selection up the Iota Draconis fusion burglarize.
From hither, this process is repeated on a weekly basis. After you finish Tracing the Stars I, the 2nd stride will become bachelor on the next weekly reset.
For Tracing the Stars quests, the steps are as follows:
- Travel to the H.Due east.L.M. and speak to Queen Mara Sov
- Collect Atlas Skews within the Dreaming City (5 total)
- Connect the recovered Atlas Skews to an Atlas Terminal past completing A Hollow Coronation
- Return to the H.E.Fifty.1000. and debrief at the Compass

After three Tracing the Stars steps, you'll begin an Exotic version of A Hollow Coronation with more Atlas Skews to find - a quest which then leads you to unlocking the Ager'southward Scepter.
In case you were wondering, y'all can find Queen Sara Mov inside the 'portal' that is located in the H.Due east.L.M. - for this, once yous're in the H.E.L.Grand., head to the right and go downstairs. The portal is at the finish of the catwalk backside the two armed NPCs.
As for A Hollow Coronation, this is a side quest that happens afterward you collect all v Atlas Skews. It'southward super piece of cake to follow, though, and yous can select information technology direct from the H.E.L.One thousand. destination tab.
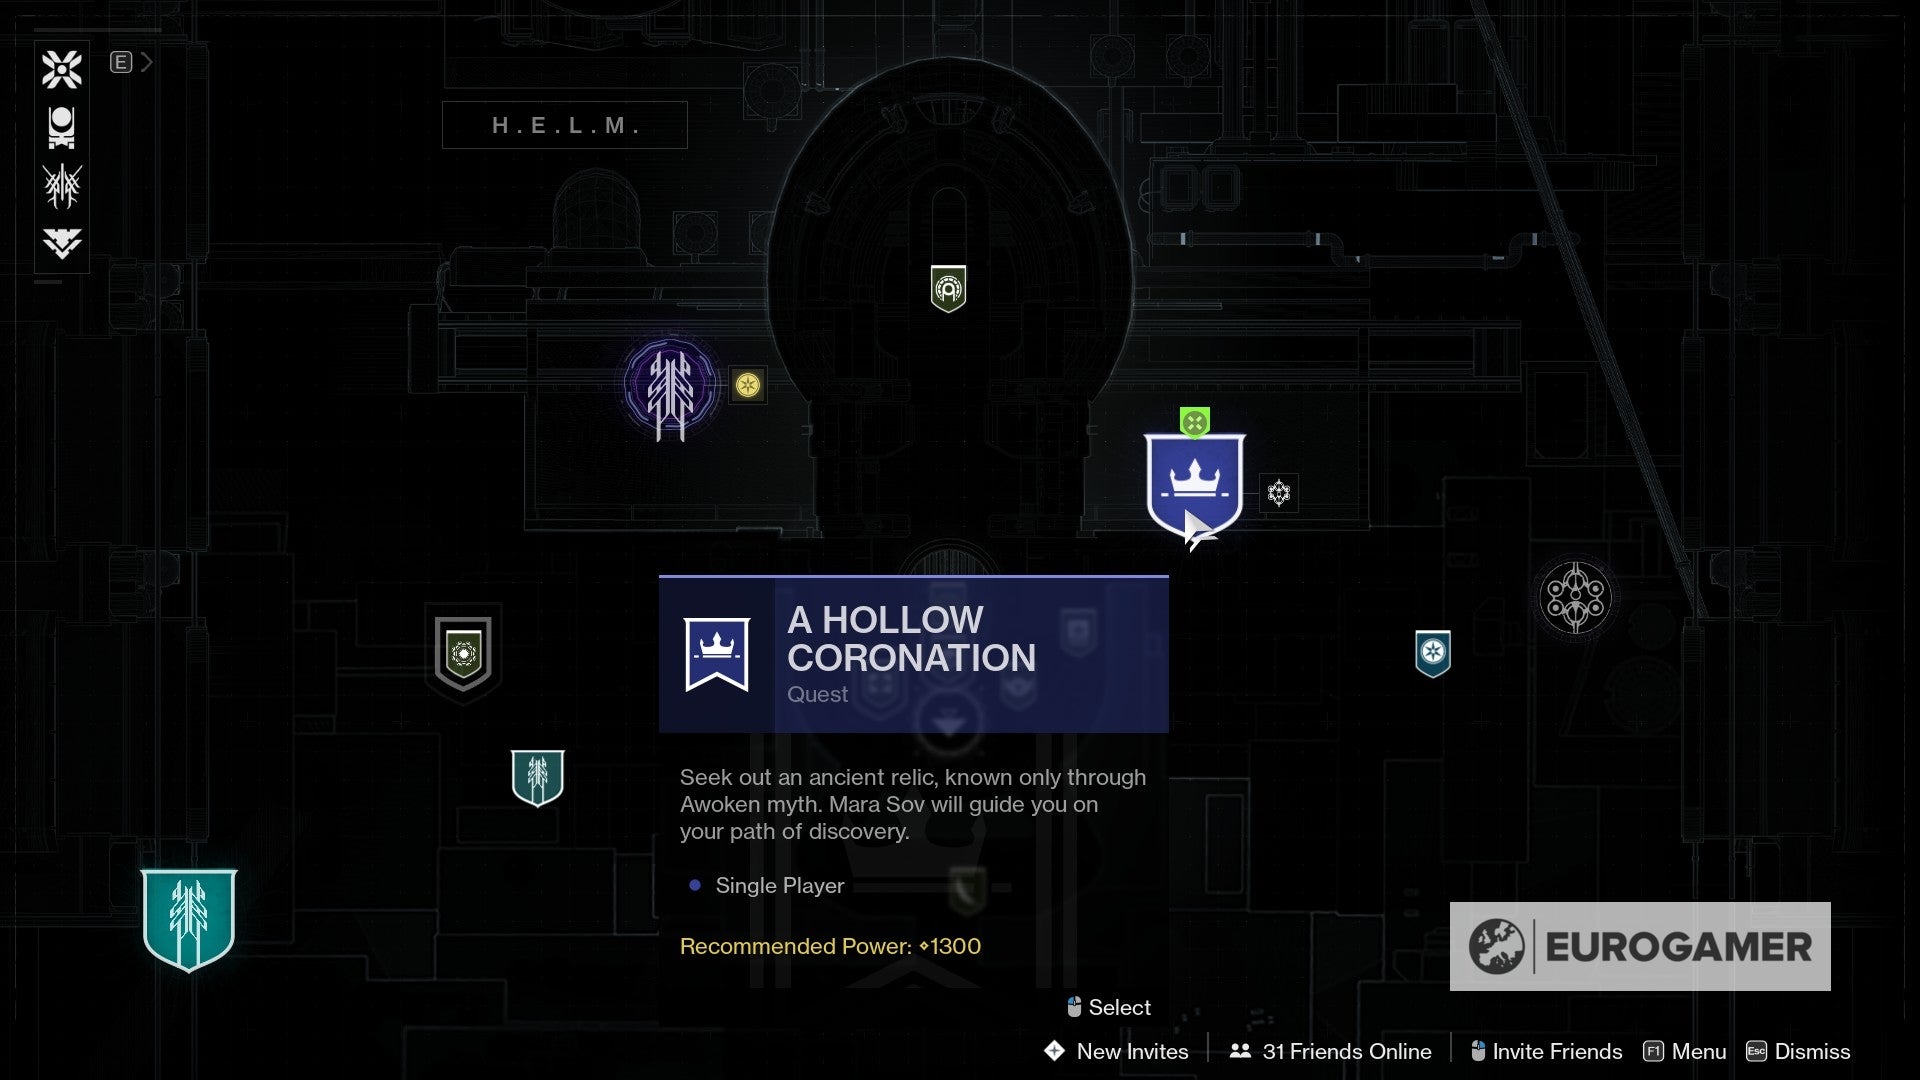
All it asks is for you to get through the portal again, which will take you to the Caliburn Gatehouse. In there, yous need to approach the corresponding terminal of the week (this is washed in clock-wise order, but the quest marker will bespeak it out either way). Interact with information technology and the quest will be over.
From there, you can debrief at the Compass once again and consummate the Tracing the Stars quest.
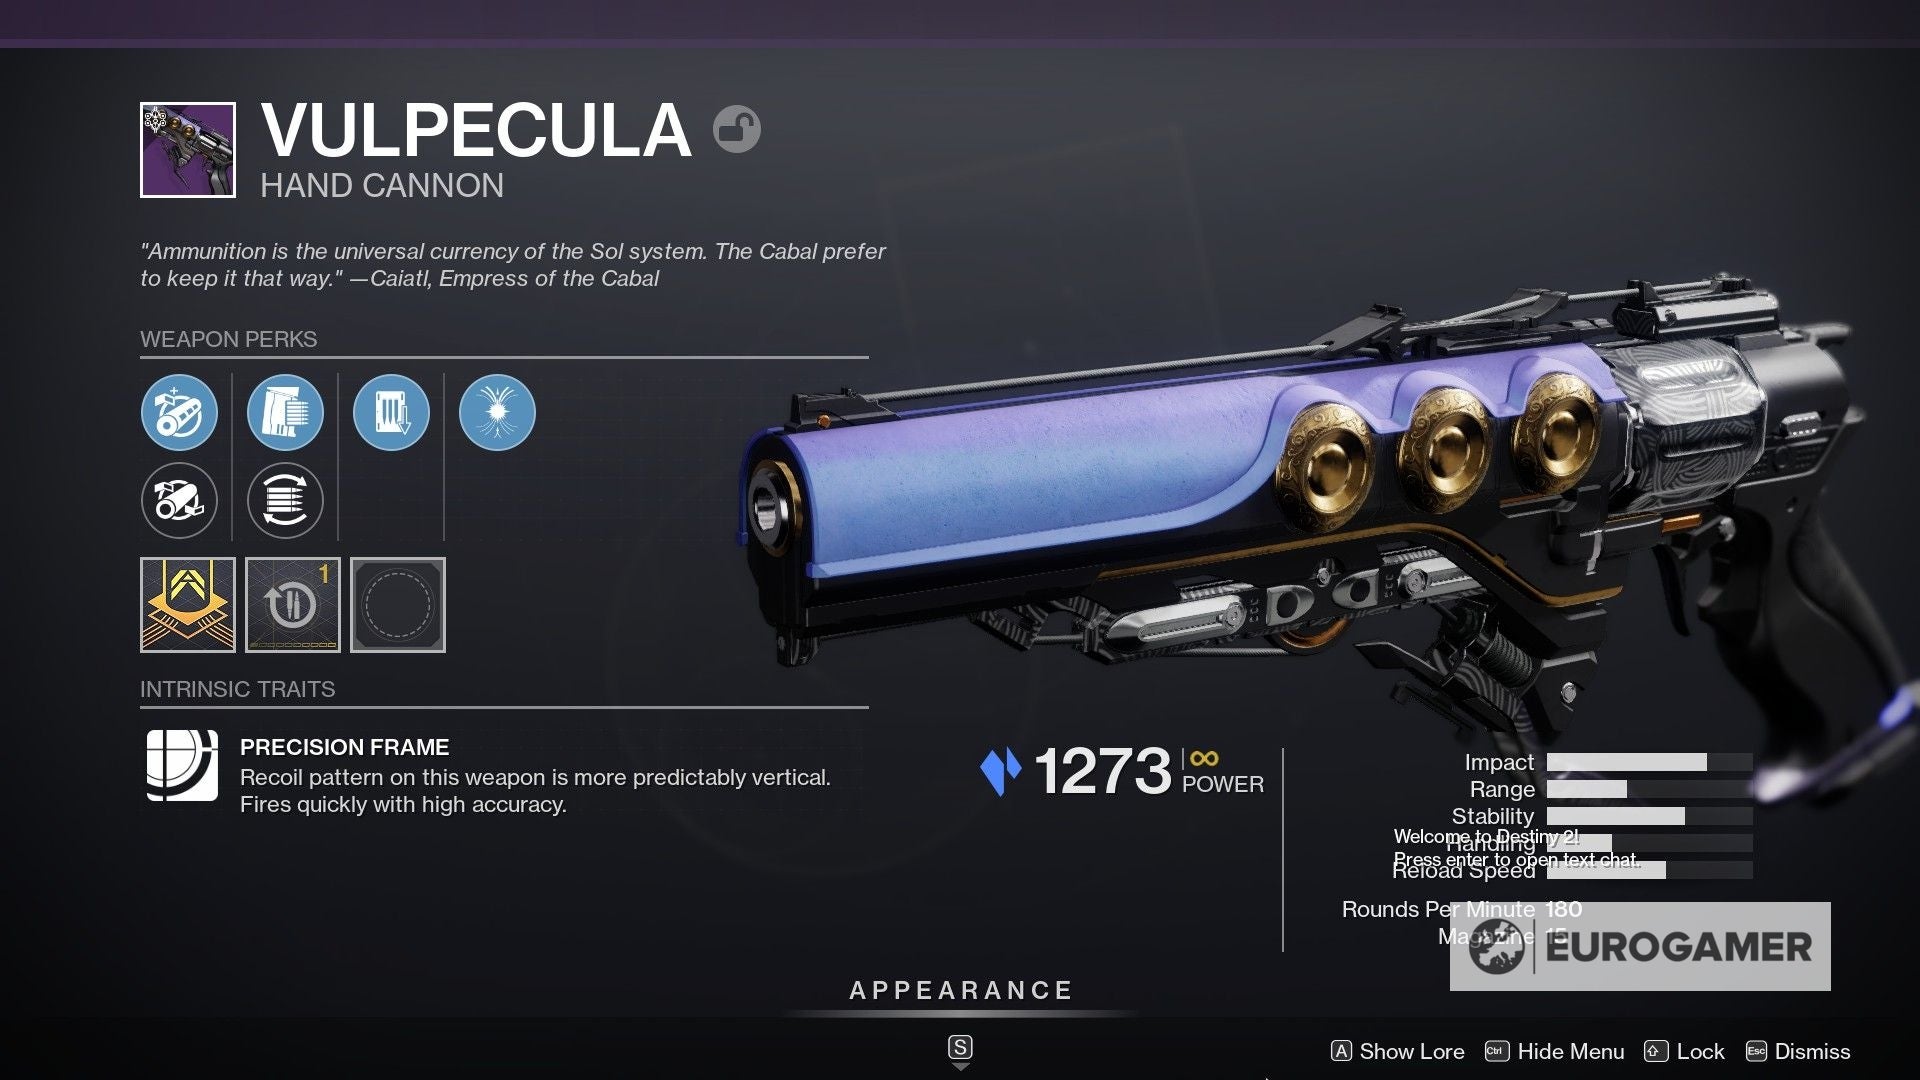
In terms of rewards, you volition always obtain 150 Parallax Trajectory for cashing in the quest, in addition to a weapon. Every bit of at present, these are the following:
- Tracing the Stars I advantage: Vulpecula (legendary manus cannon)
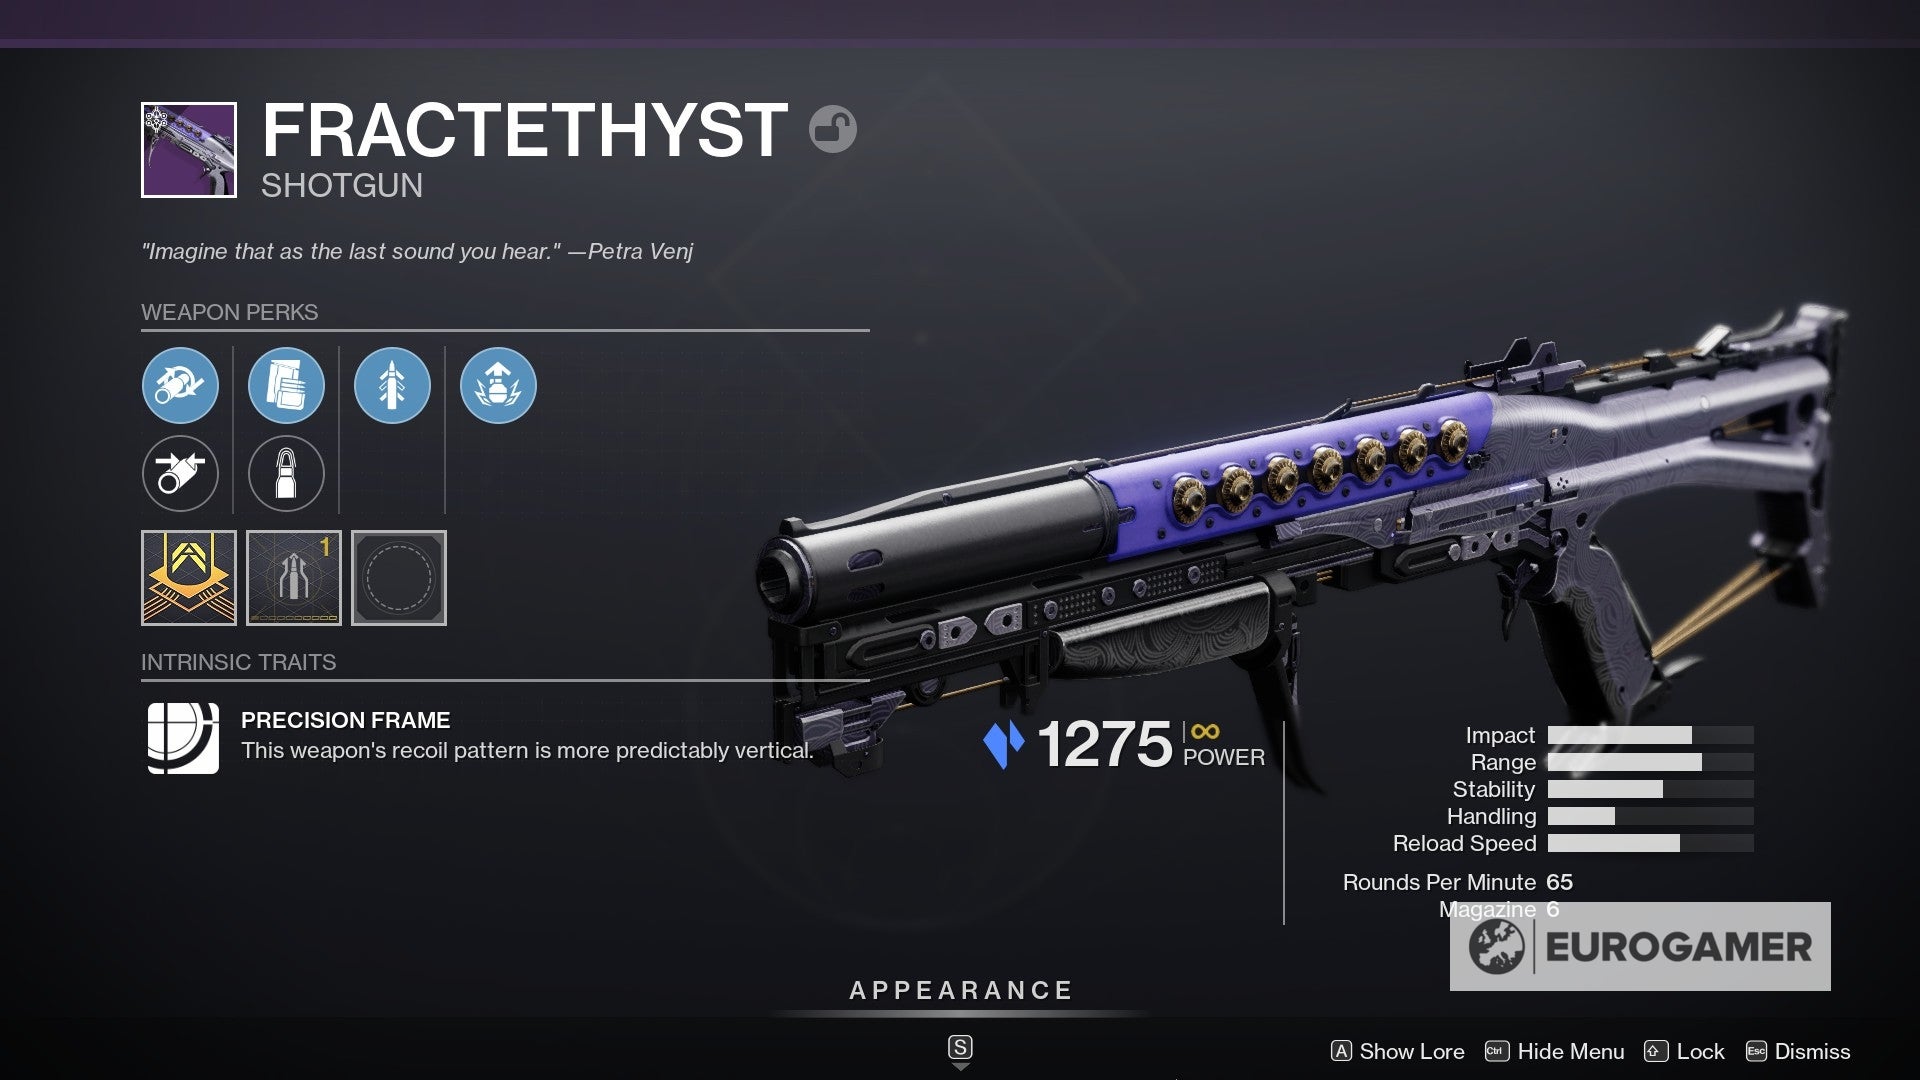
- Tracing the Stars II advantage: Fractethyst (legendary shotgun)
- Tracing the Stars Three reward: Chrysura Melo (legendary auto burglarize)

- A Hollow Coronation reward: Ager'southward Scepter
Now, let'due south find all those Atlas Skews.
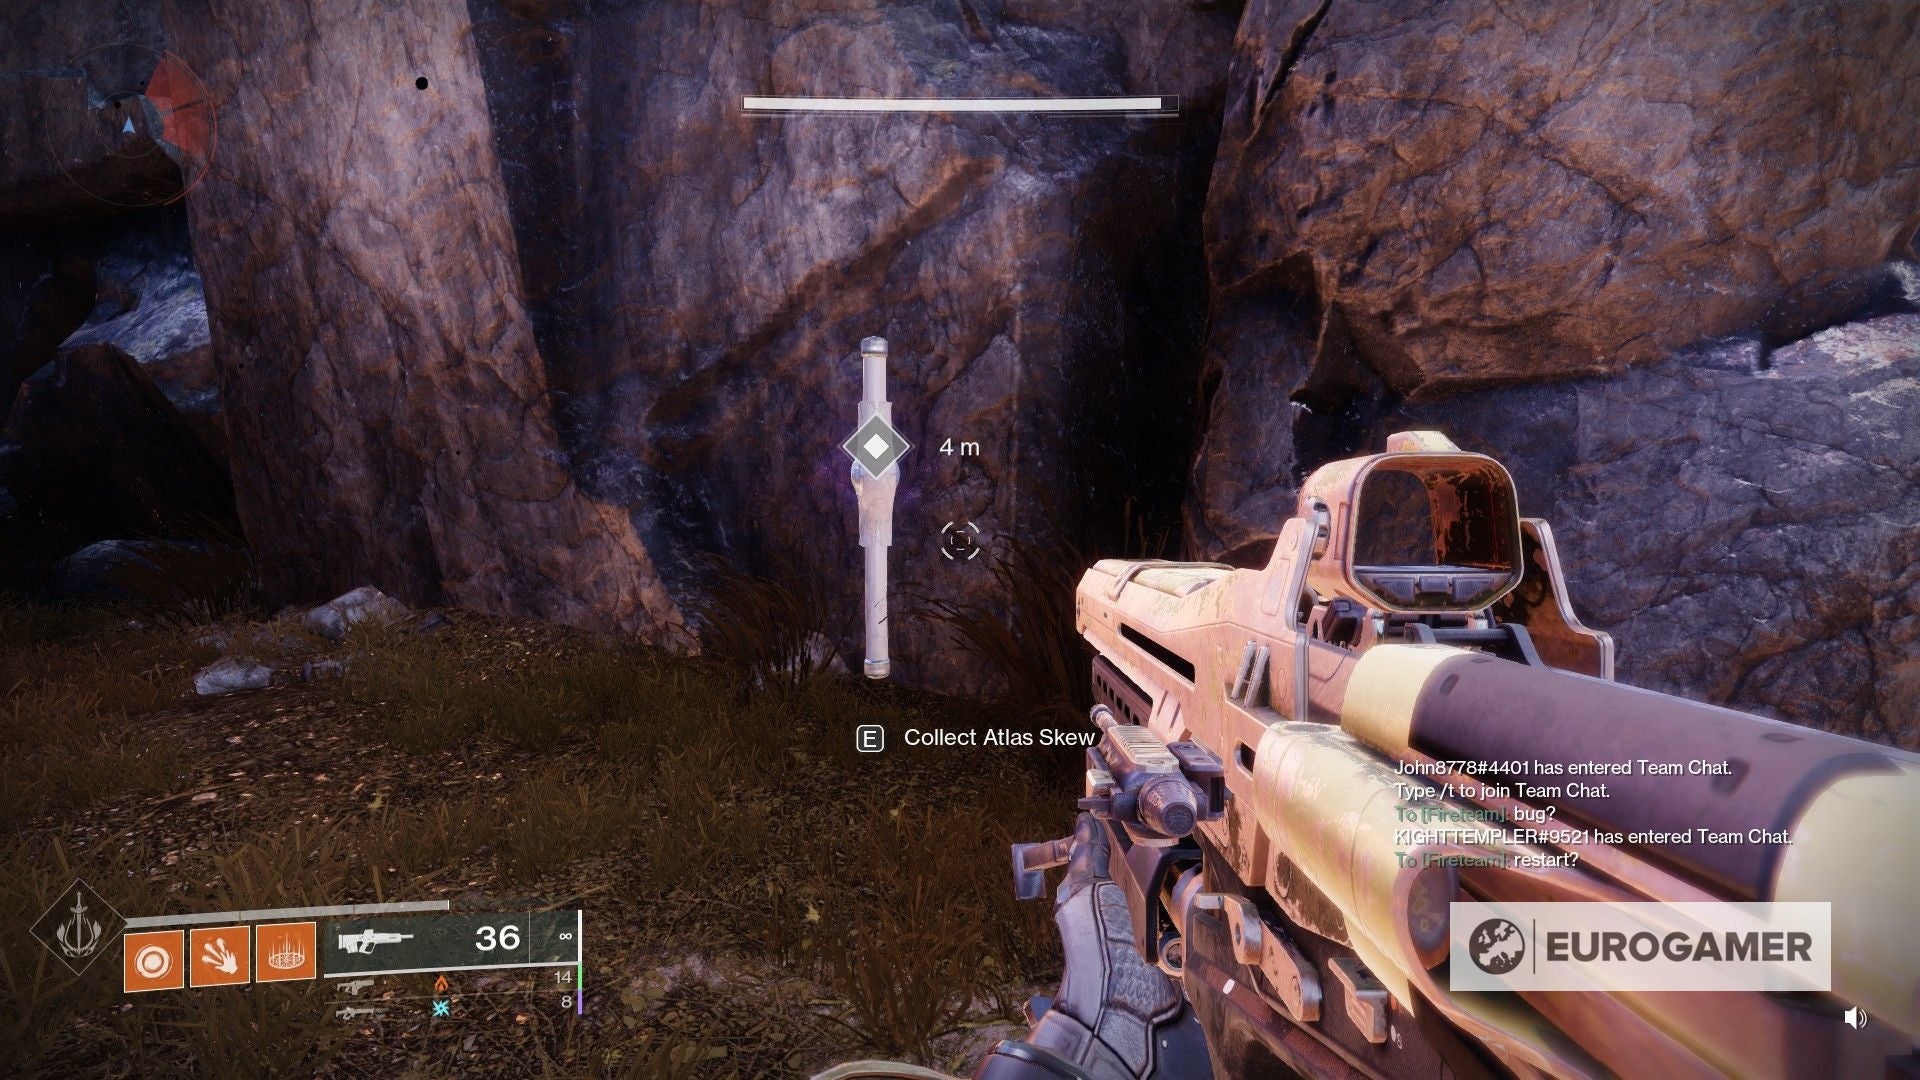
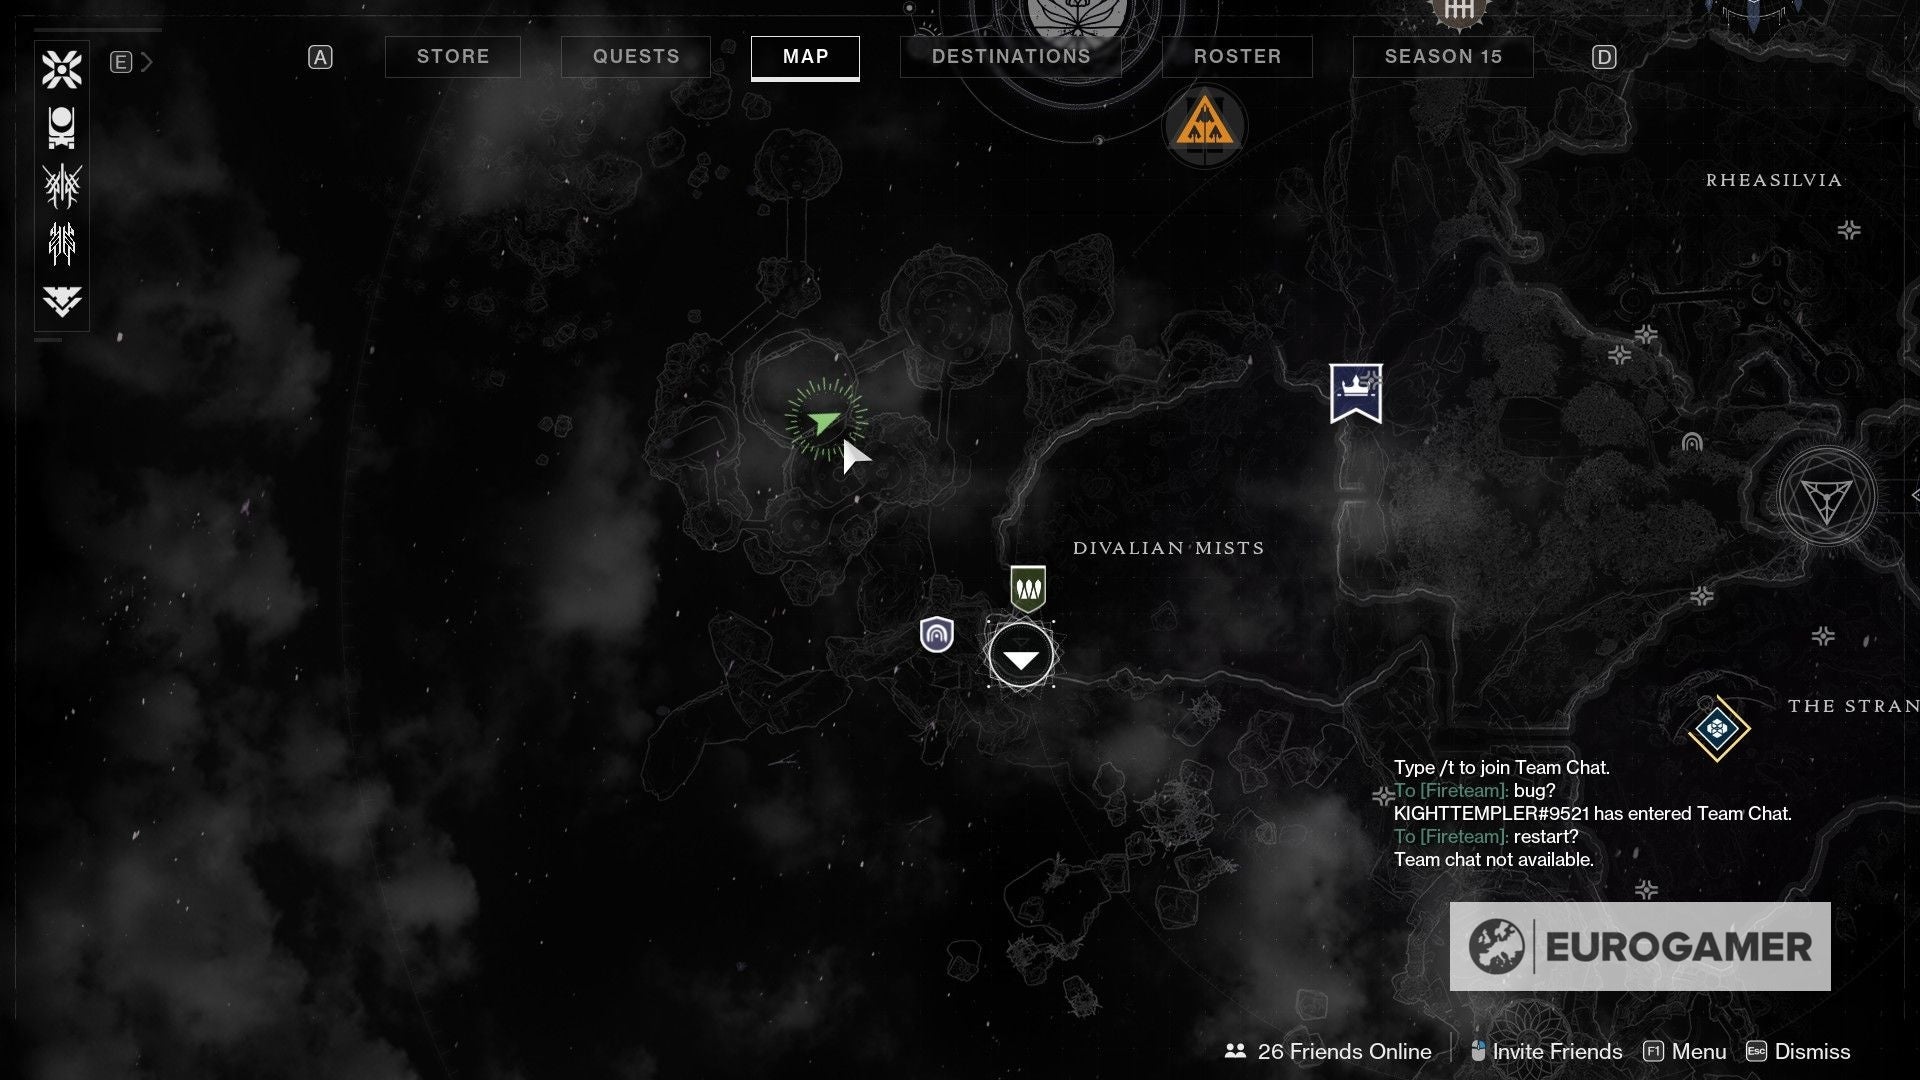
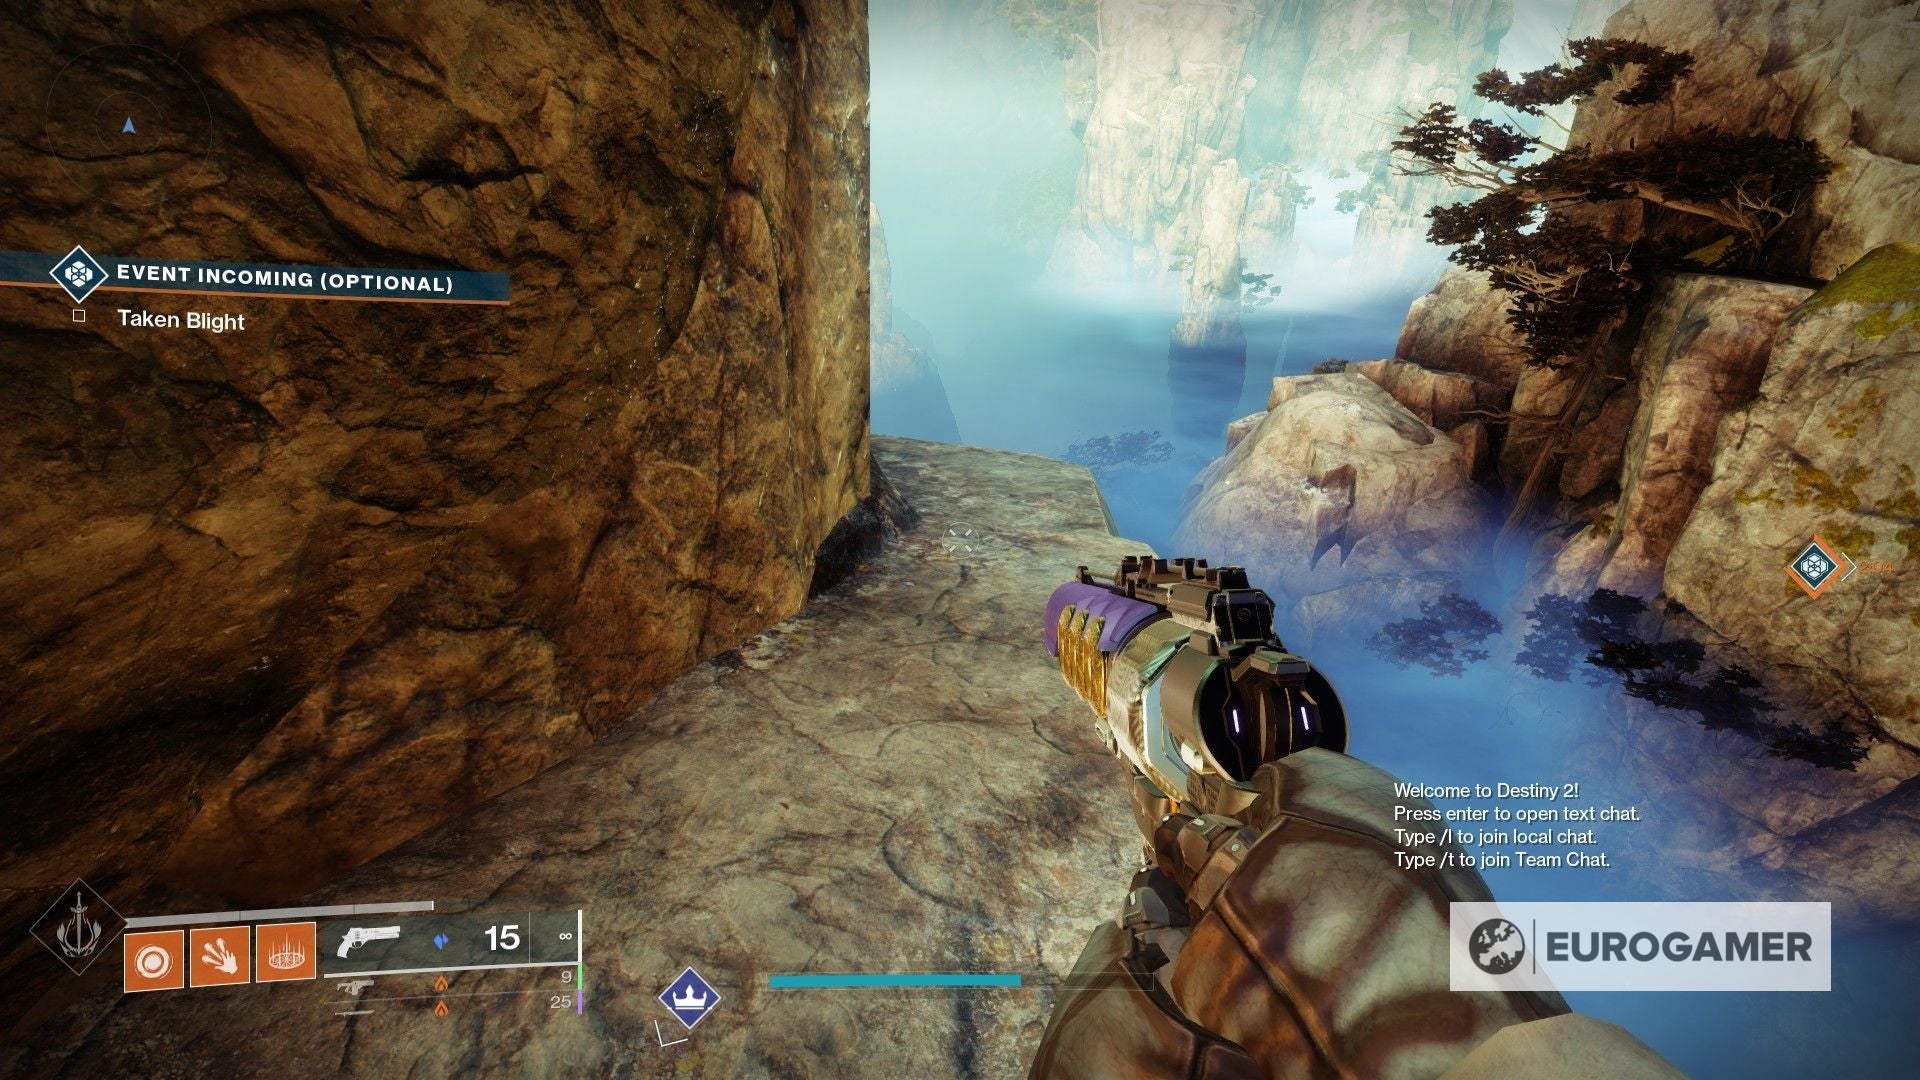
Divalian-Rheasilvia Path, Lower Cliffside Atlas Skew location
The starting time Atlas Skew can be institute in Divalian Mists, which is one of the large named areas in the Dreaming City.
Head to the far due north-east of the area to stumble upon a cliffside, between where you can go out the surface area either north or north-east.
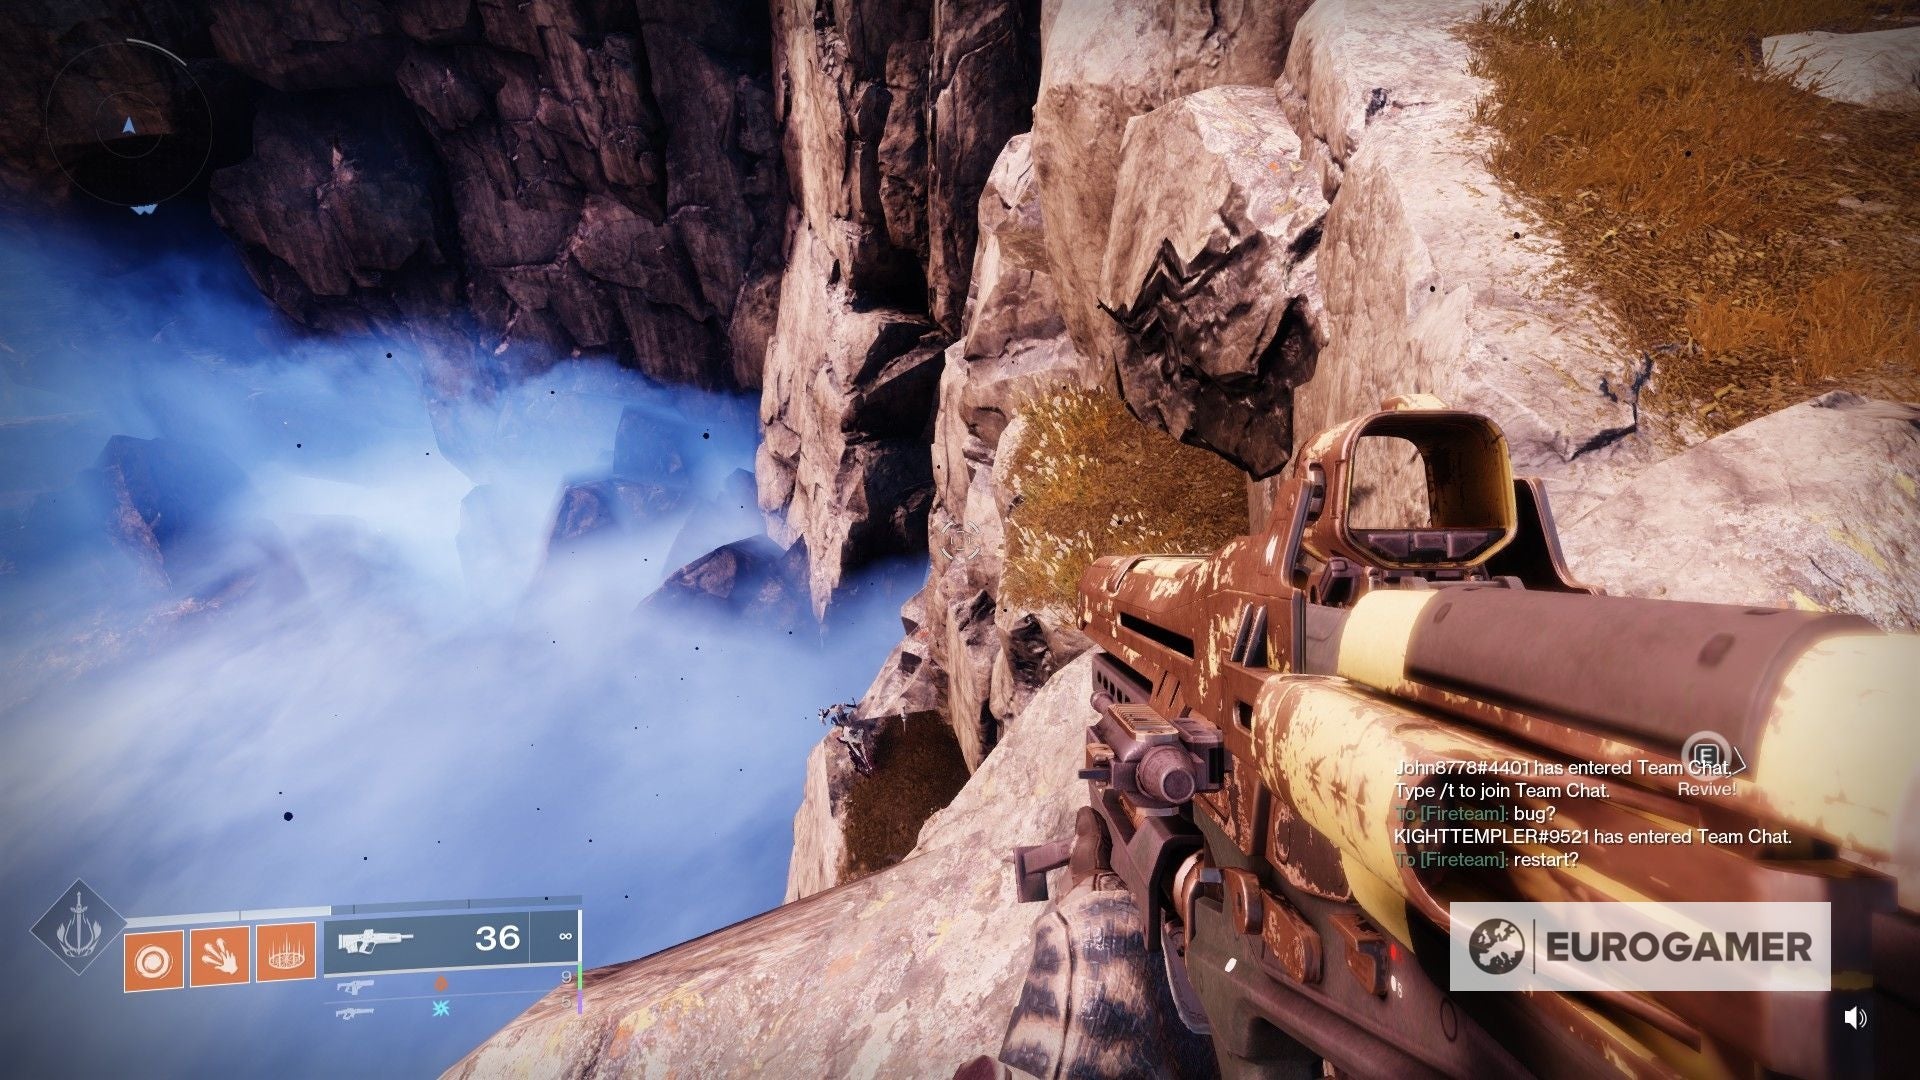
If you lot look below, you volition discover a couple of ledges. Information technology's quite a drop - only y'all should see the Atlas Skew there.
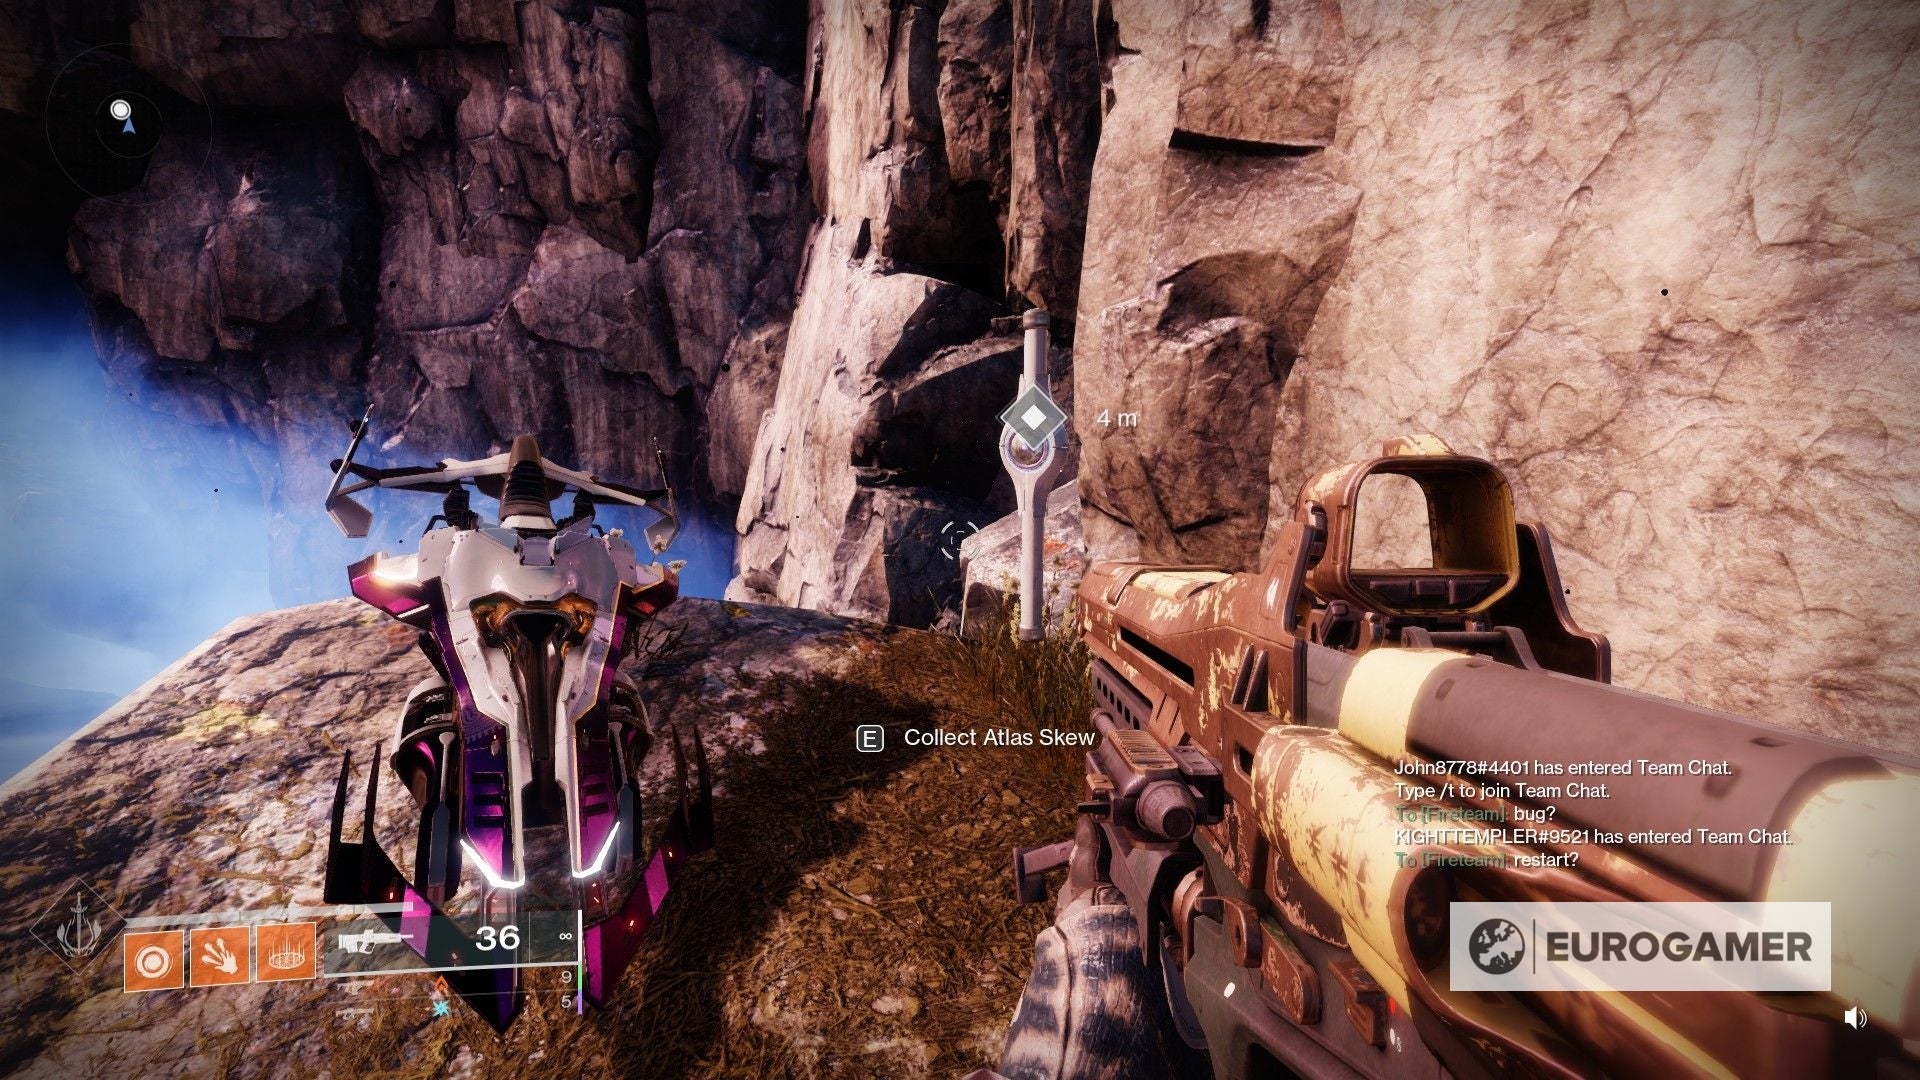
Drop down and take hold of it and go fix to motility on.
Iv more to go!
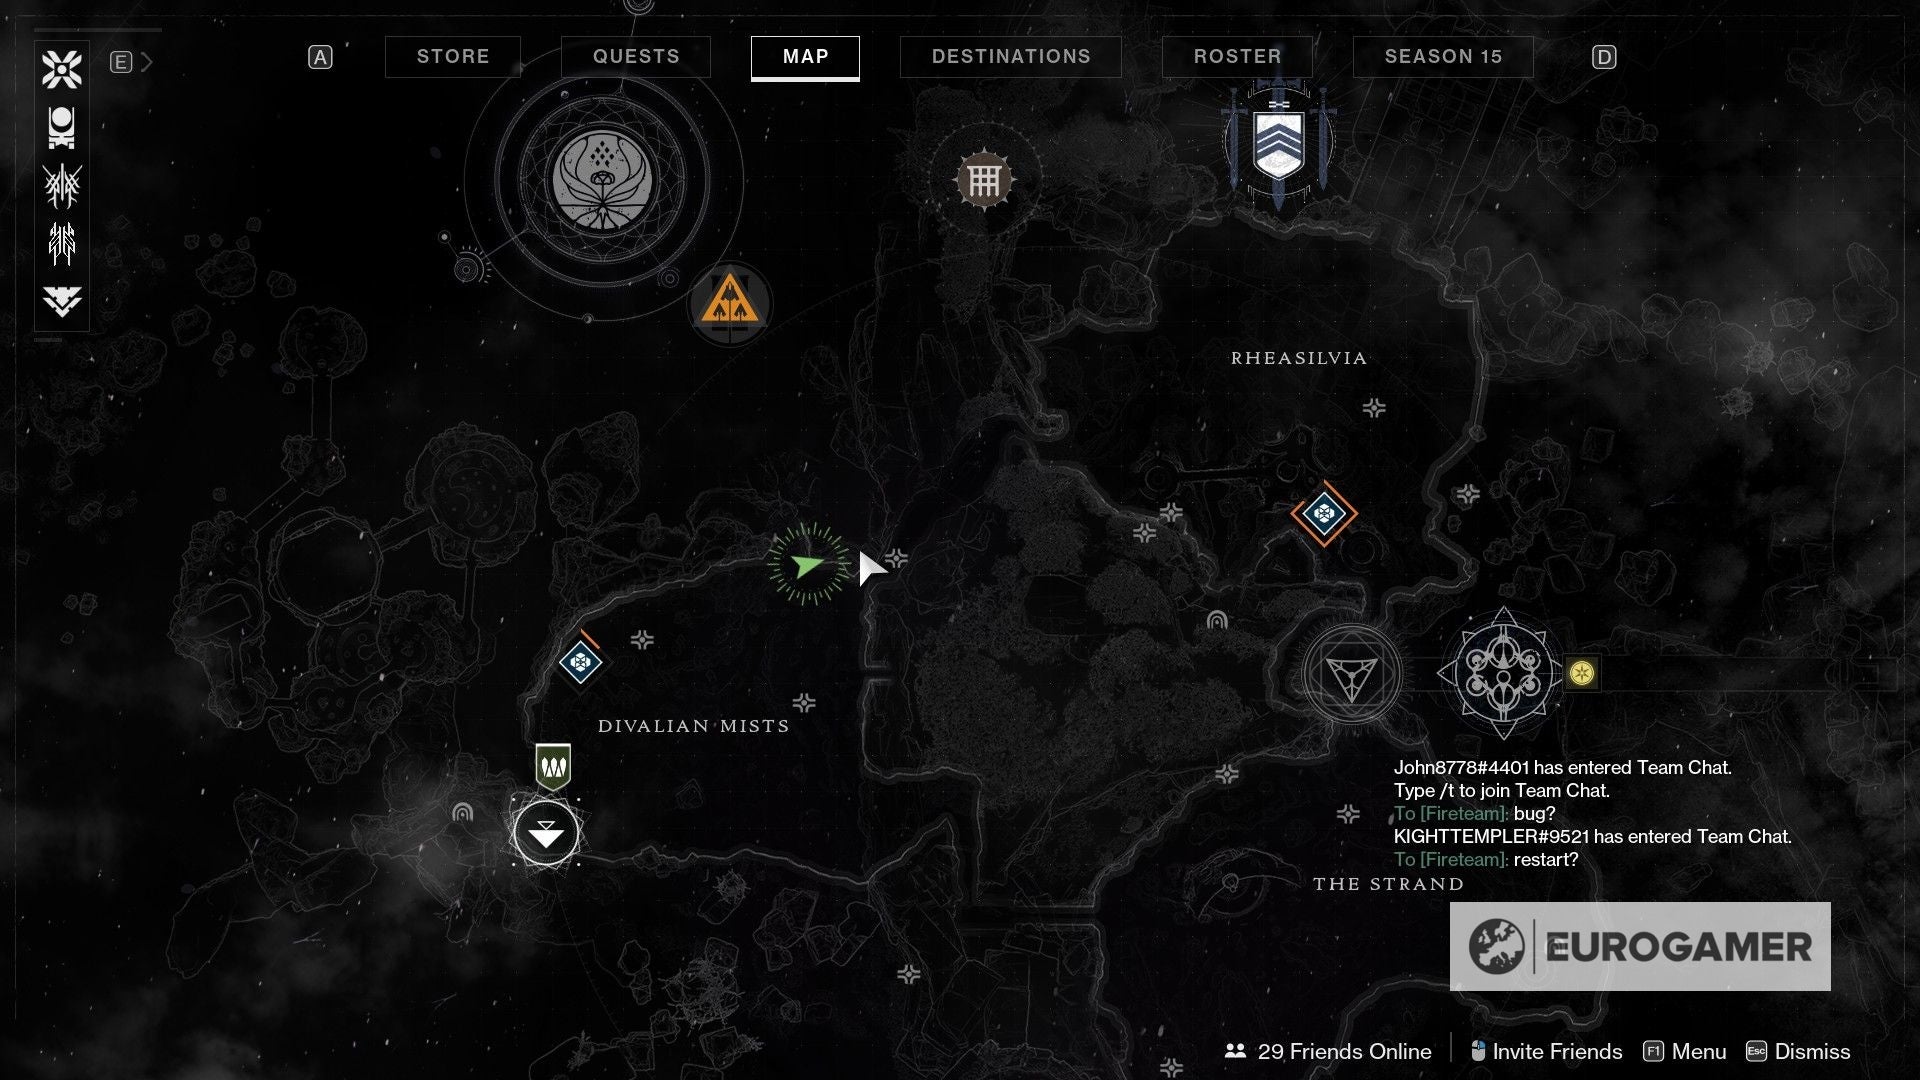
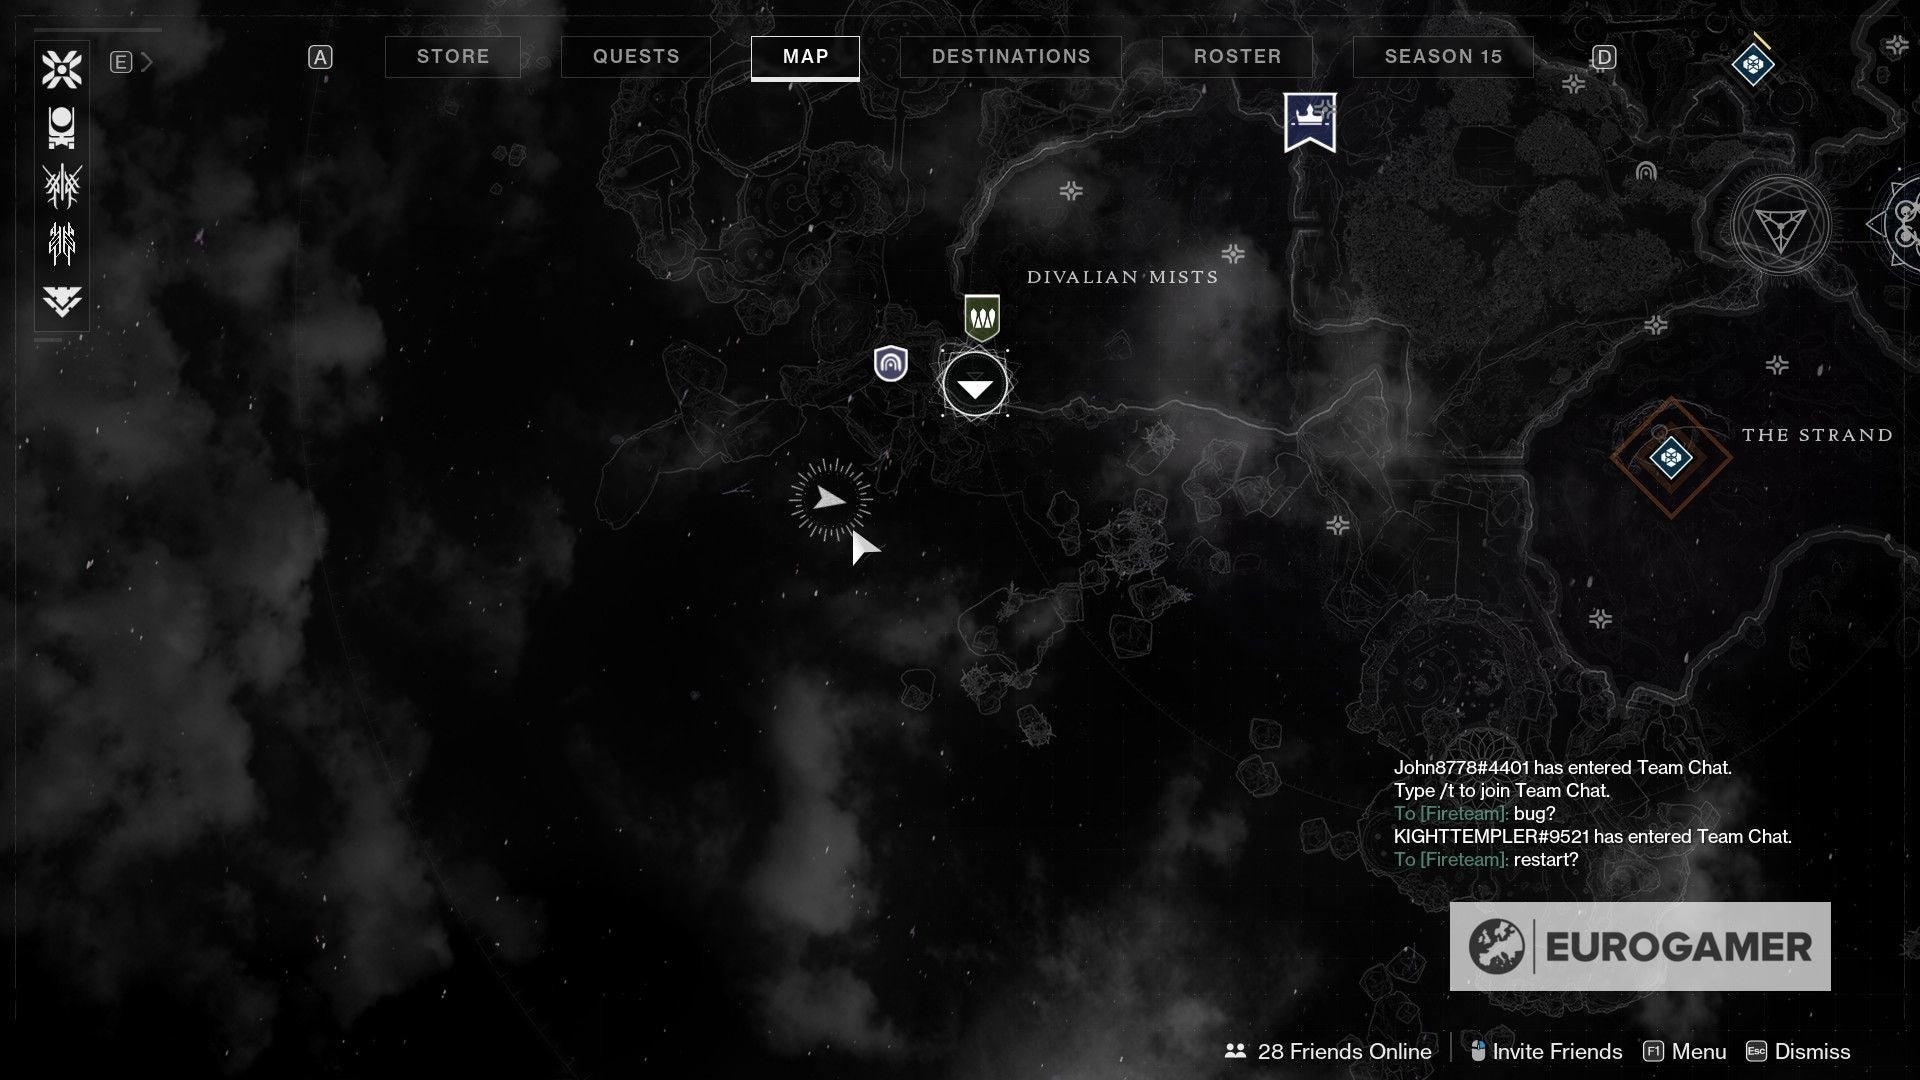
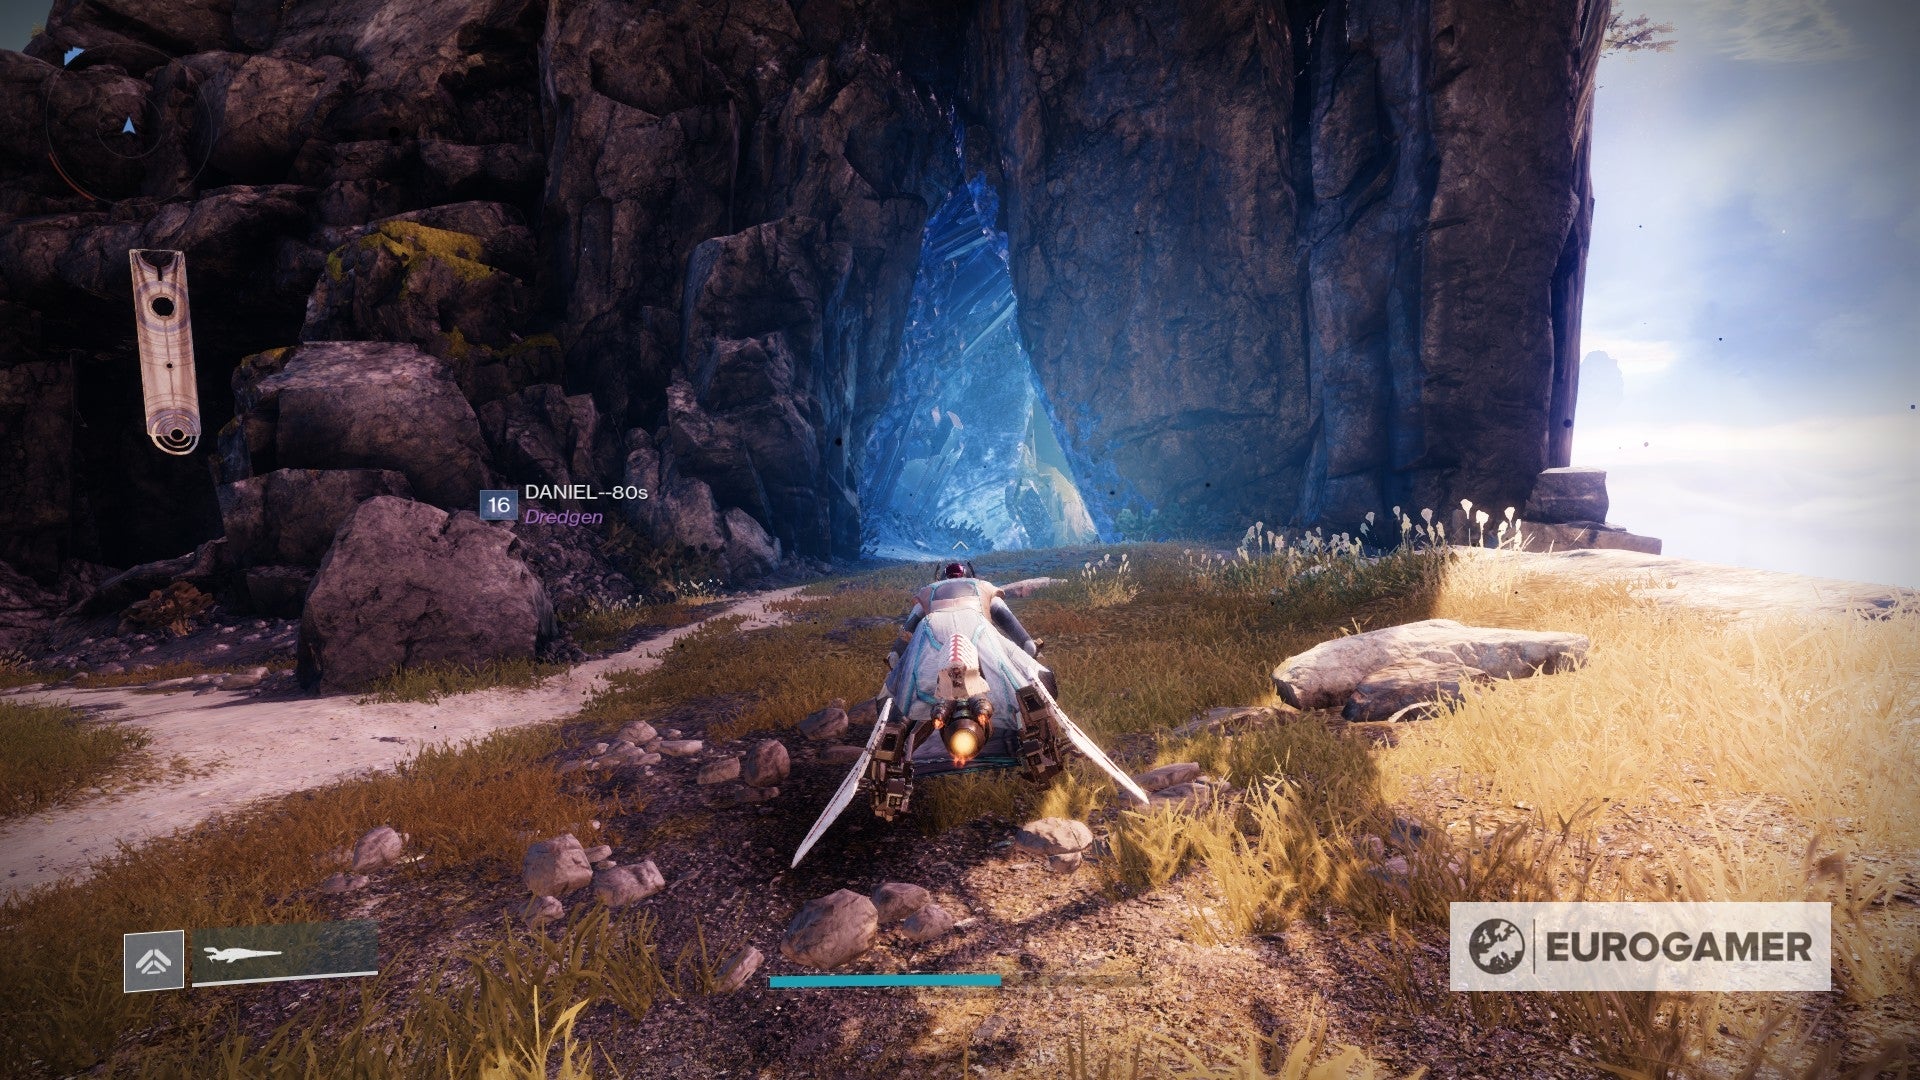
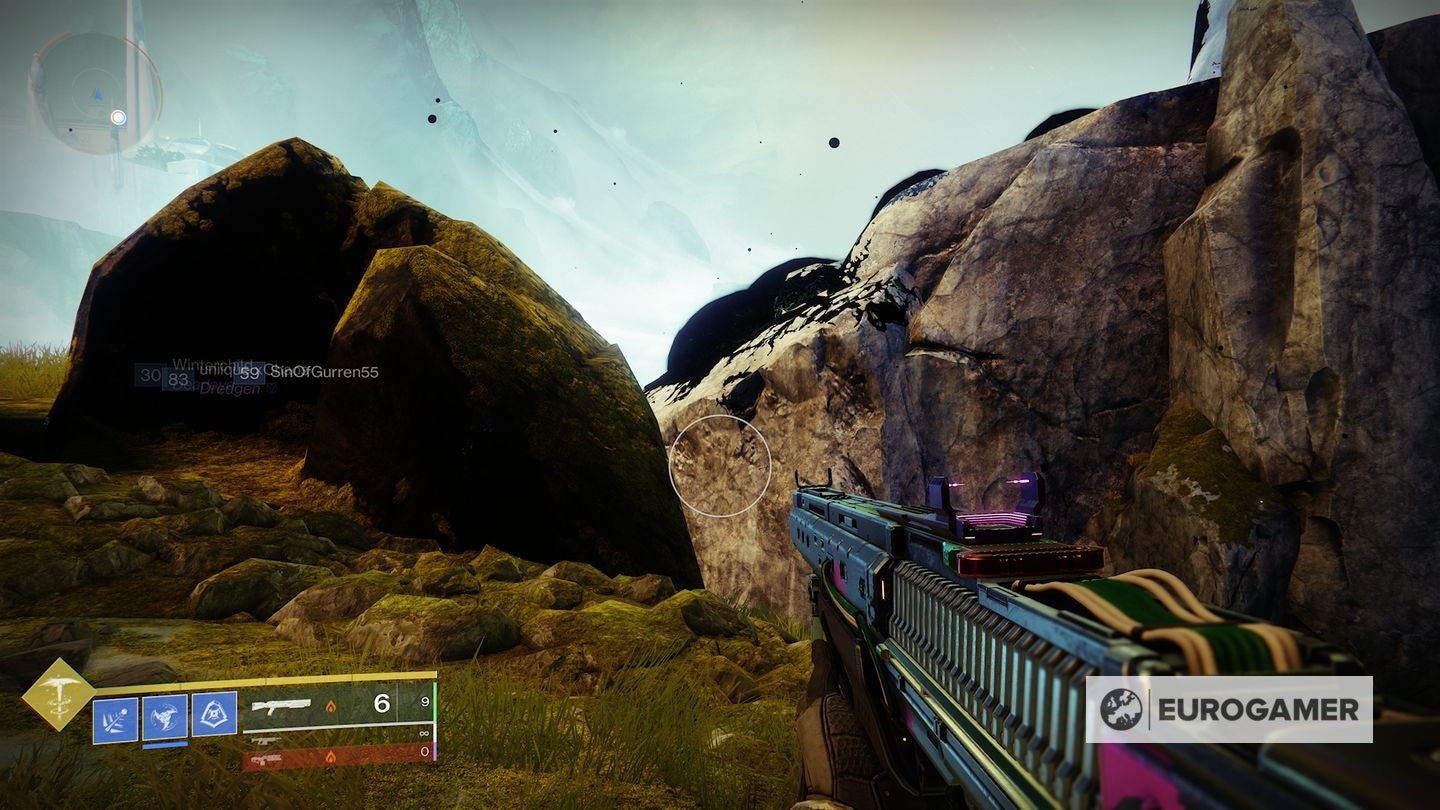
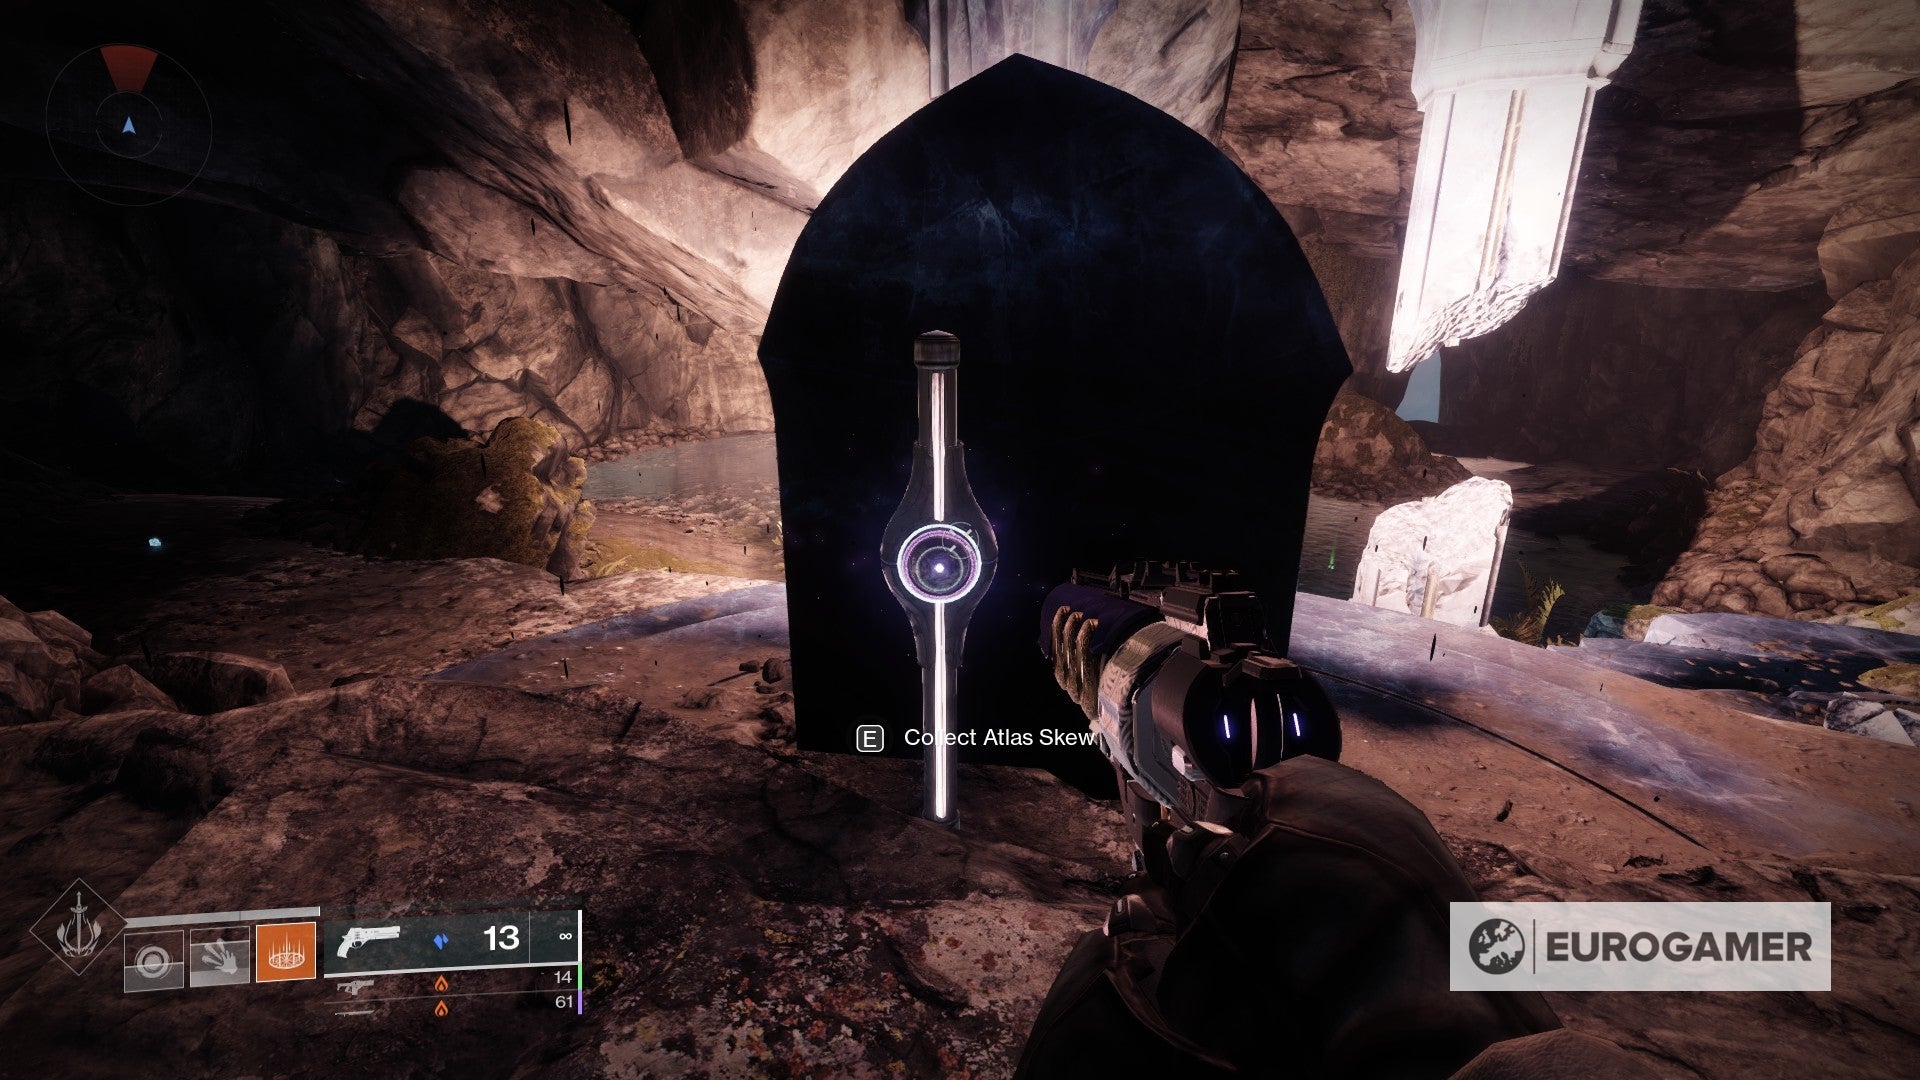
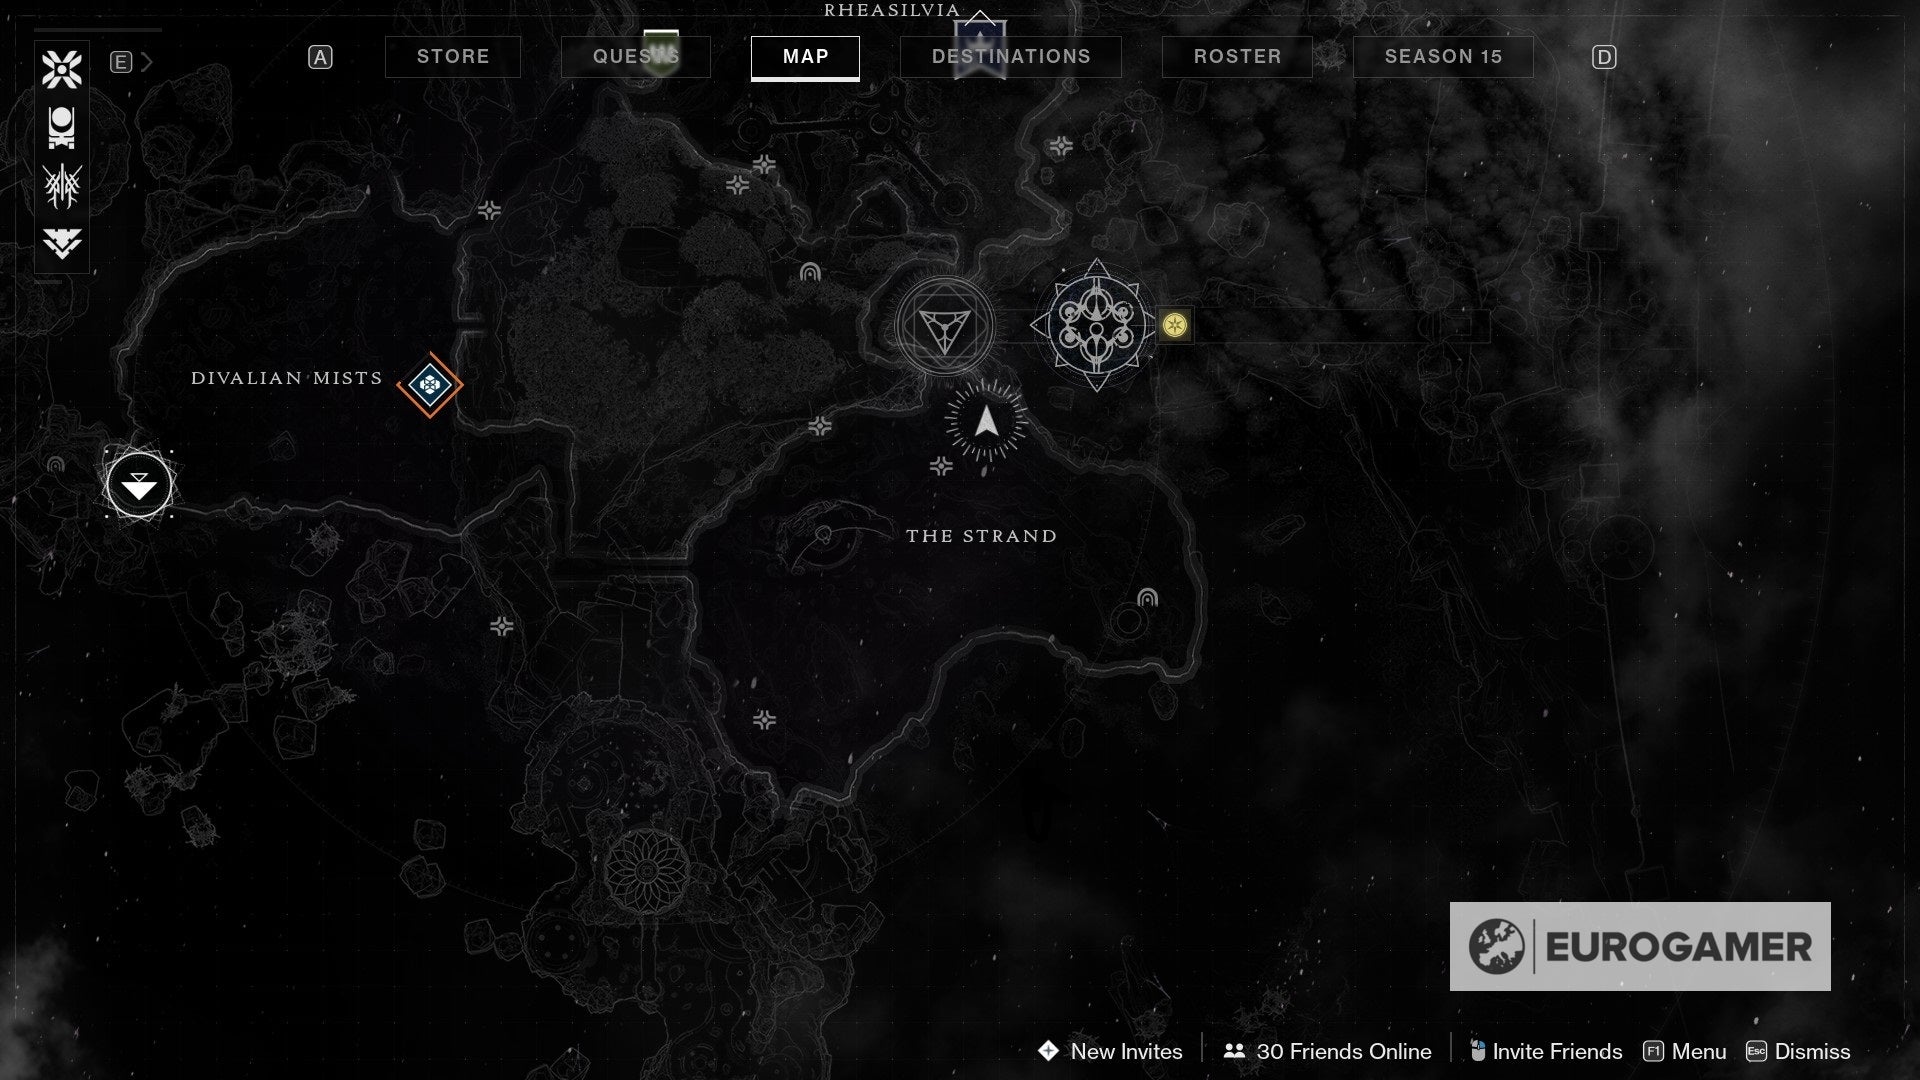
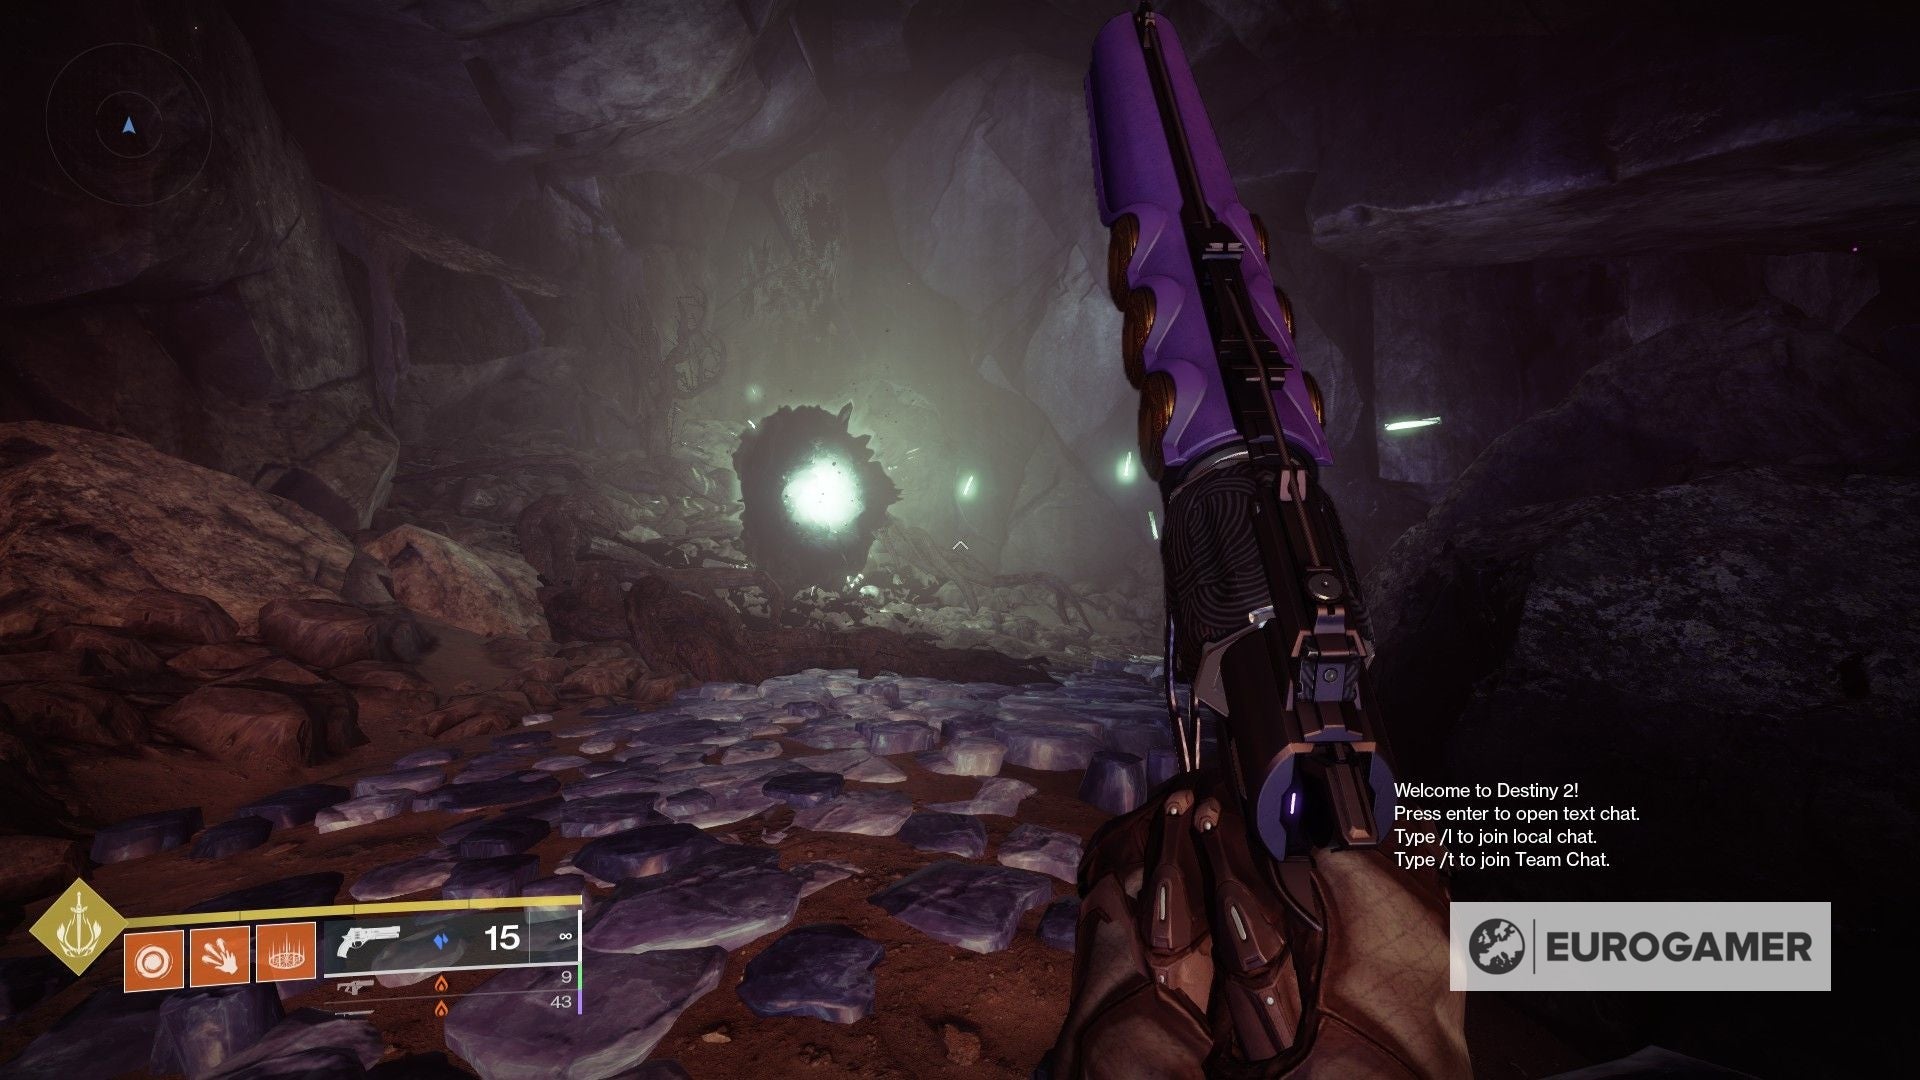
Divalian-Cimmerian Path, Central Cavern Atlas Skew location
The 2d Atlas Skew can exist found in Divalian Mists as well, which is one of the big named areas in the Dreaming City.
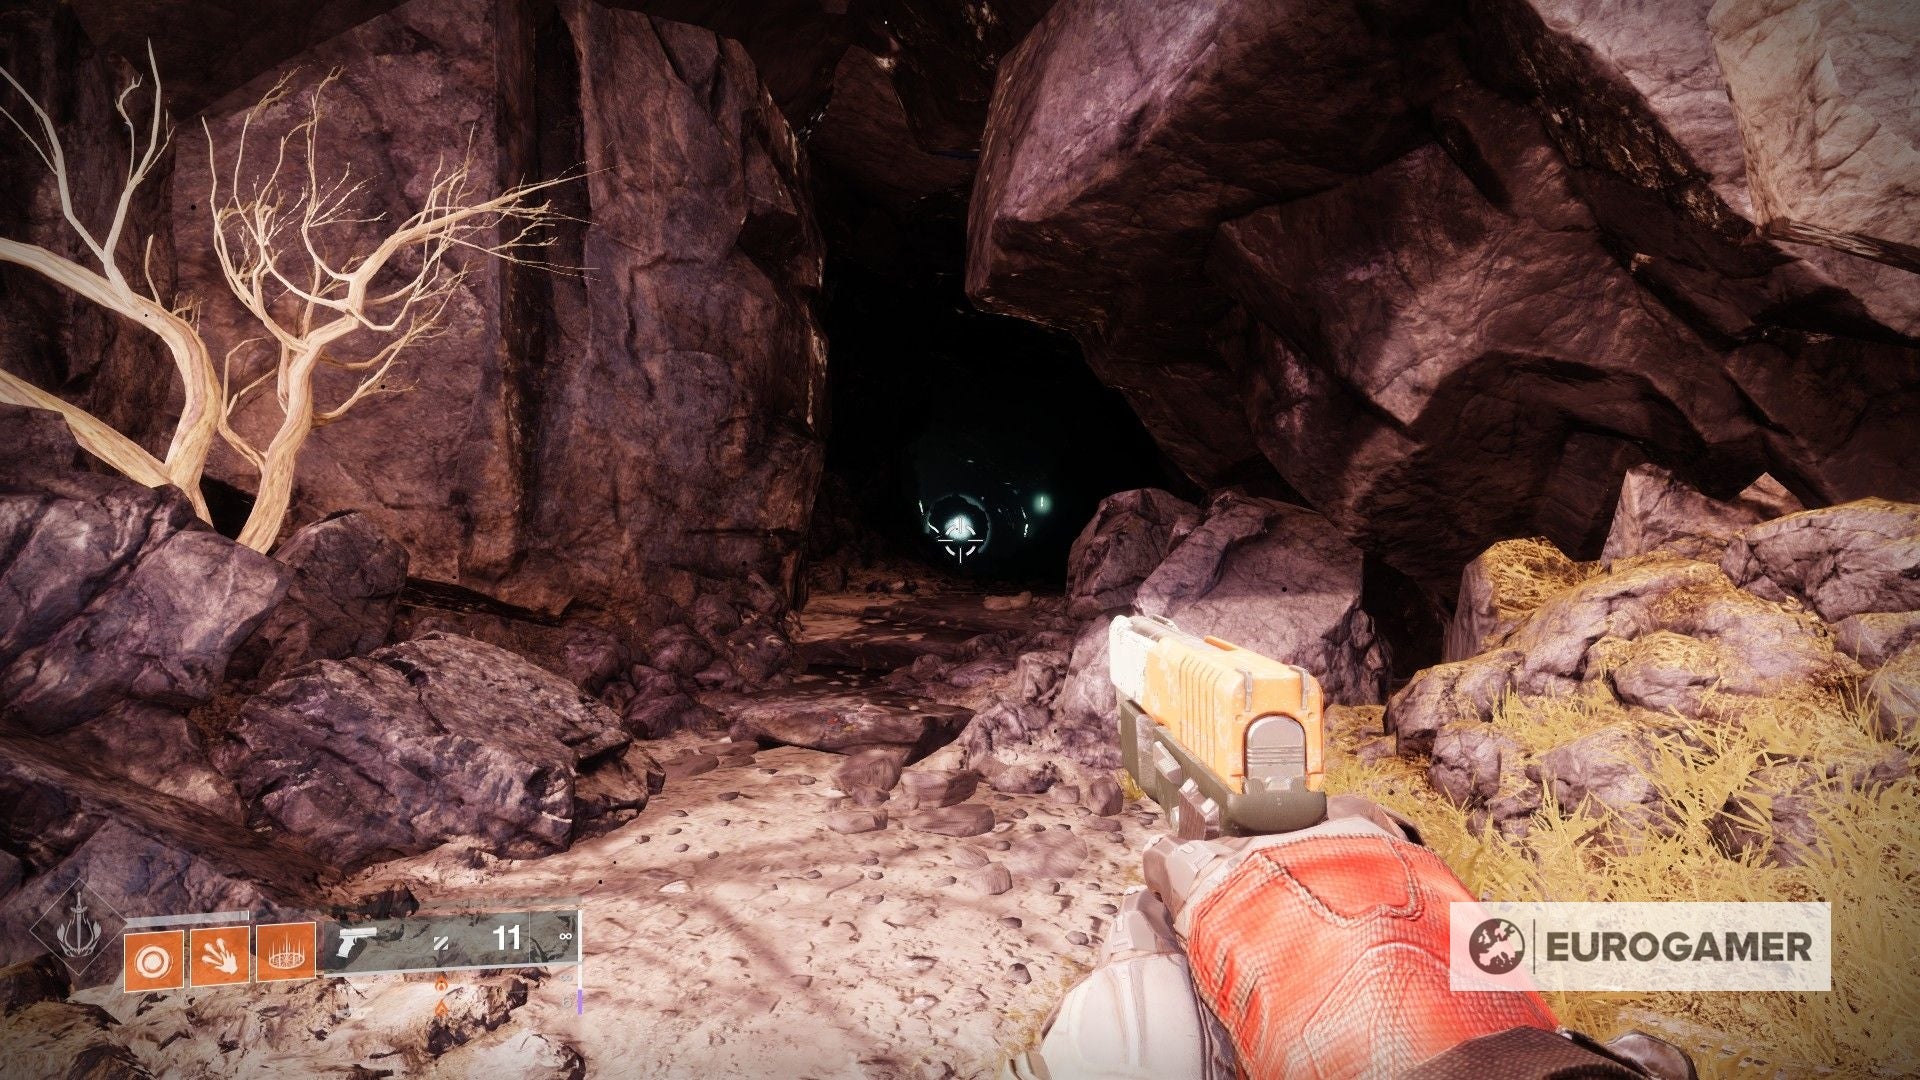
Once y'all teleport to the starting point, head to the heart of the area. Going east slightly (towards the blue gate that leads to Rheasilvia), you will find a cave entrance amidst the massive rock.
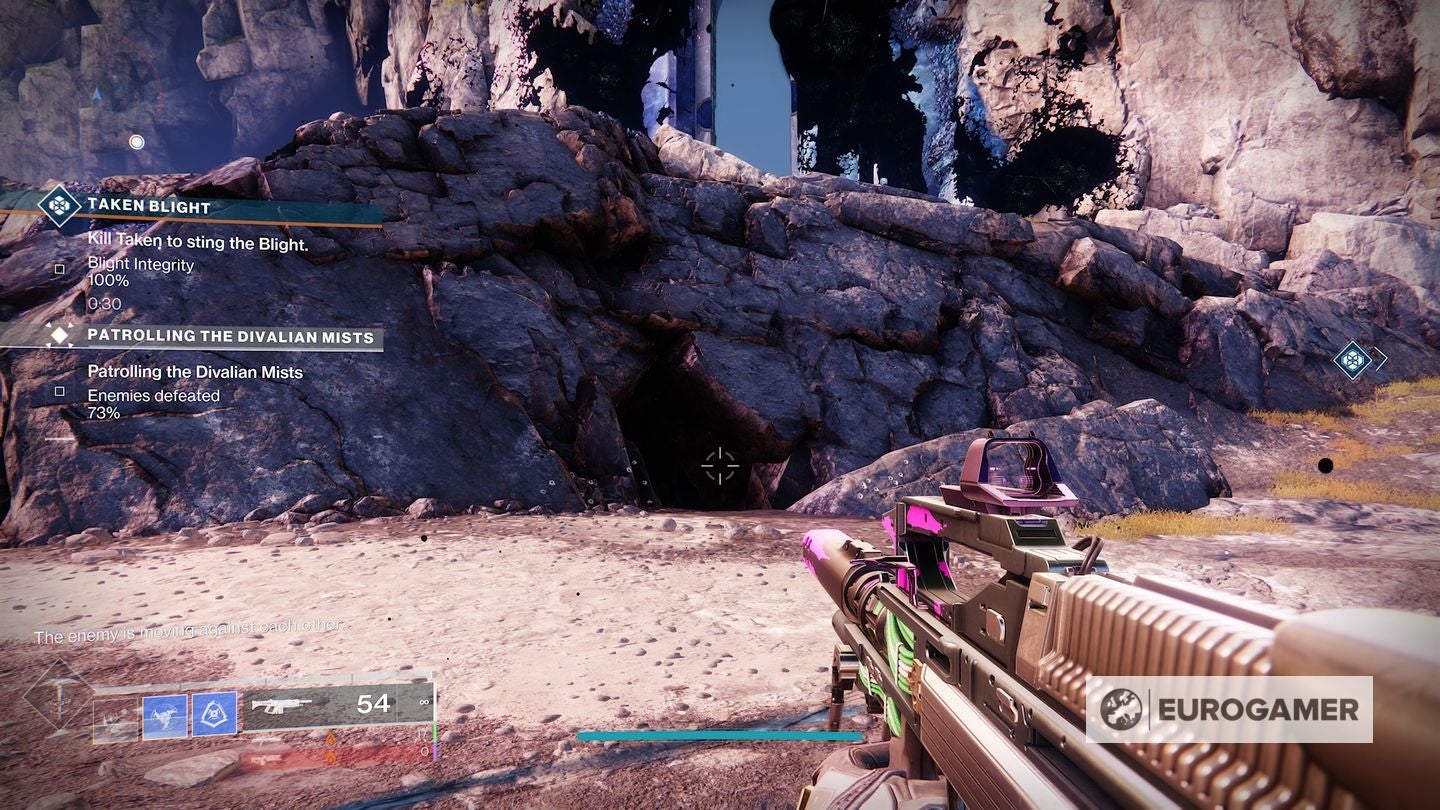
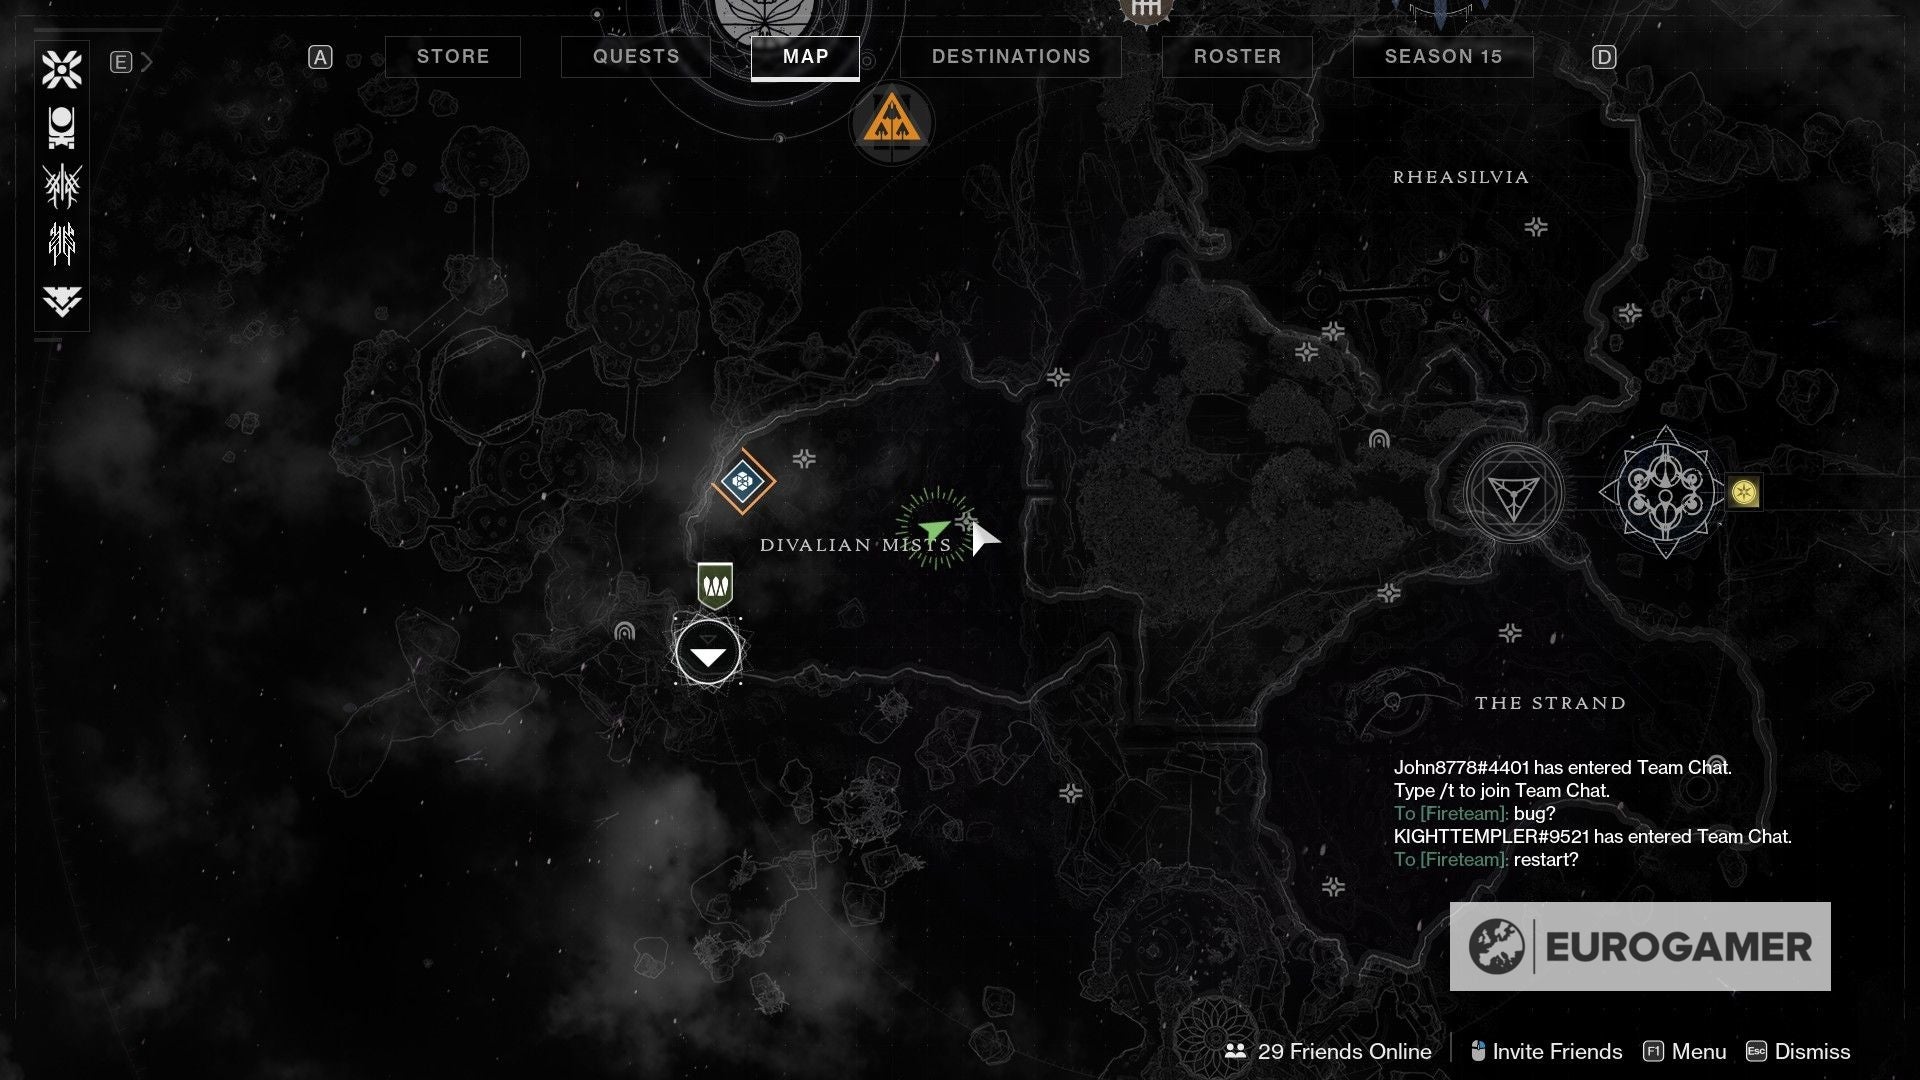
Head inside the cave and grab the second Atlas Skew.
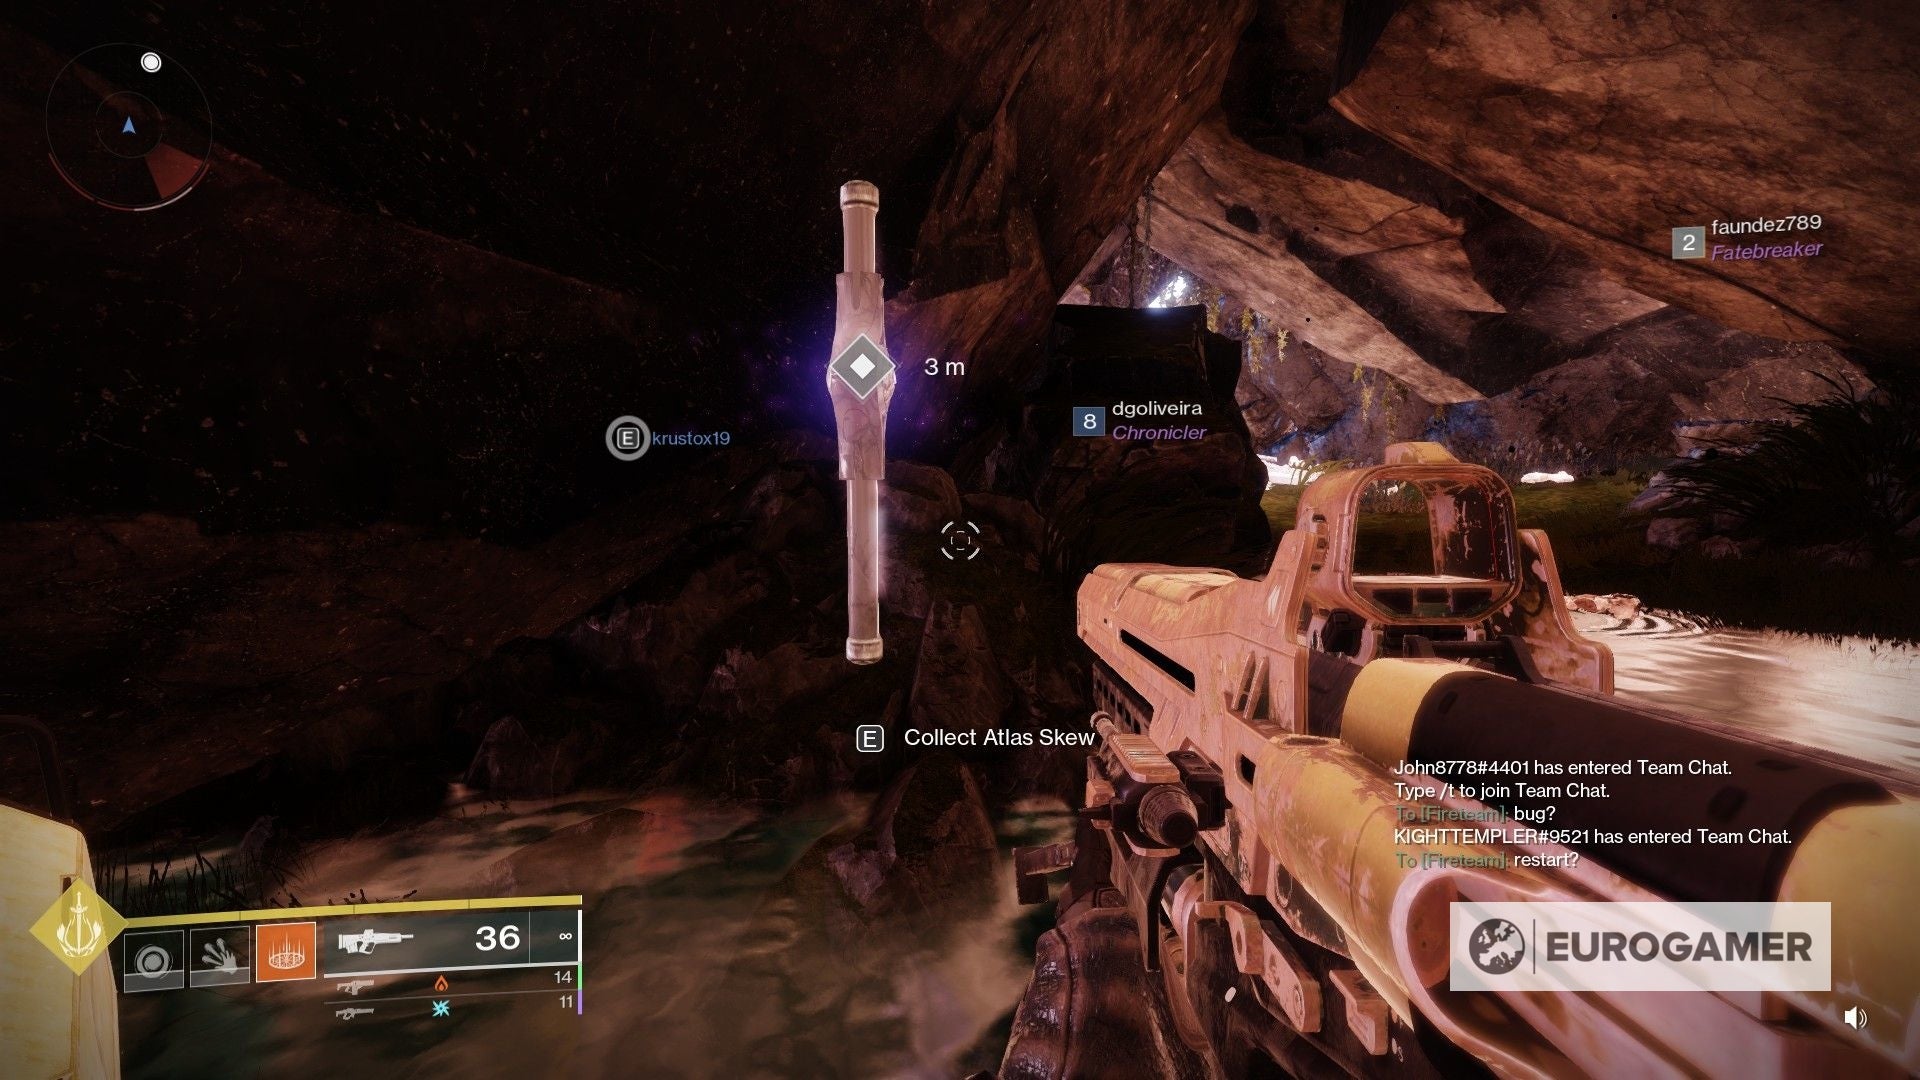
Three more than to go!
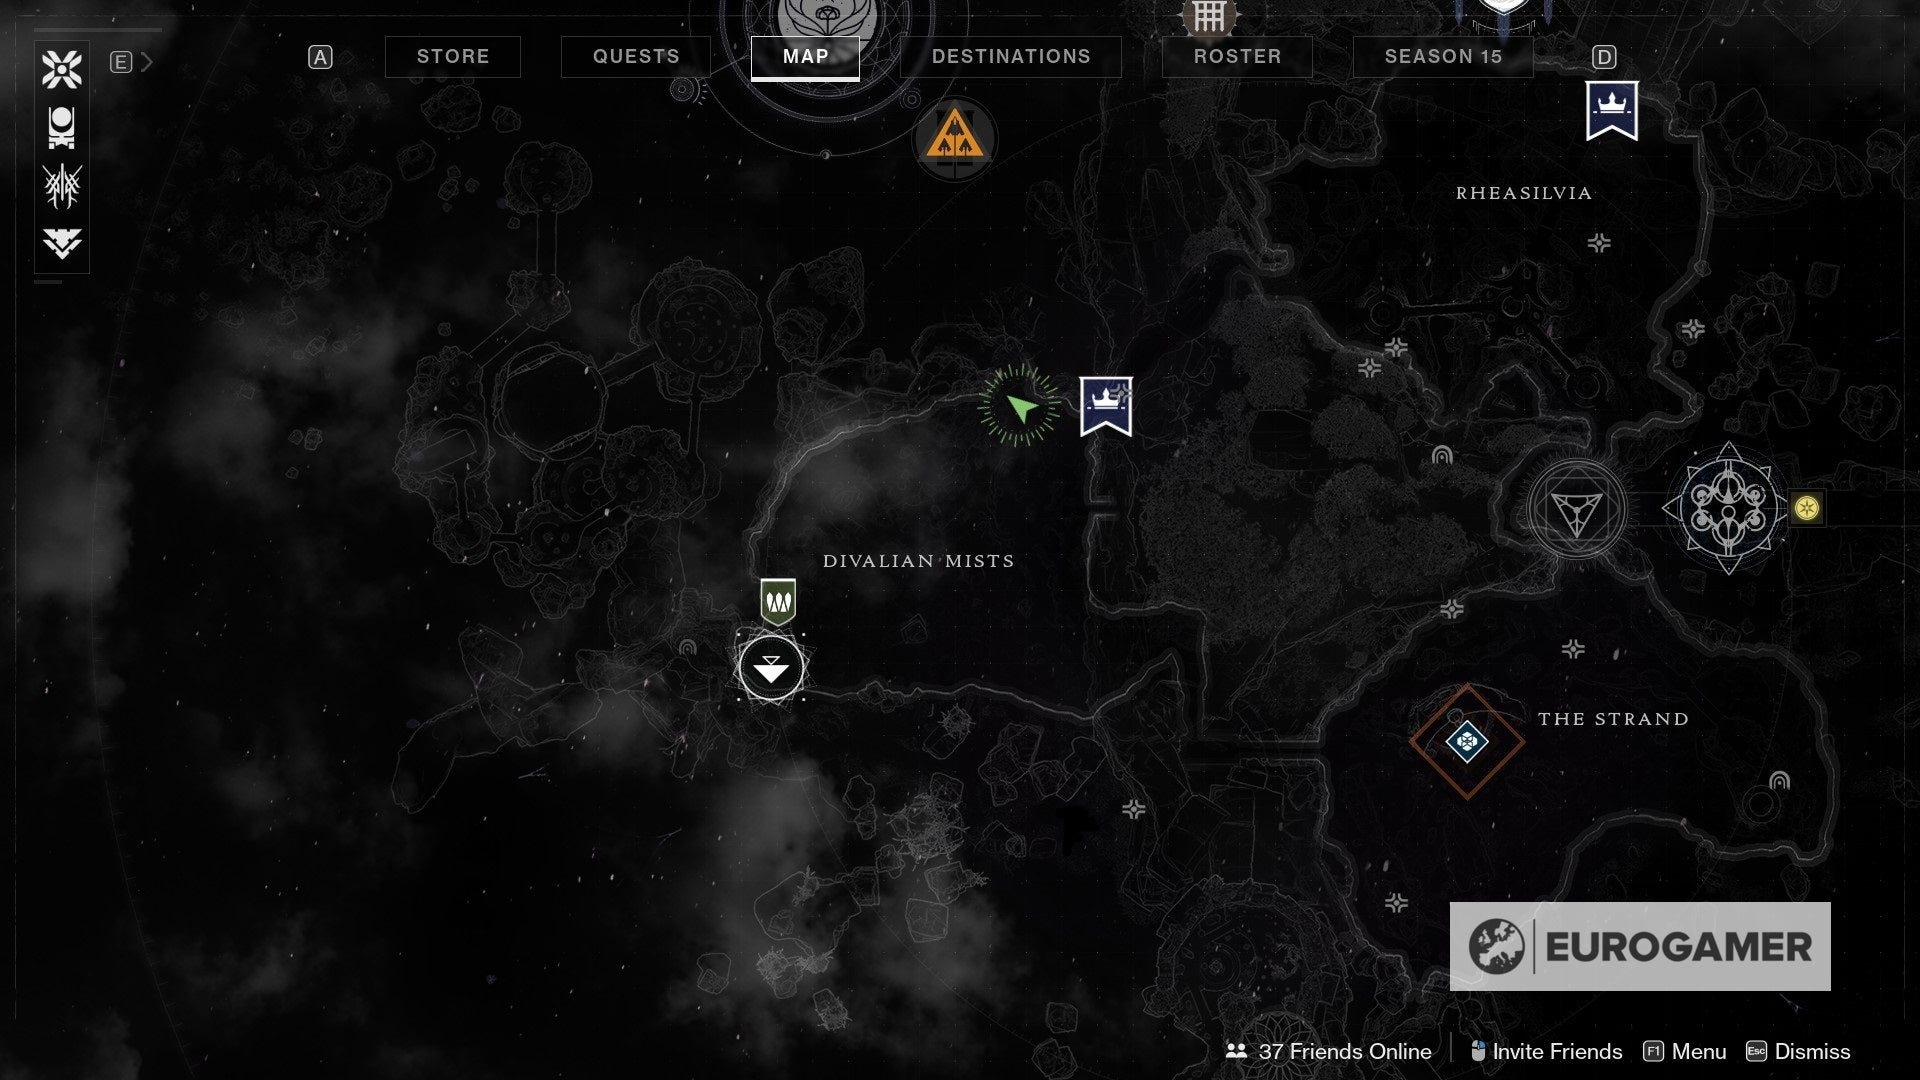
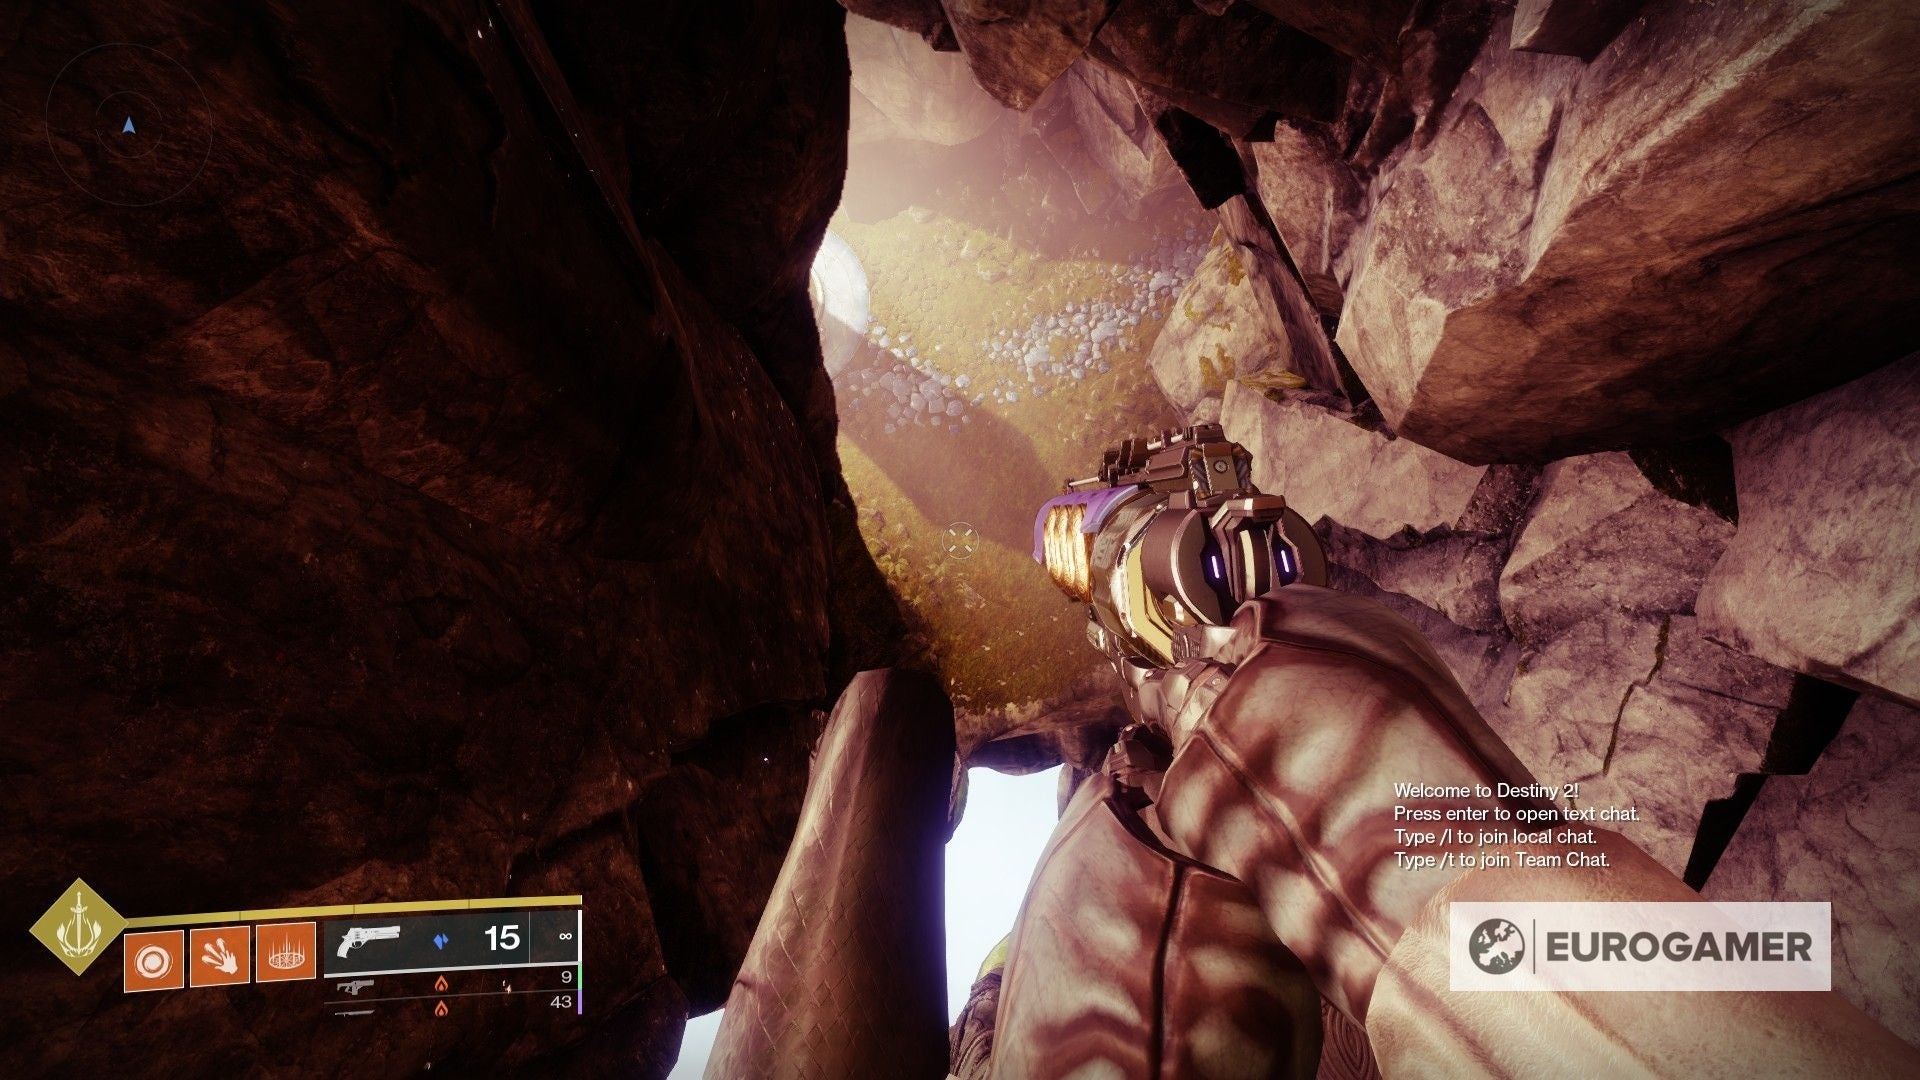
Drowned Bay Alcove Atlas Skew location
The 3rd Atlas Skew tin can be plant in the Bay of Drowned Wishes, which is the Lost Sector located right backside the spawn location in Divalian Mists.
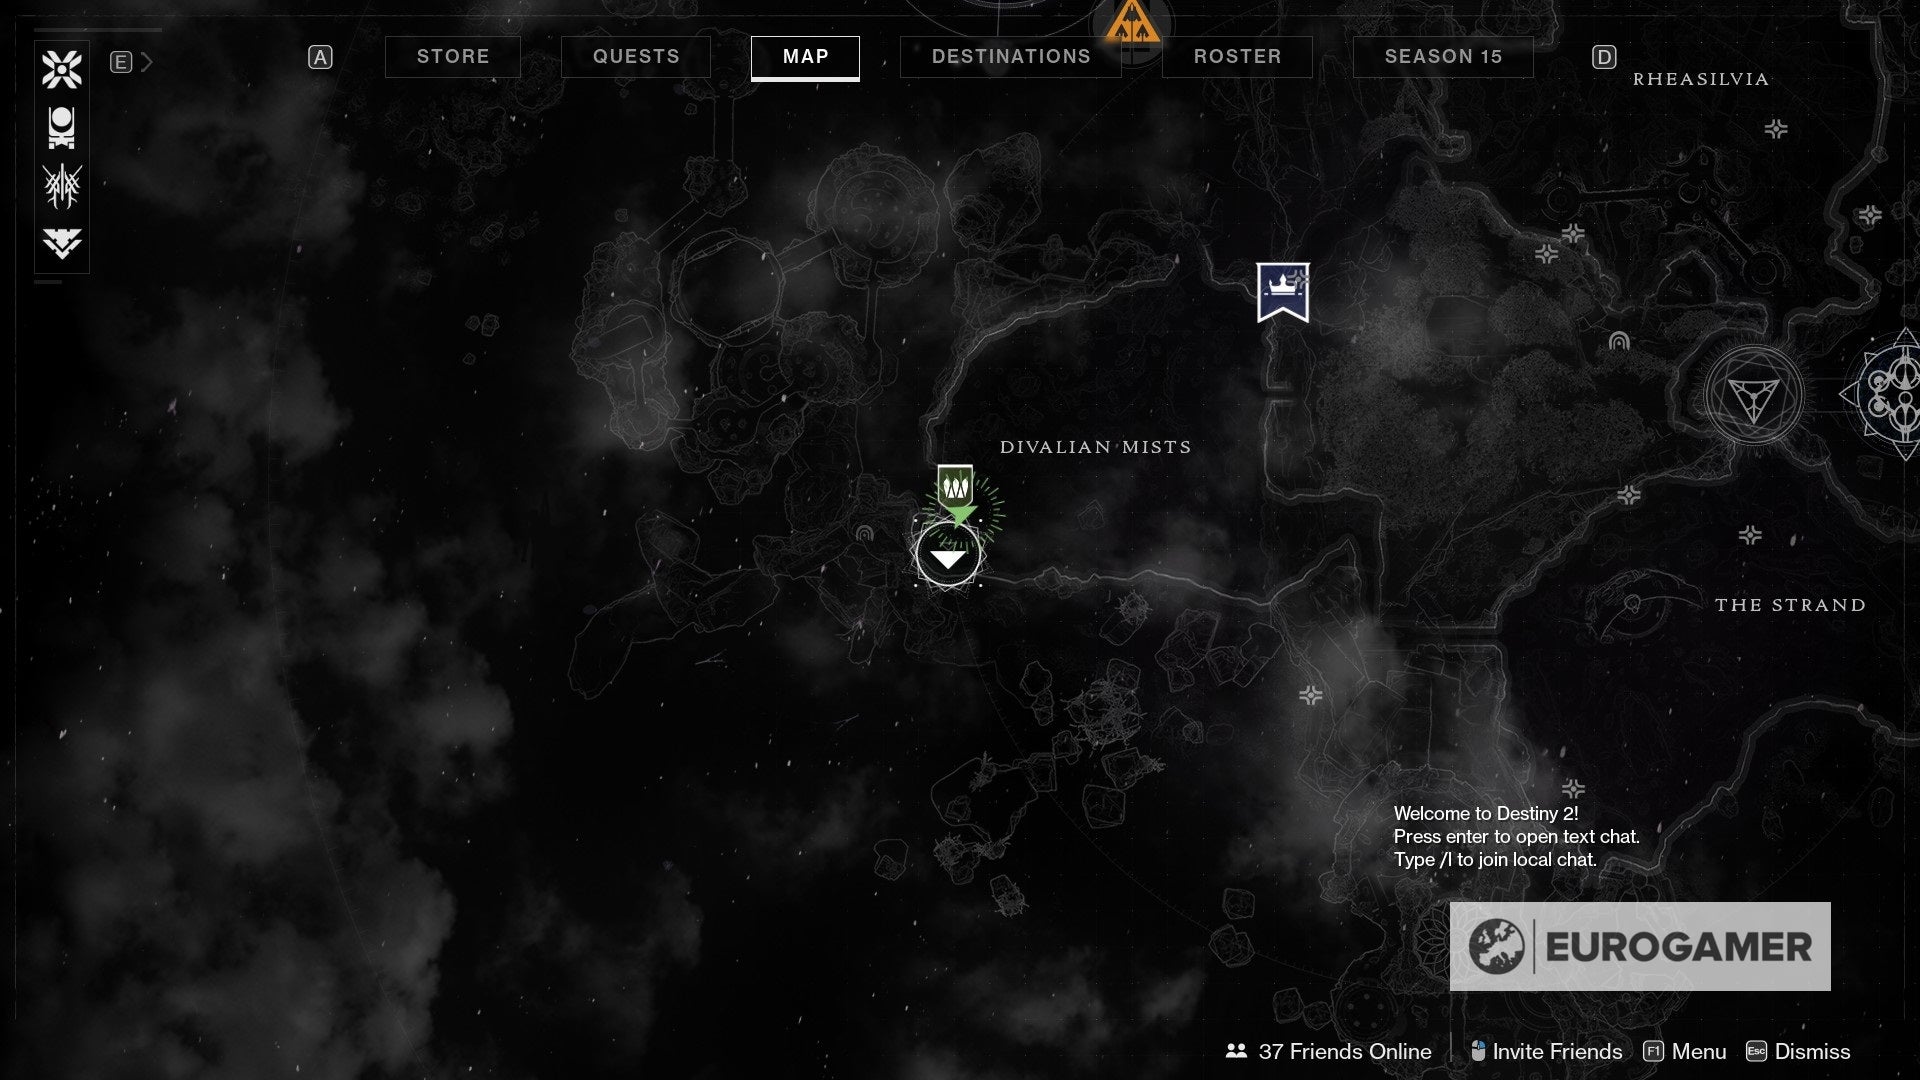
This Lost Sector is, in fact, a large area with tonnes of enemies that will most likely get in your mode, so tread carefully.
One time outside the archway, stick close to the wall and first heading to your right. Instead of going all the way to the other side of the area, all you lot have to do is make a brief cease at the first cavern entrance you find.
This is rather close, so it won't take long. One time you're done, feel gratuitous to complete the Lost Sector for some rewards at the end, or just continue the quest.
Two more to become!
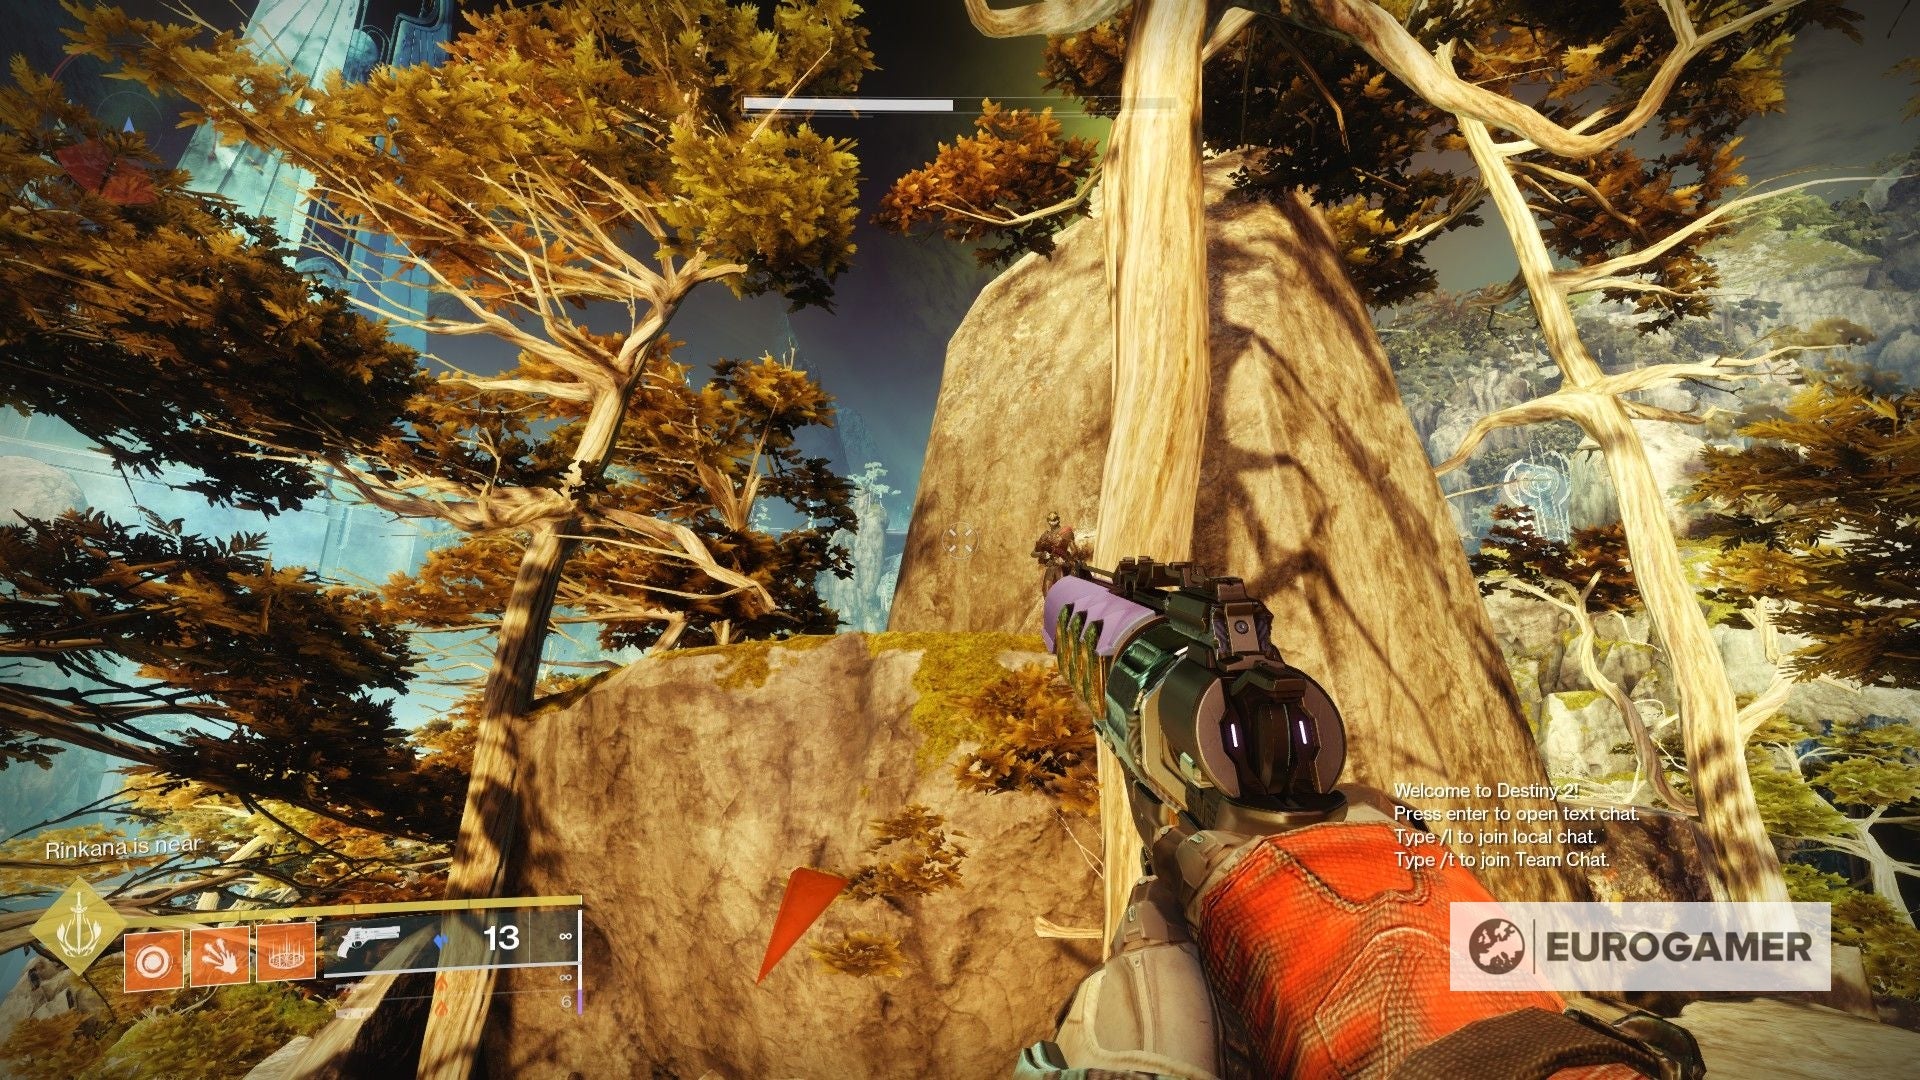
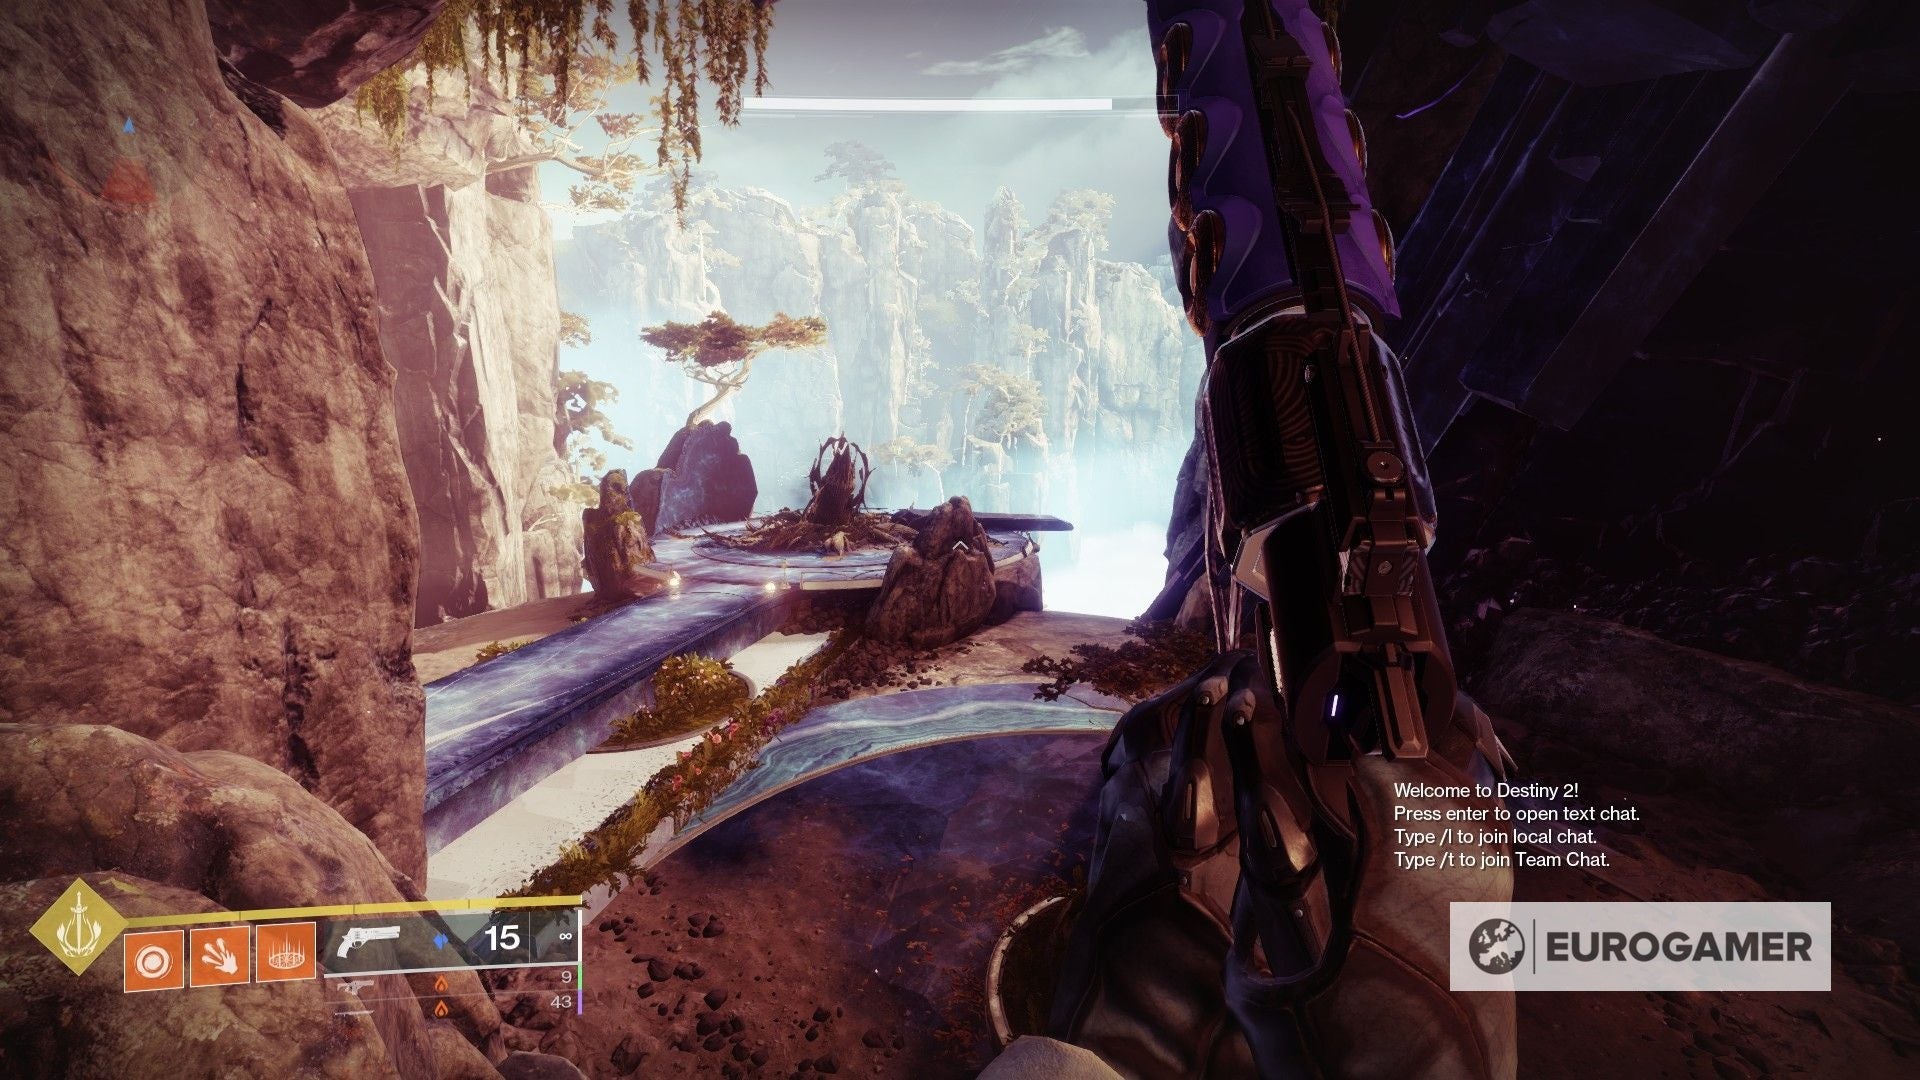
Spine Oracle Orrery Atlas Skew location
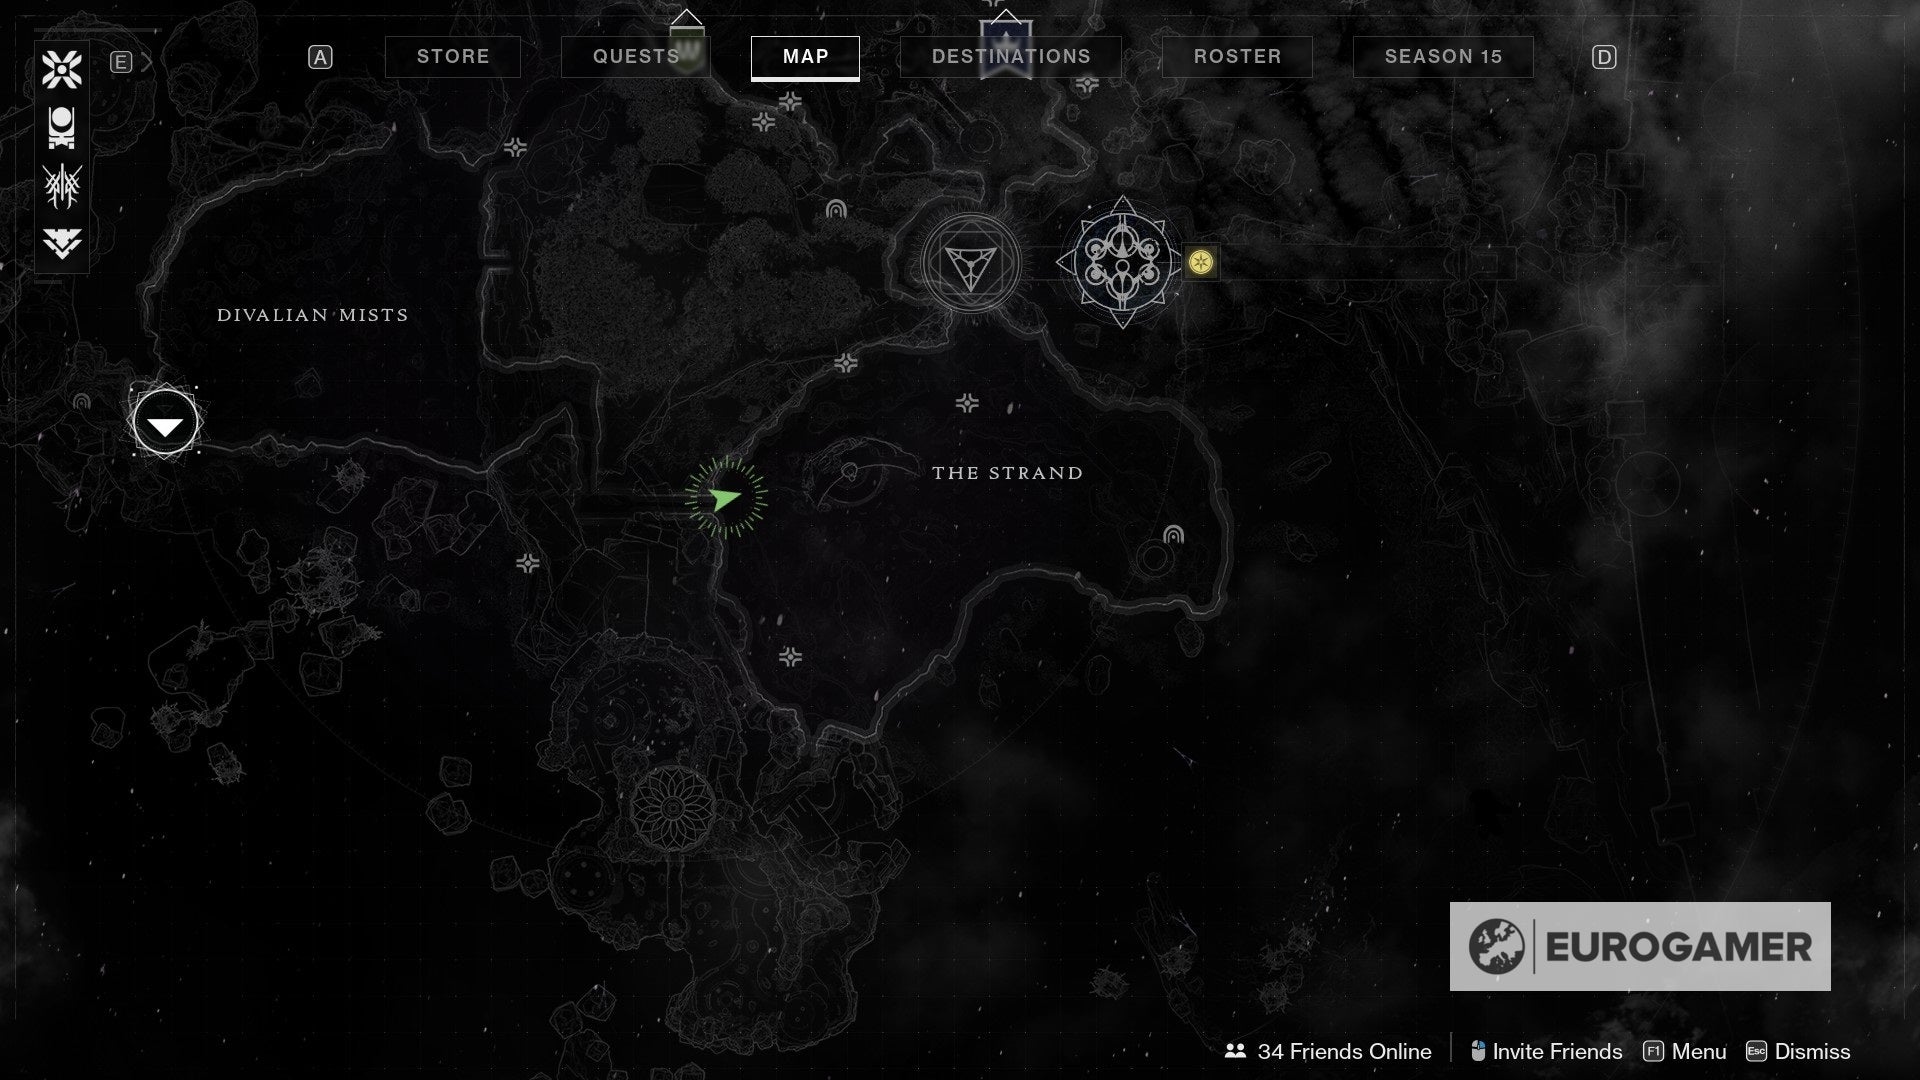
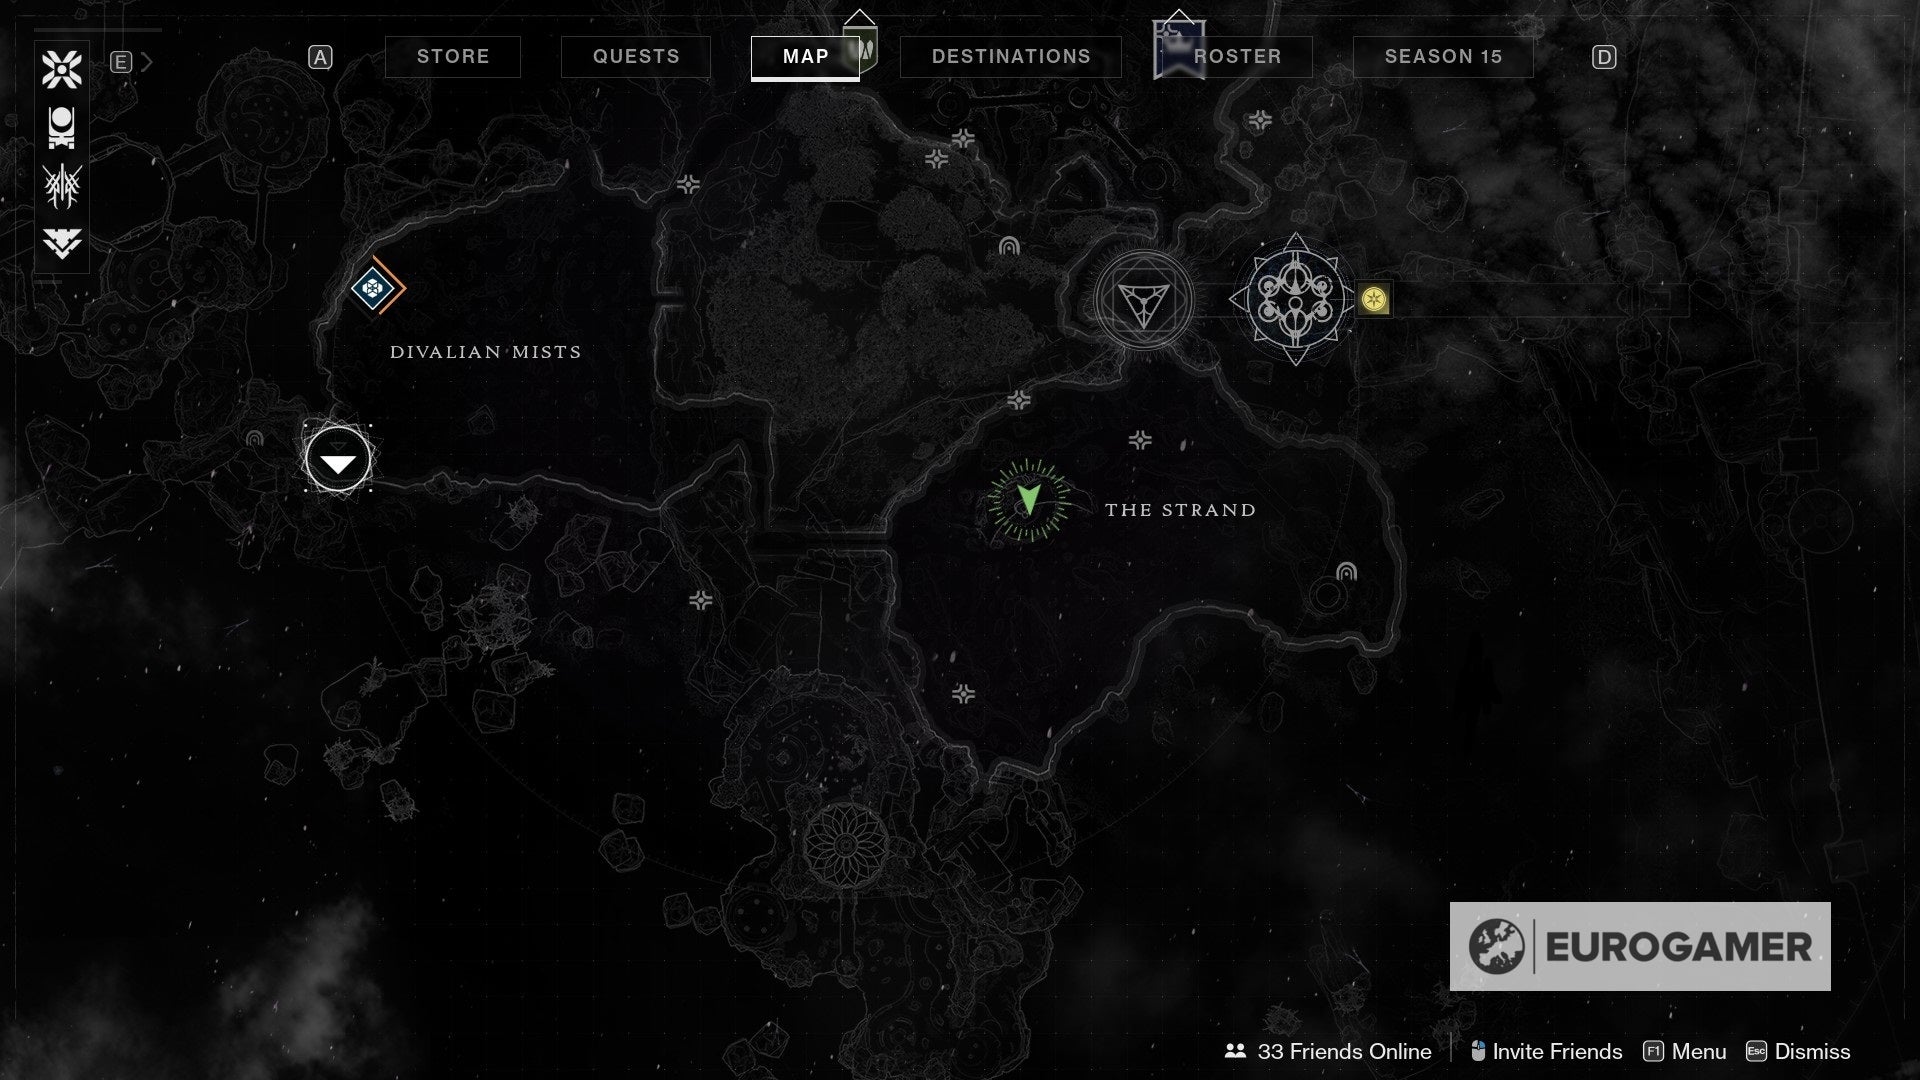
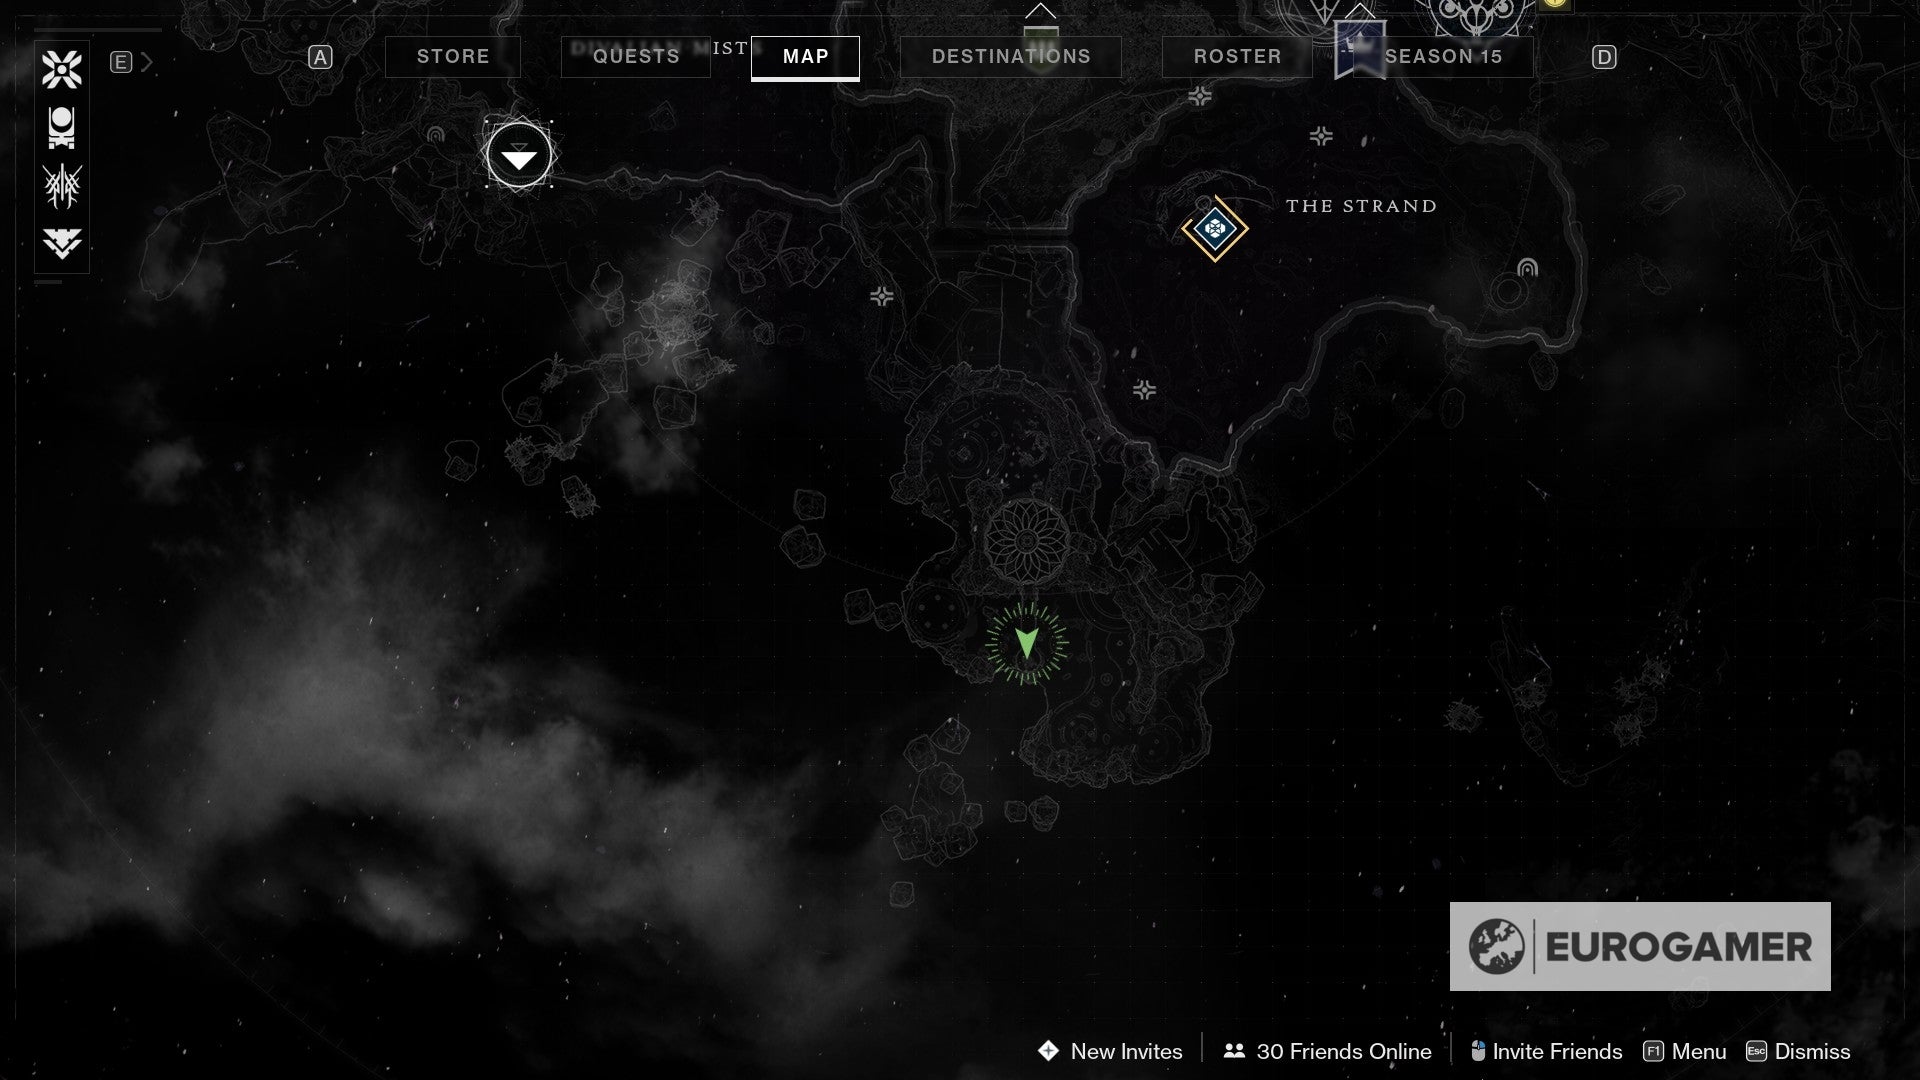
The fourth Atlas Skew can exist plant in the Spine of Keres.
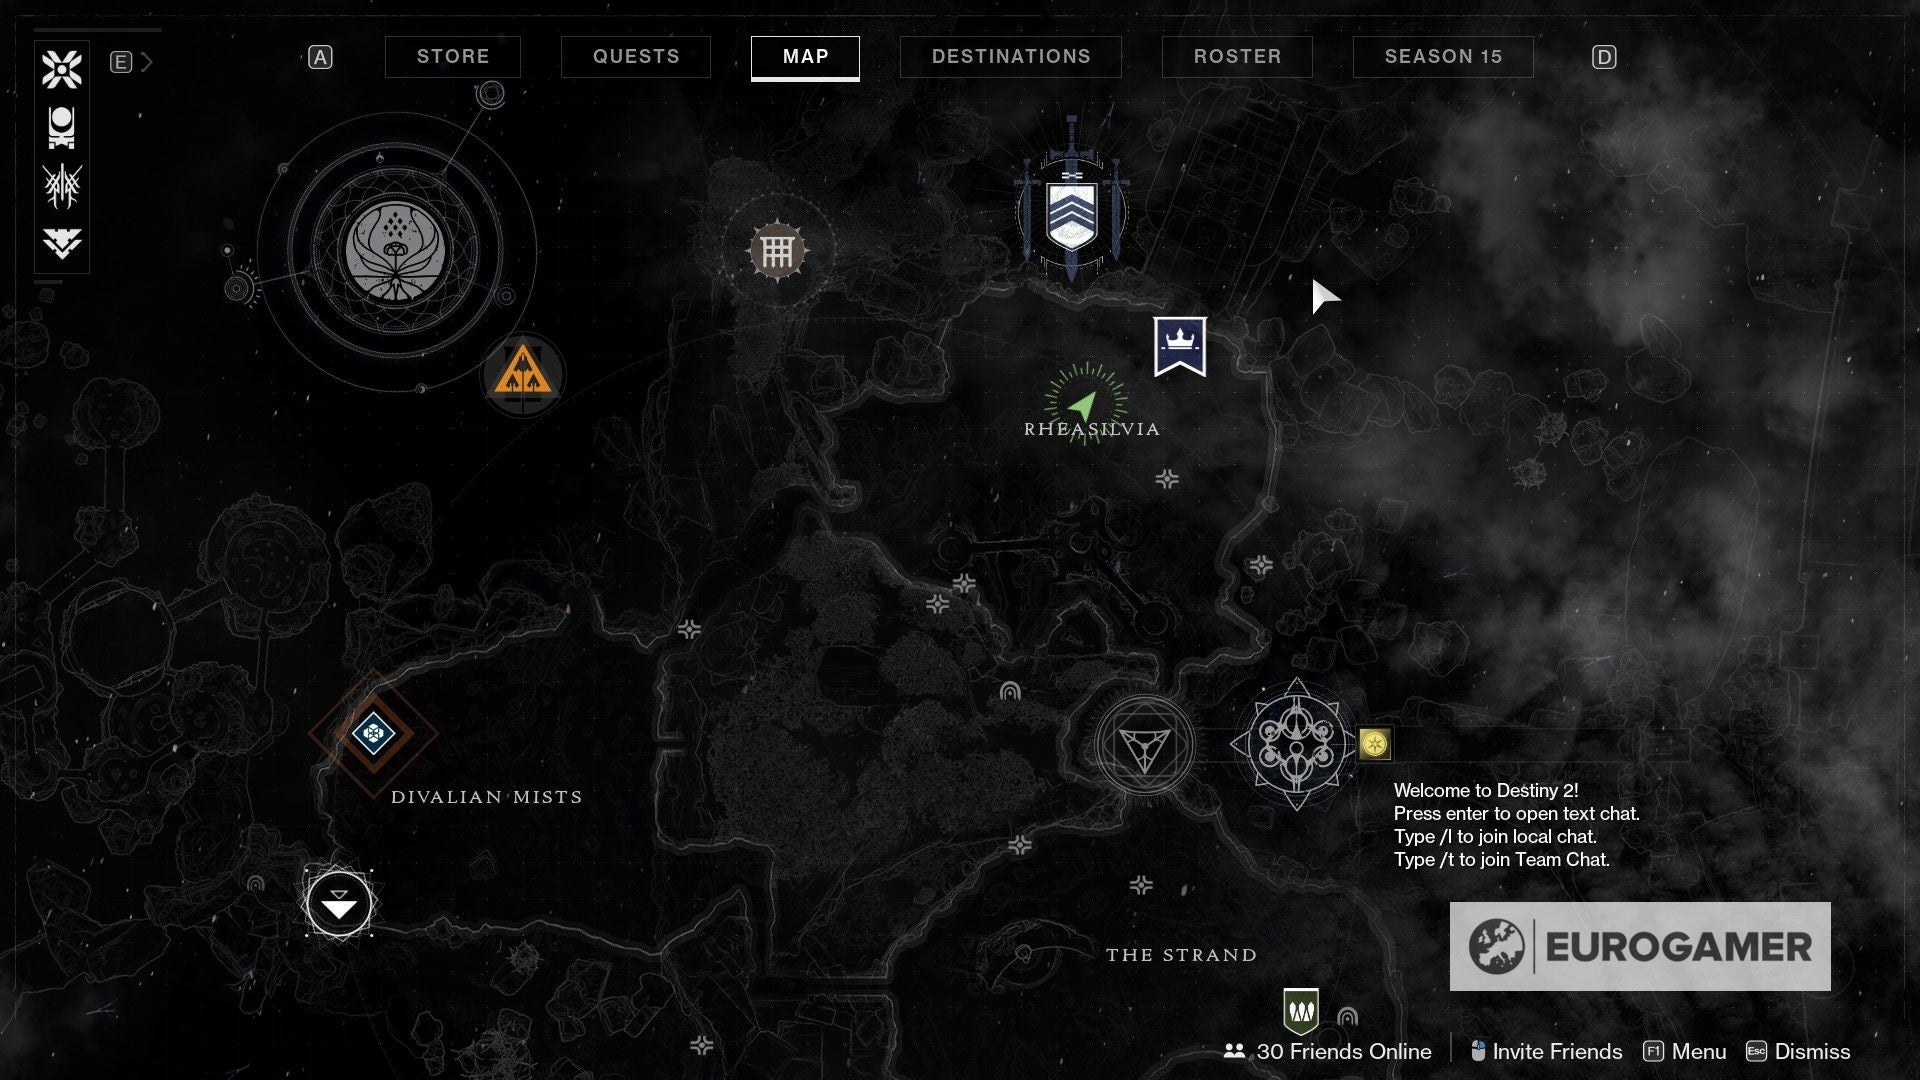
If you look at the map of the Dreaming City, you will observe a road up north of Divalian Mists - that's the i you're going to have.
In one case you see the ice passage, traverse through it and onto the other end, where a destroyed route awaits. Spring all the manner across and enter the area.
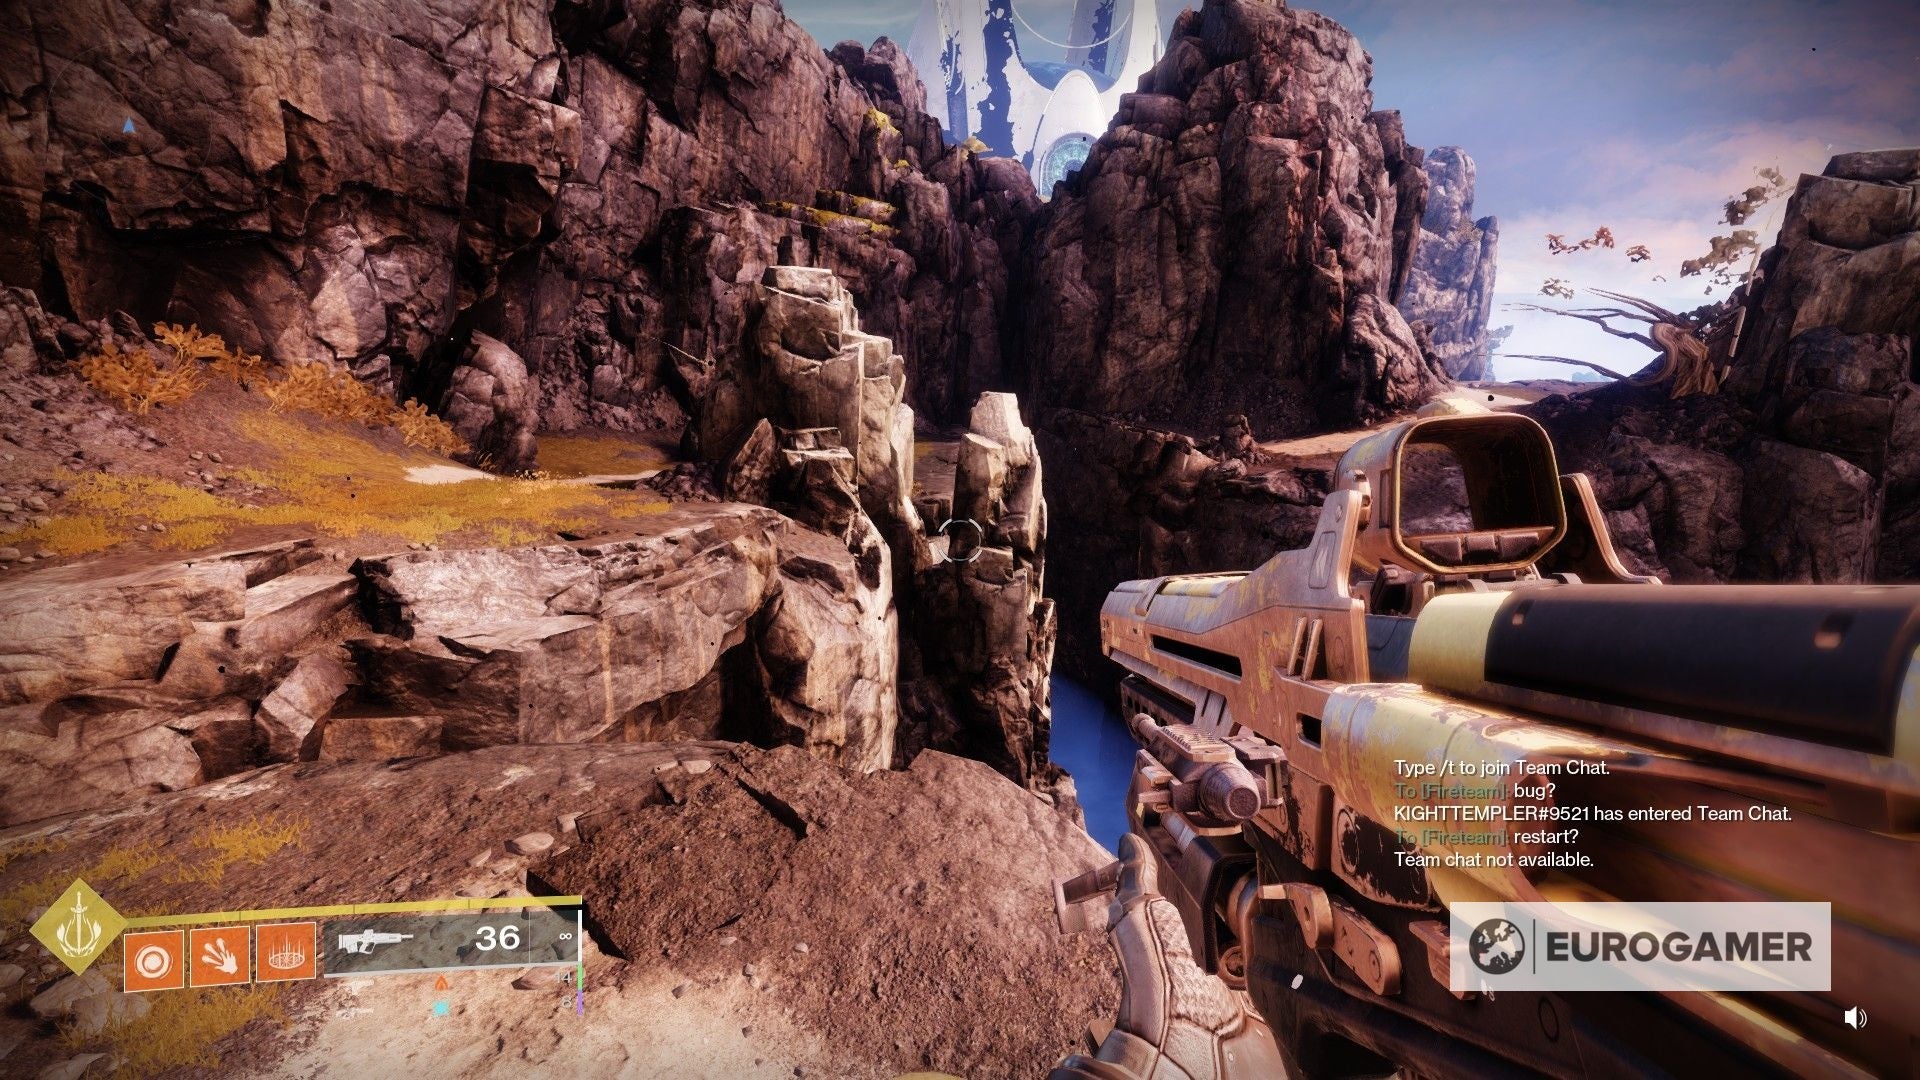
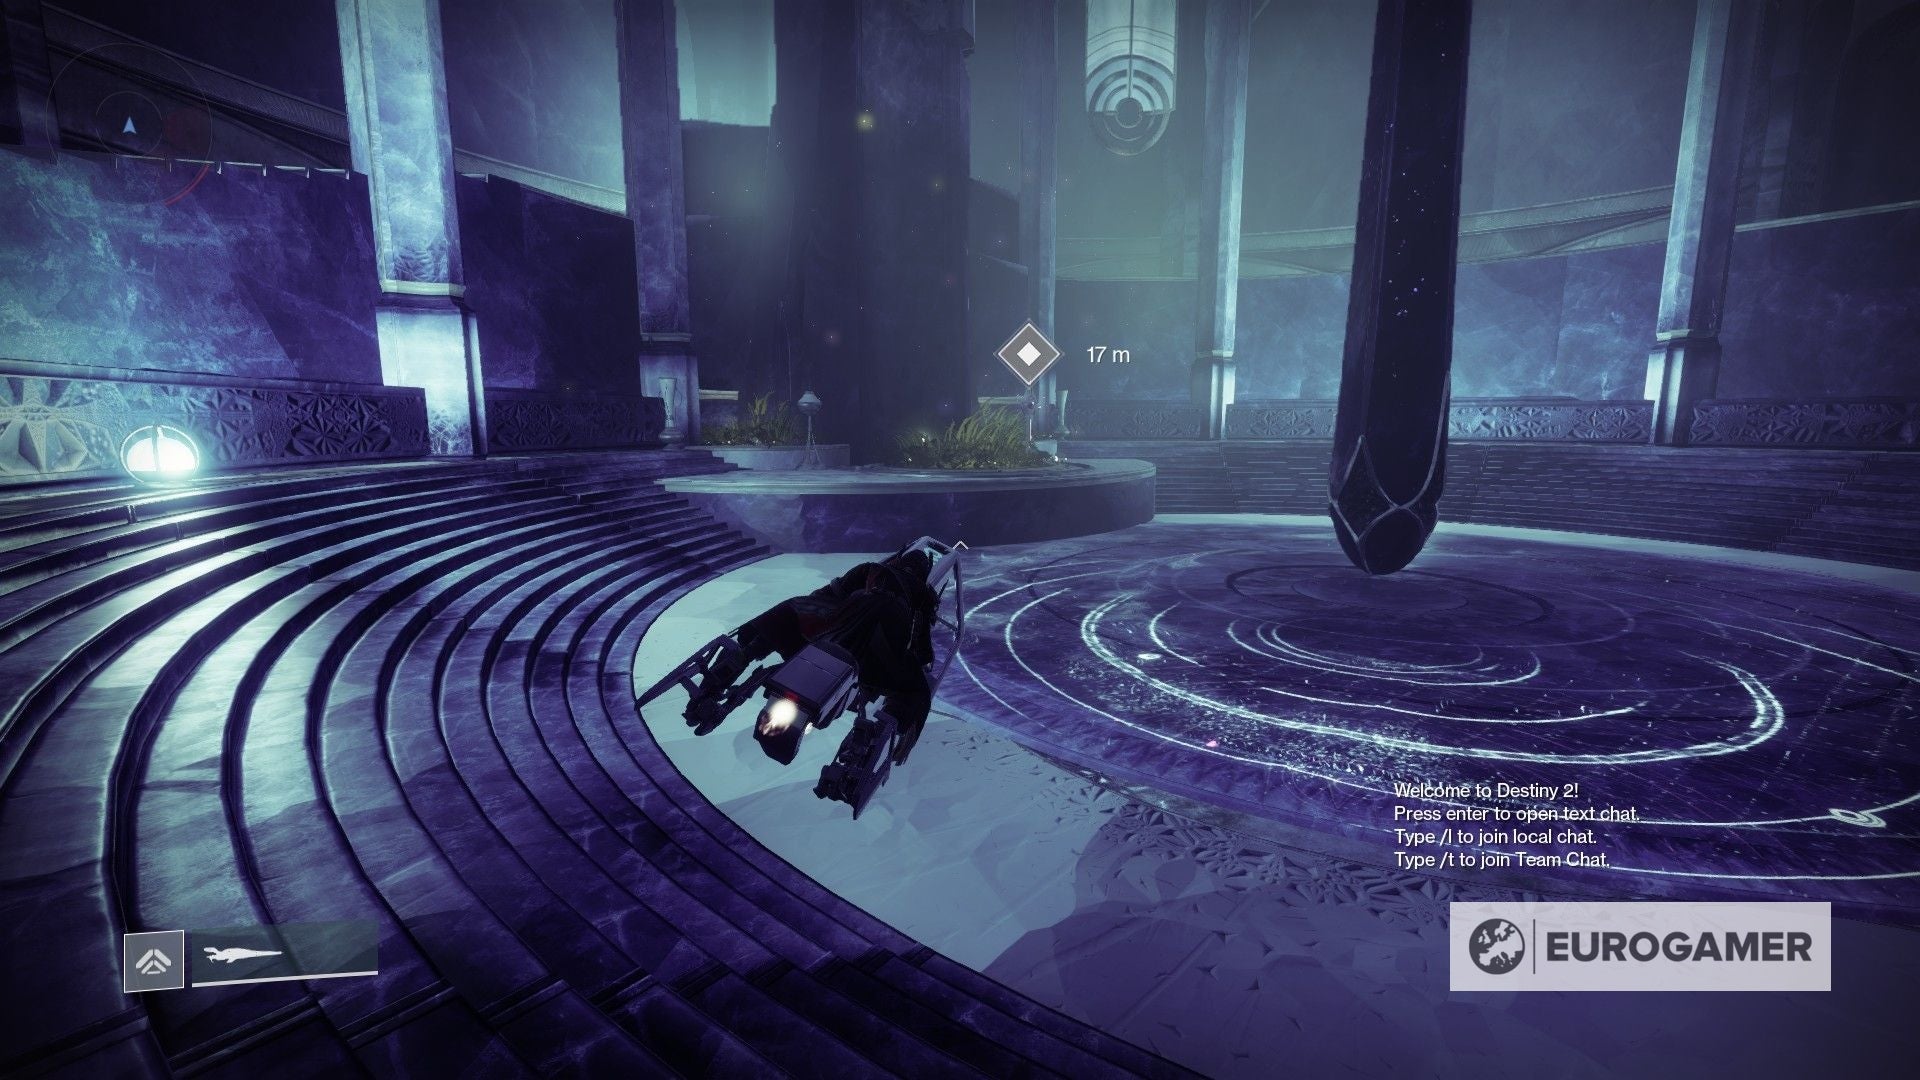
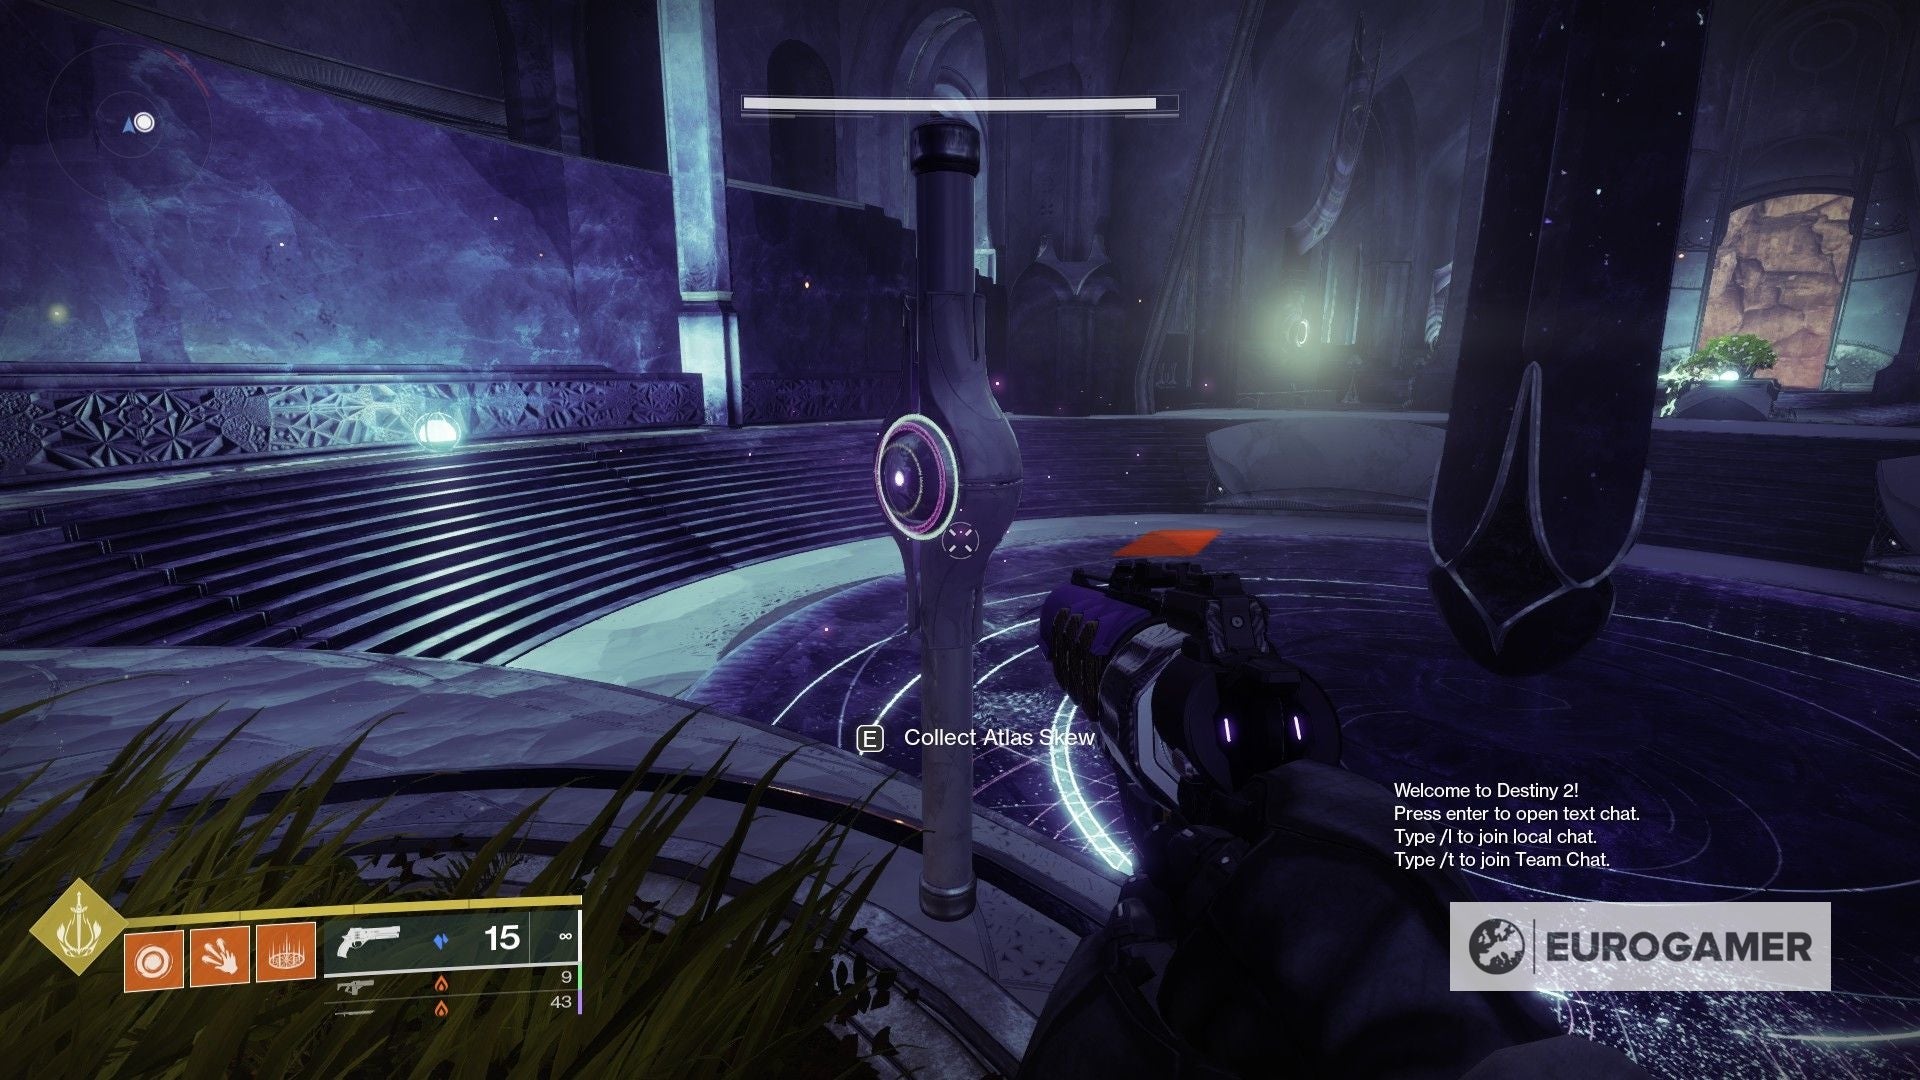
From here, the rest is rather straightforward. You only need to keep heading straight, enter the massive castle, and go all the way upstairs to the throne room.

One time there, keep moving upwards onto the top floor to find the Atlas Skew, which is in between ii (infinite?) benches.
Merely one left!
Season of the Haunted is here! Get up to speed with our levelling guide. For The Witch Queen, larn how to get Exotics including Dead Messenger and Parasite. Tardily last year, we saw the Bungie 30th Anniversary, which adds the Grasp of Avarice dungeon, Strange Coins and new Exotics, including the Gjallarhorn and Forerunner.
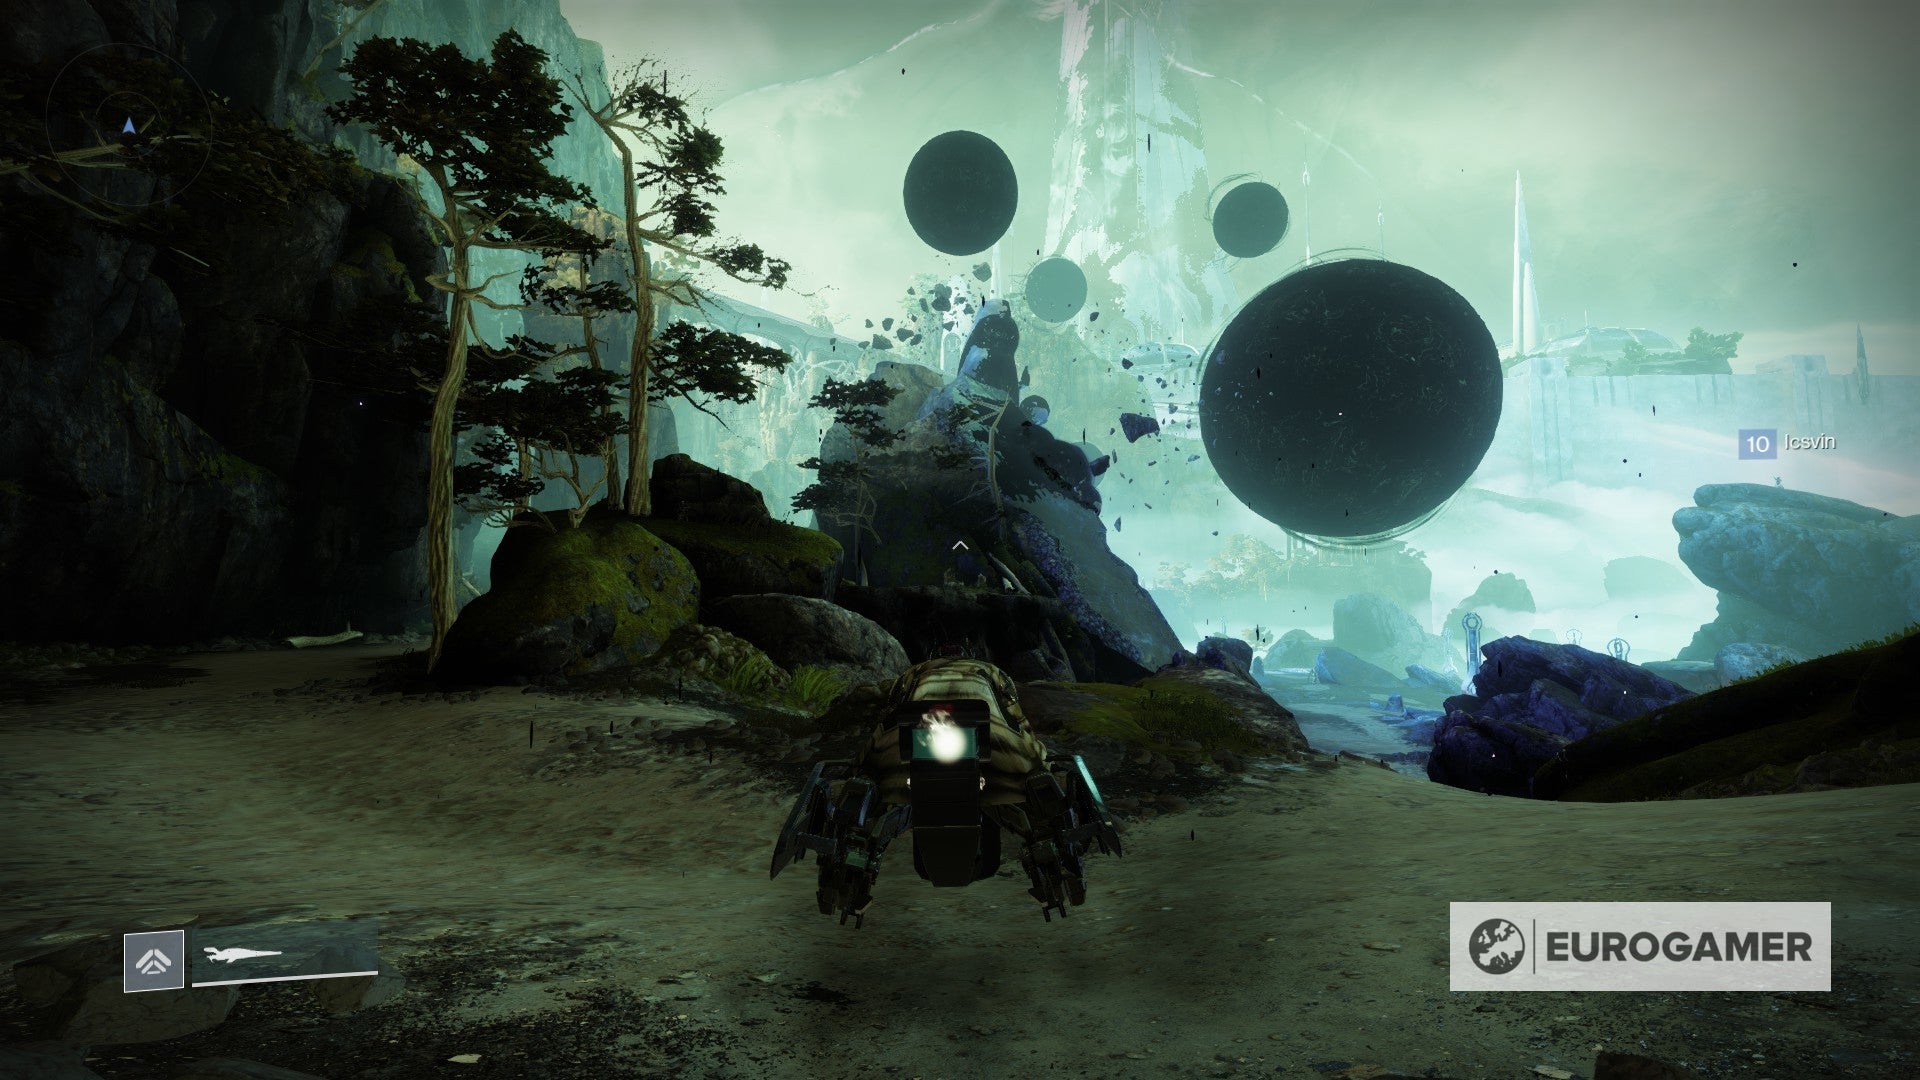
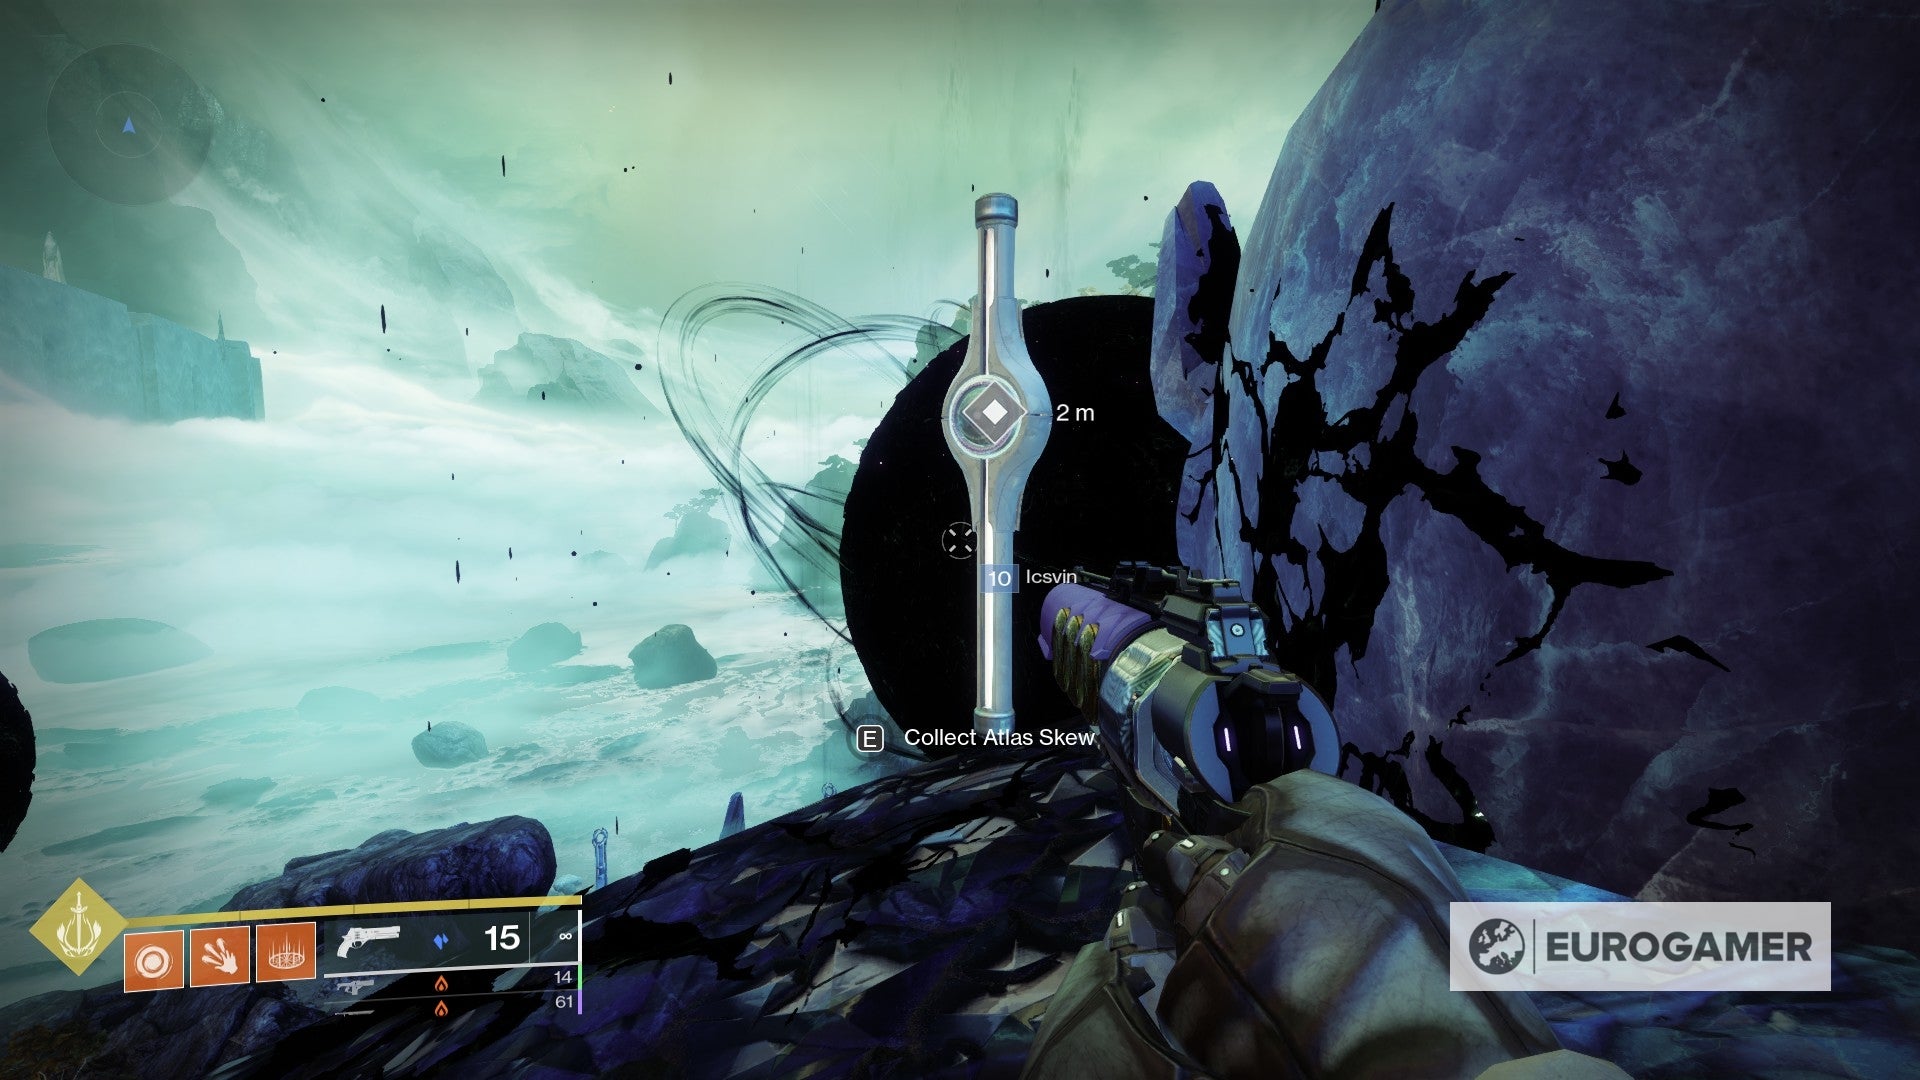
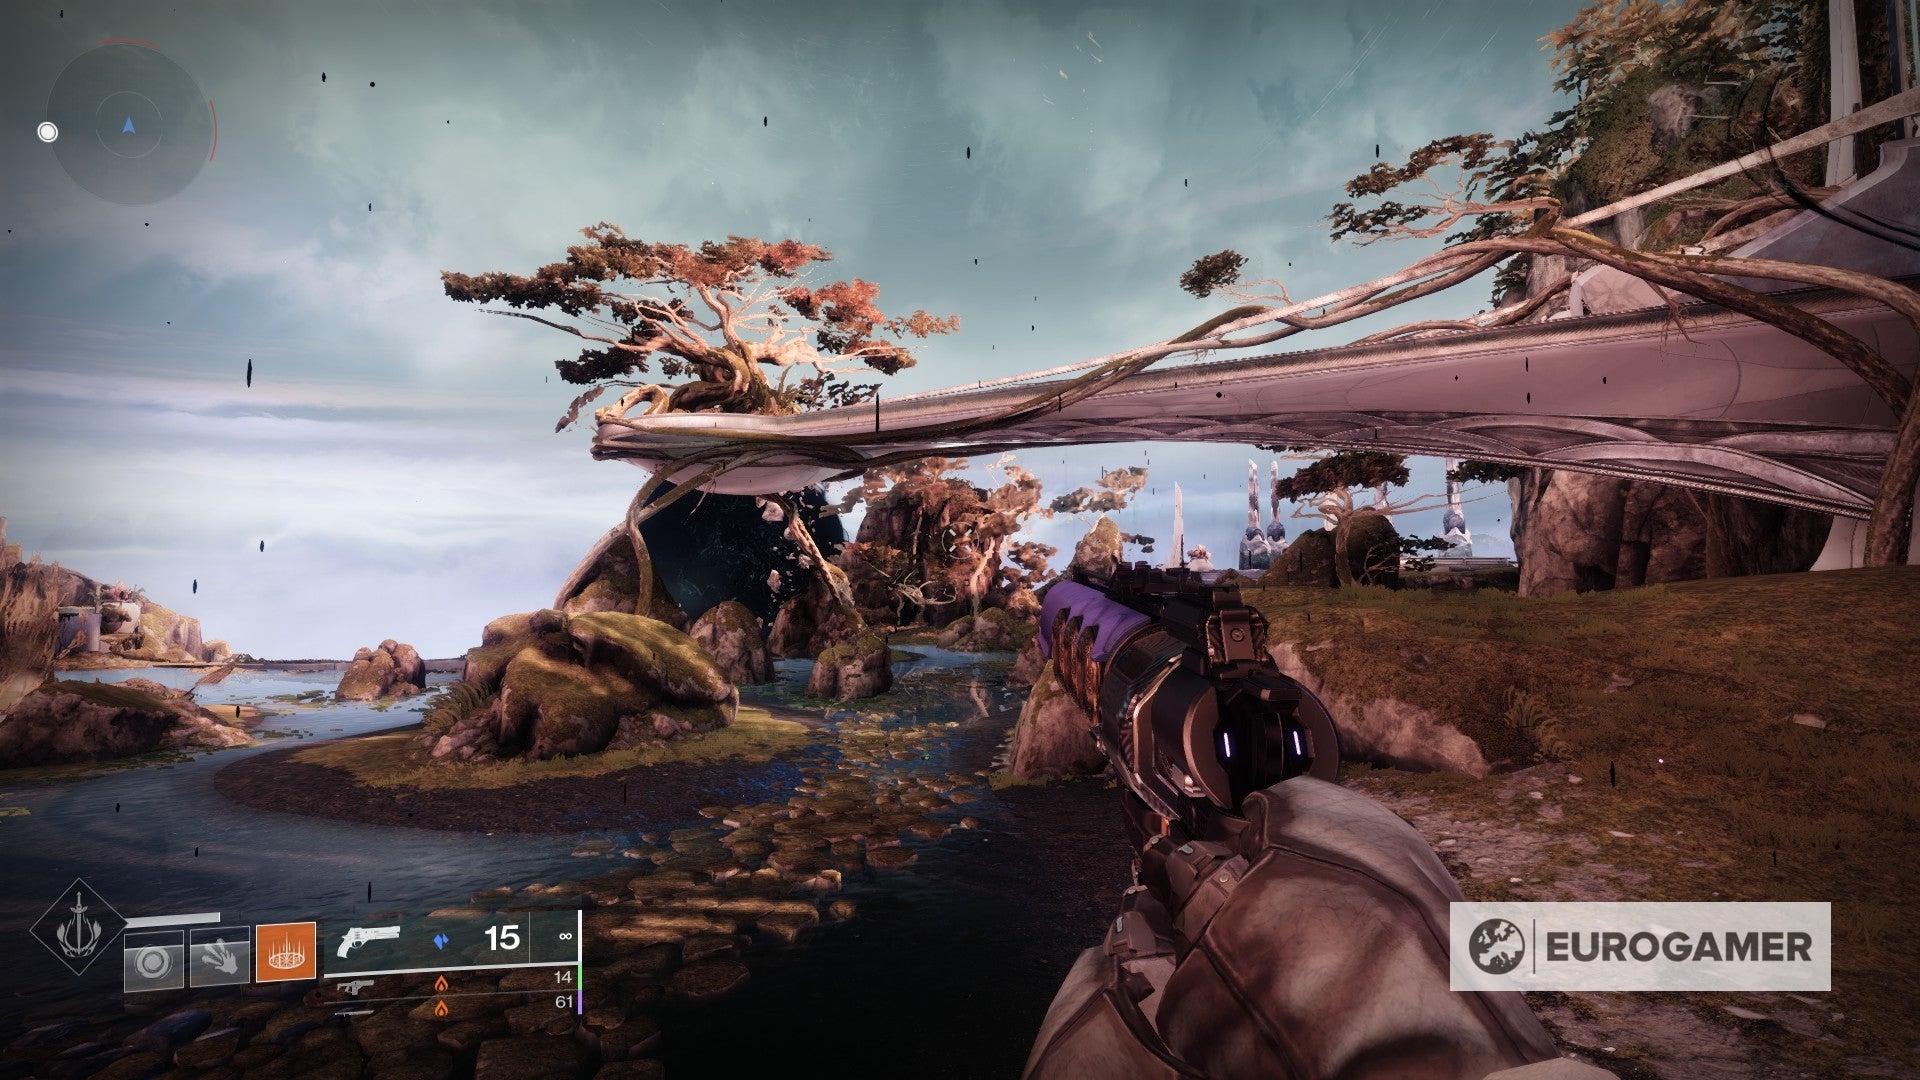
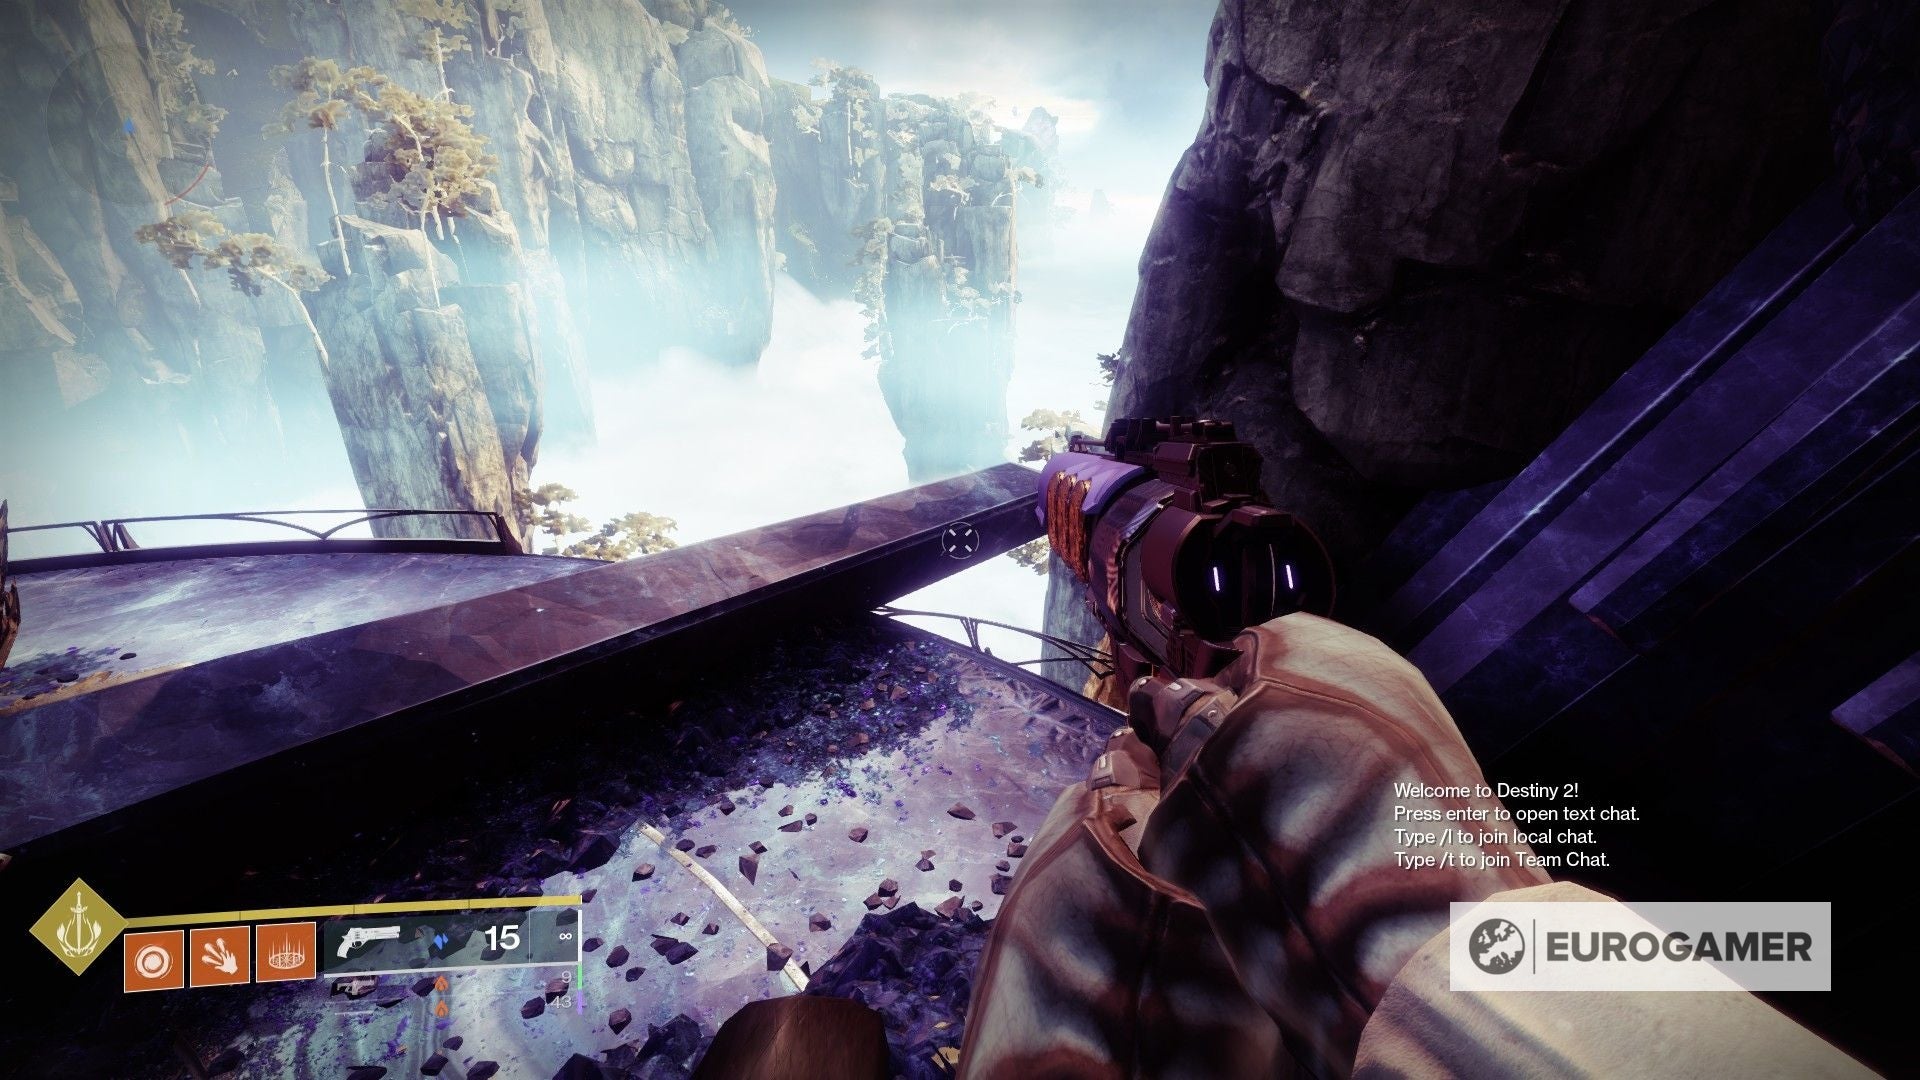
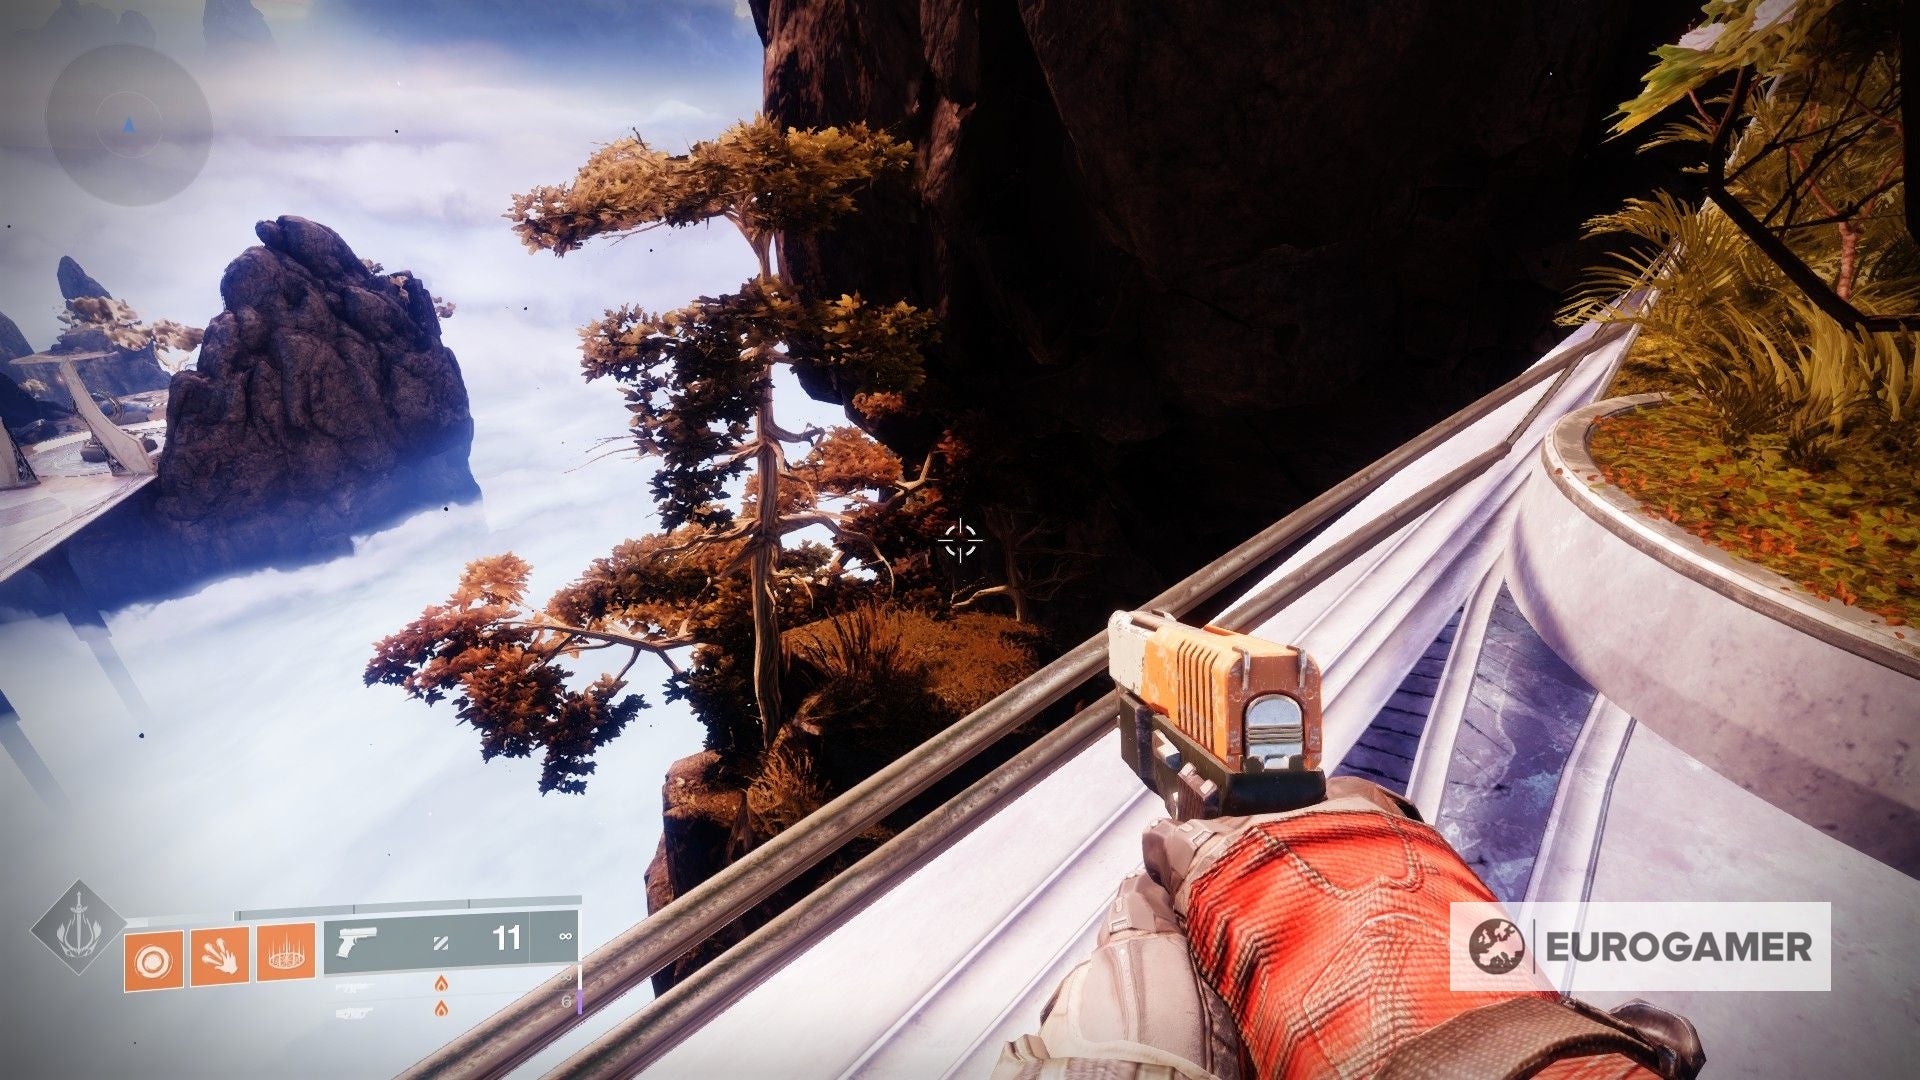
Distant Spine Island Tree Atlas Skew location
The fifth Atlas Skew tin can exist found in the Spine of Keres as well. Follow the aforementioned path as earlier and finish right before entering the castle (if yous're following the quest, but exit the castle and become to the bridge.)
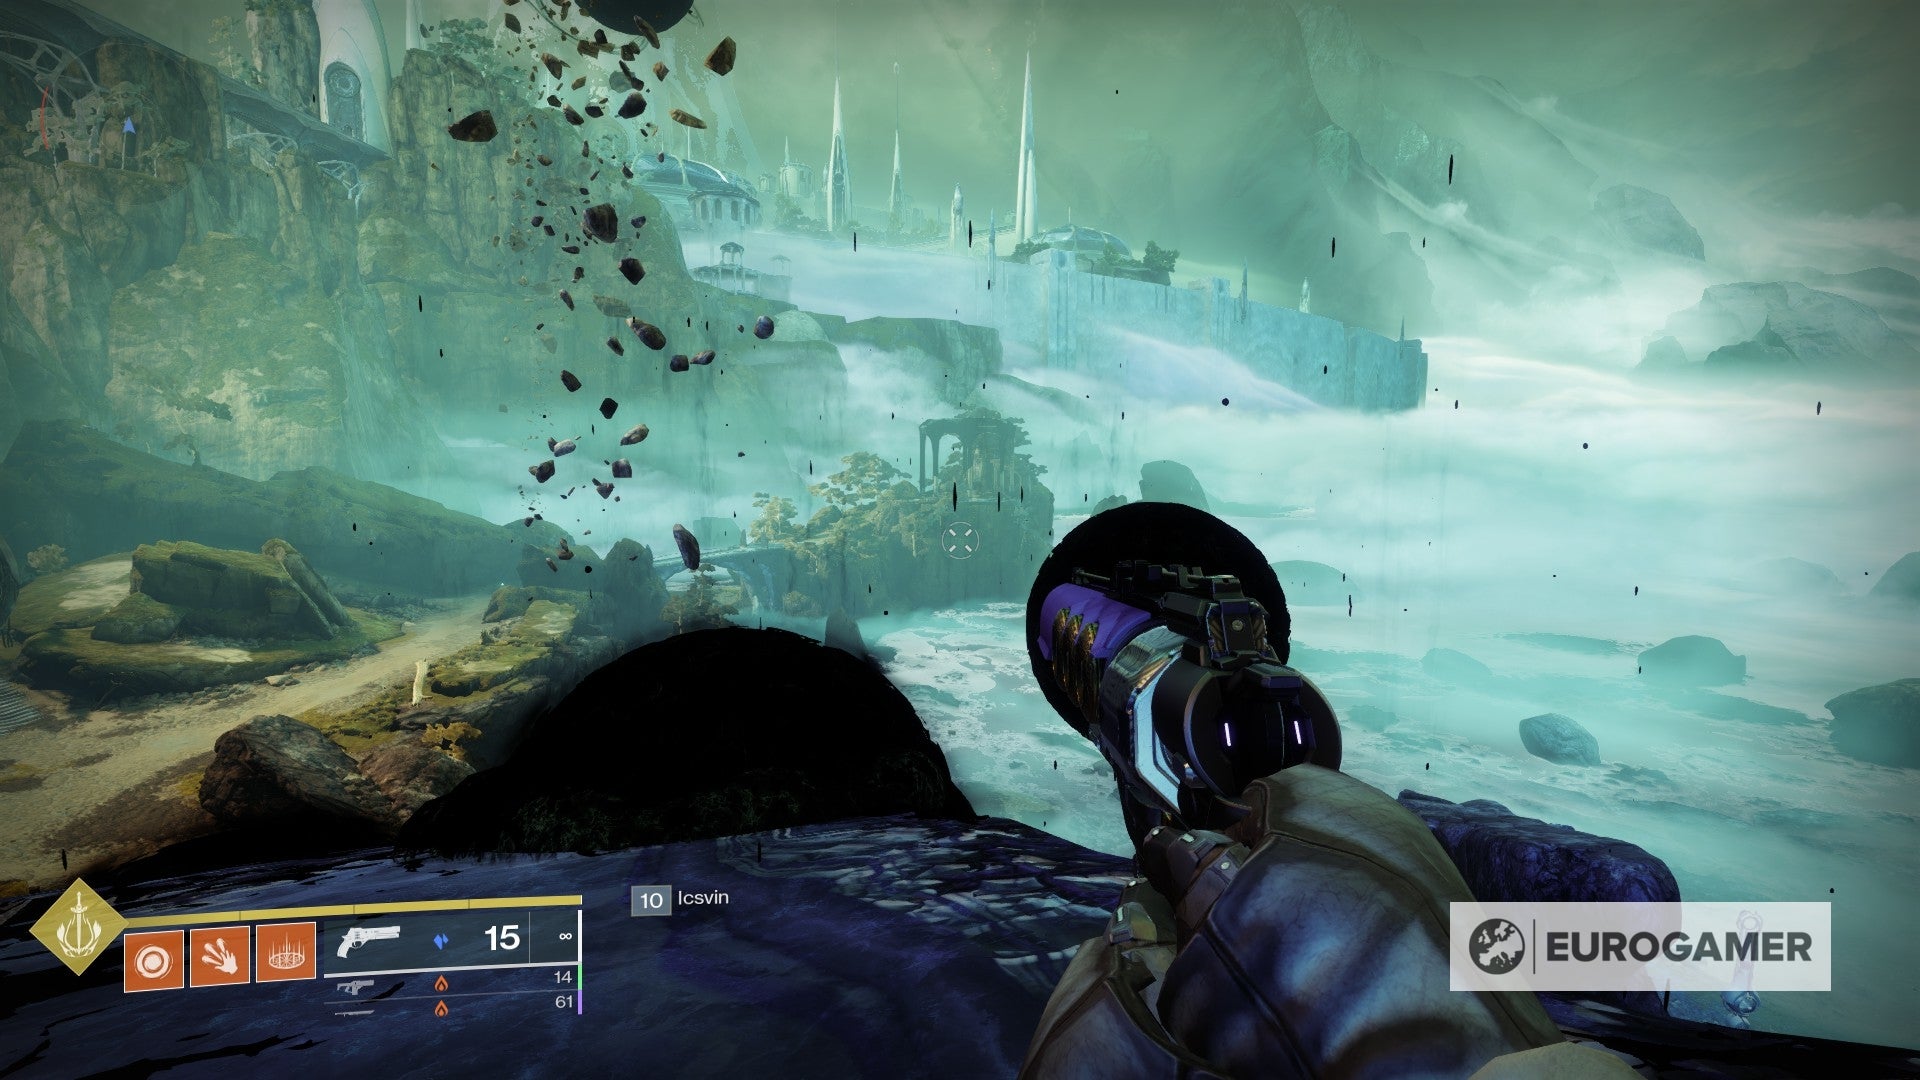
At present, this one is a bit tricky. You lot're going to head all the way to the other side of the bridge and onto the islands to the far north. You'll want to end up hither:
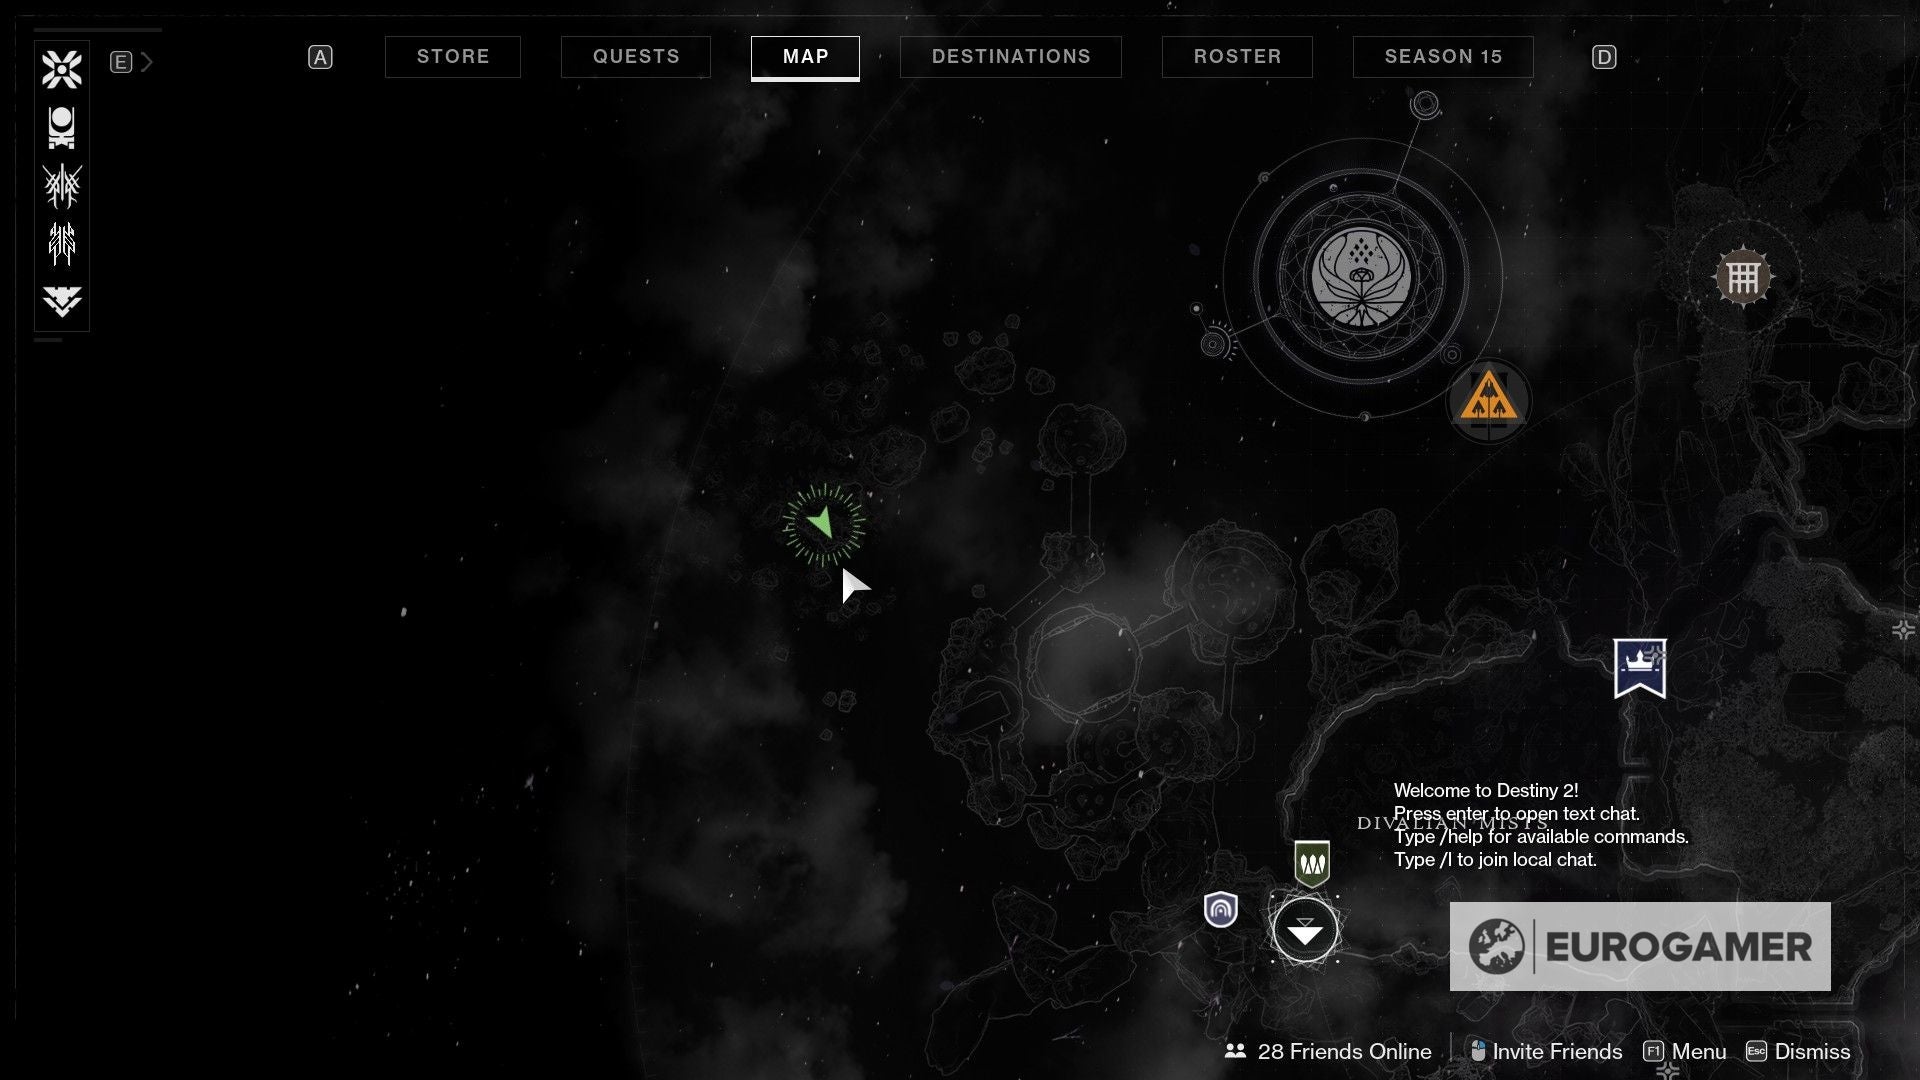
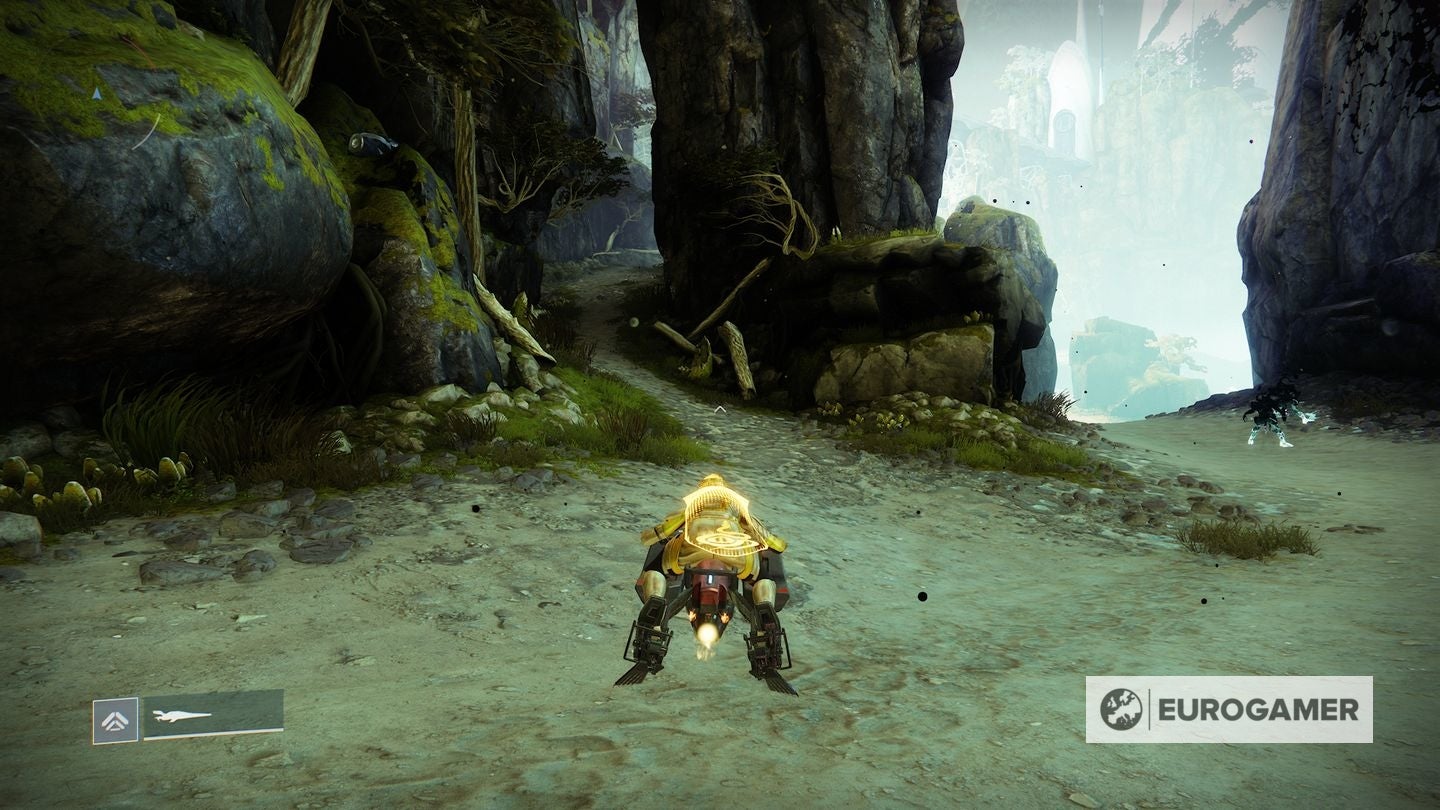
There are multiple means to practice this - we recommend you go n as much as possible and drop downward to lower paths to keep going.
For us, we found information technology easiest to use a Tincture of Queensfoil.
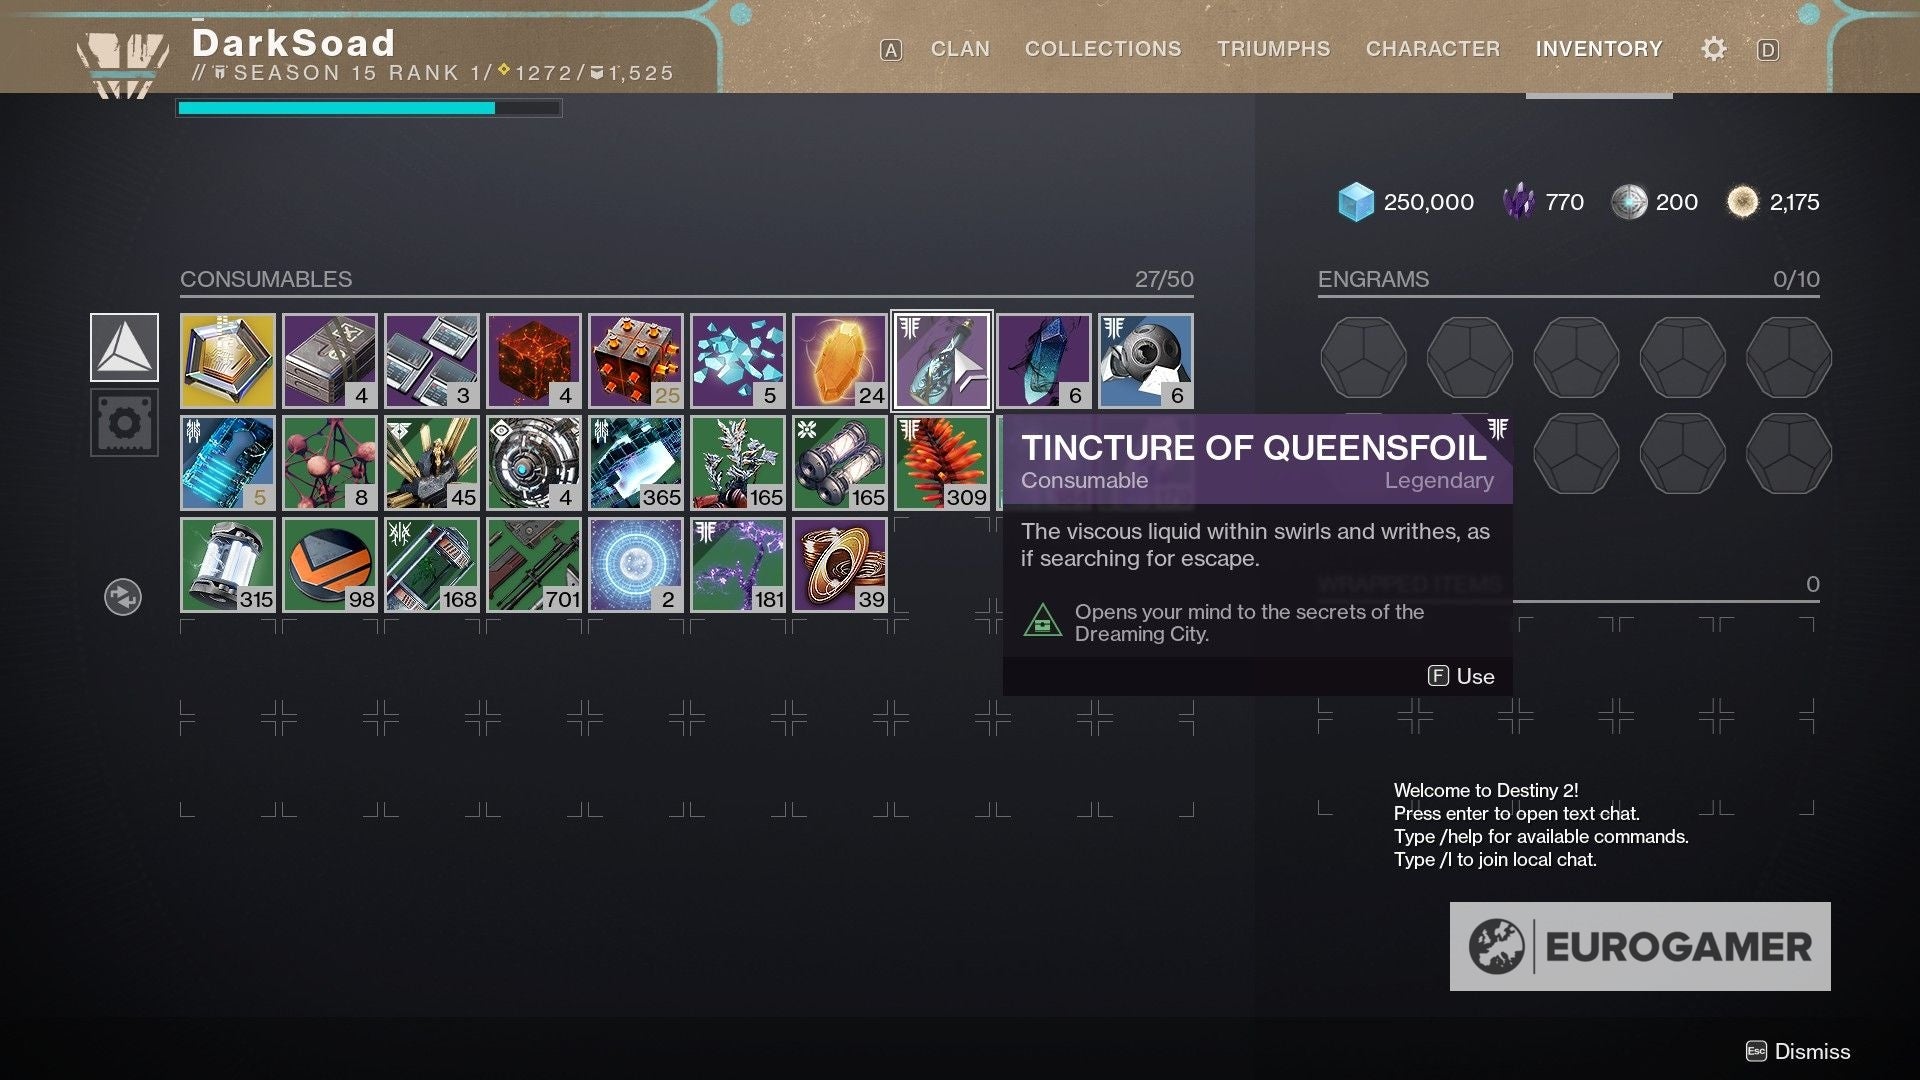
Afterward utilise, it will allow you to see secret pathways, which will reveal themselves in full once you're close enough to them.
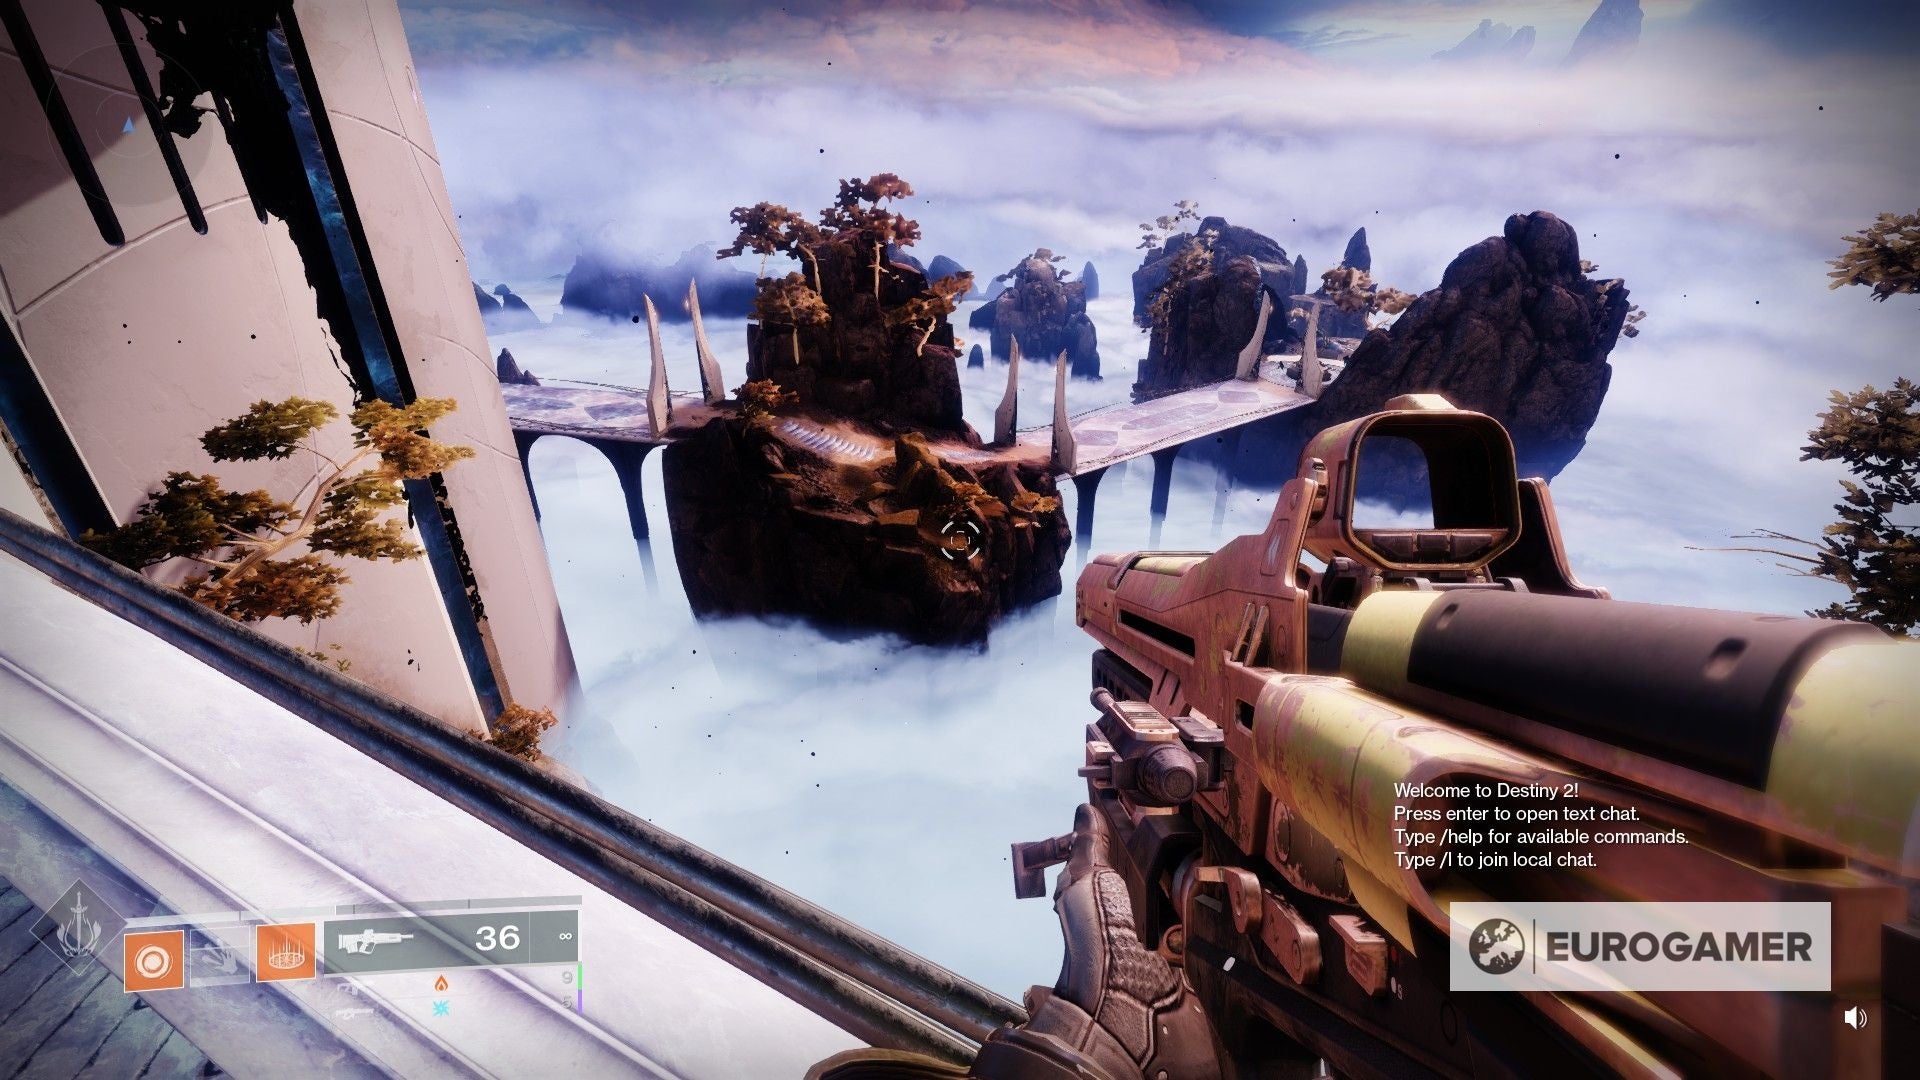
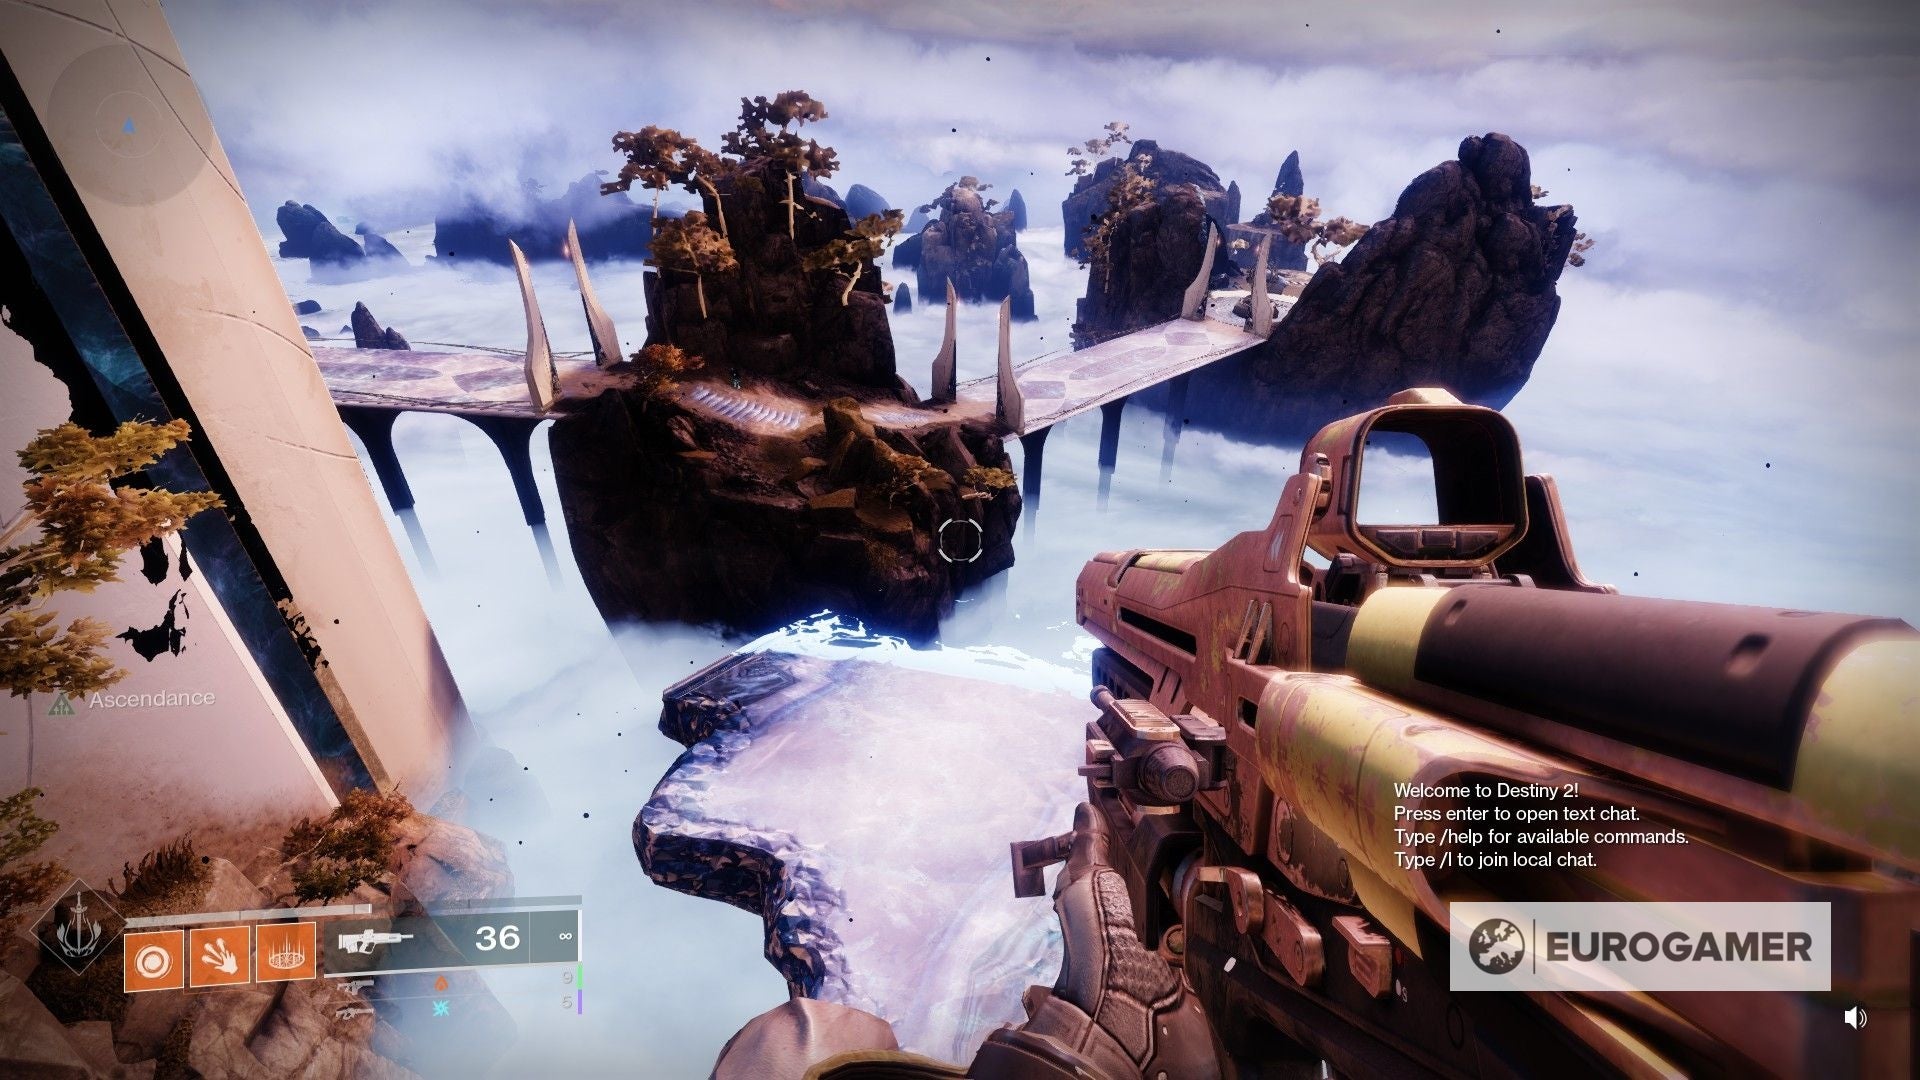
At that place are a couple platforms to traverse to the other side. One time at that place, all you lot have to do is start moving across the floating islands.
As you lot exercise this, at one point you will notice a long, dark shore on the correct side. Keep heading straight until y'all detect a large tree in one of the islands.

Once in said island, you volition find the Atlas Skew right next to the tree. That's all of them!
Congratulations on collecting all Atlas Skews in Divalian Mists!
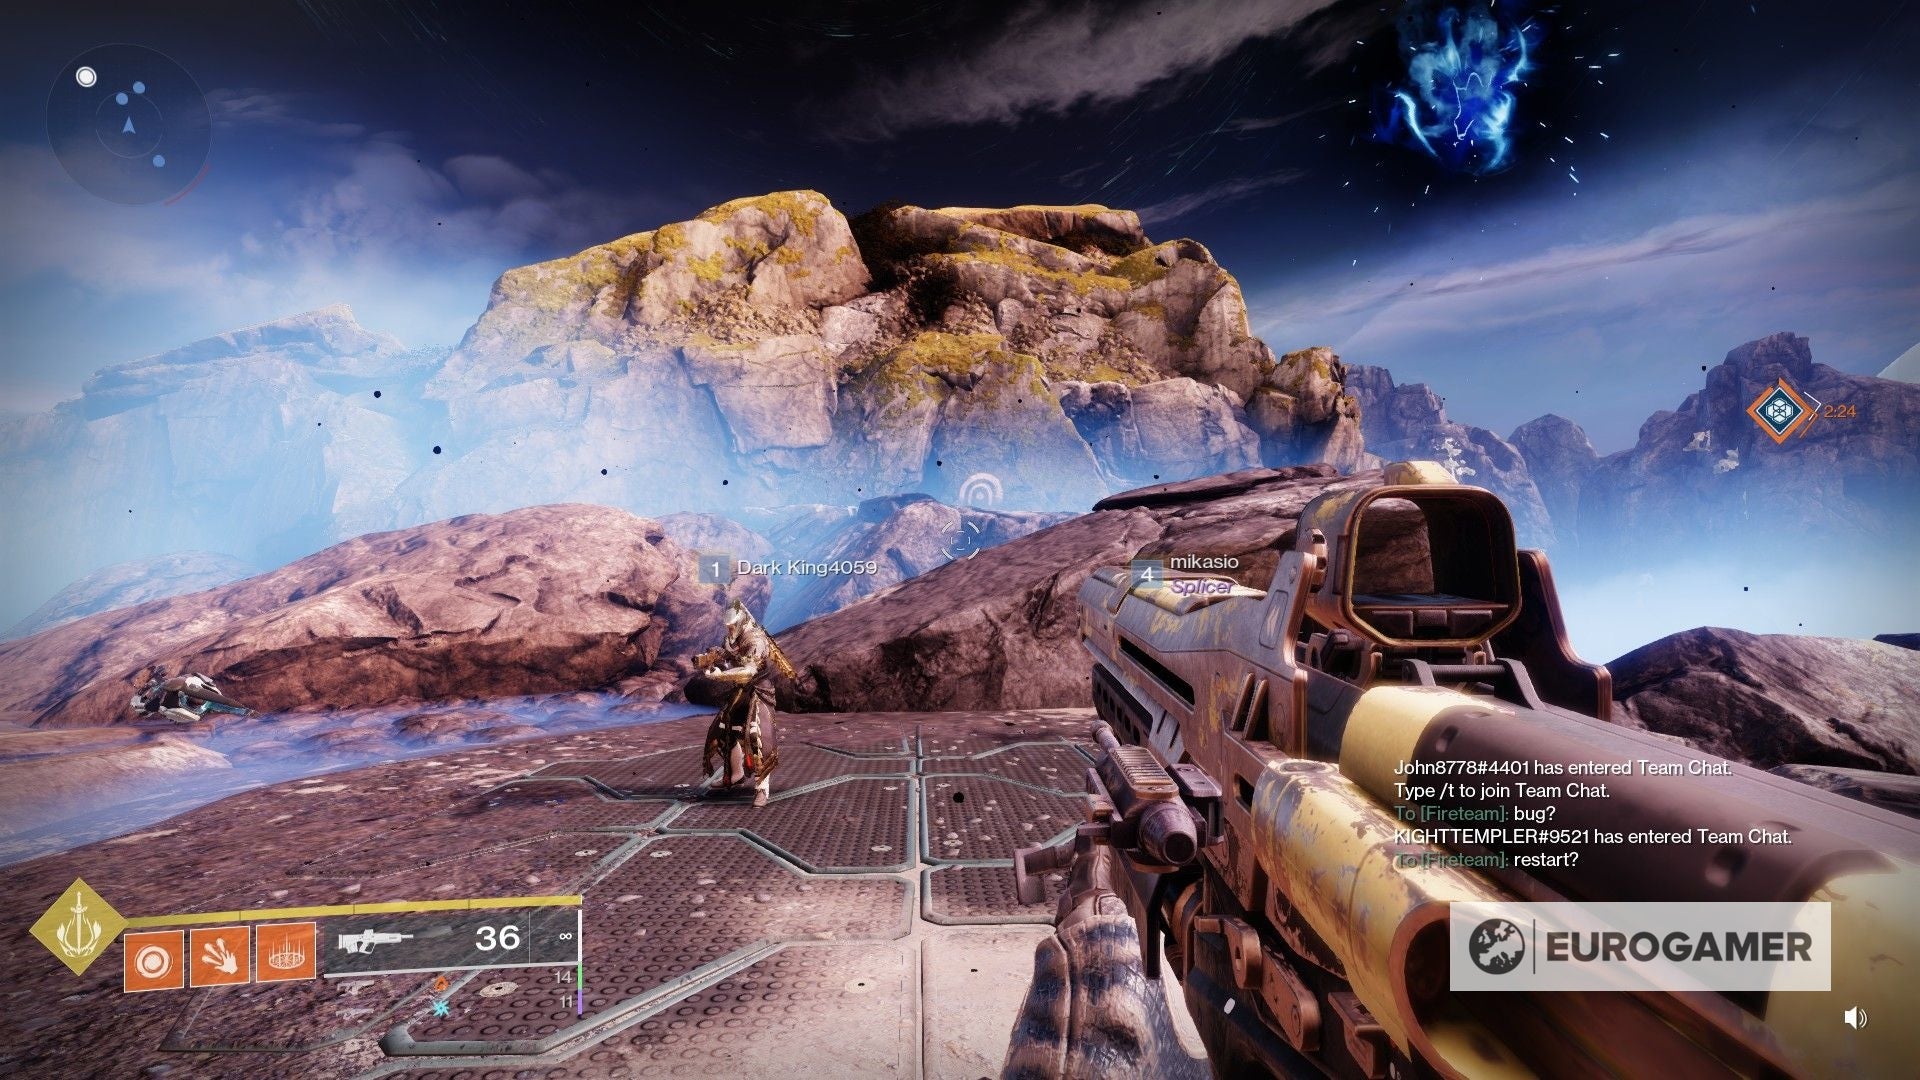
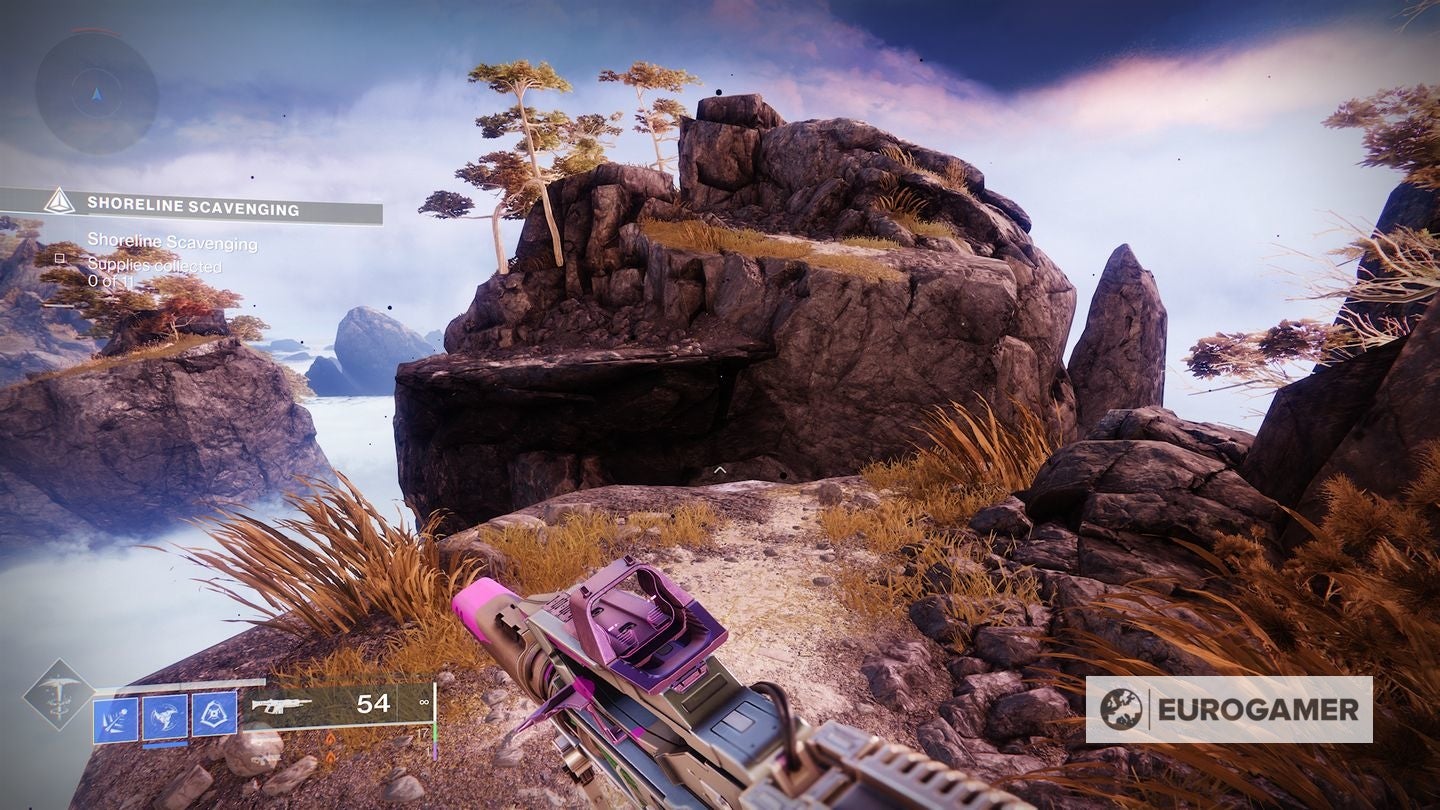
Strand Towering Statue Atlas Skew location
The first Atlas Skew tin be constitute in the Strand, which is one of the big named areas in the Dreaming City.
Once you arrive to the starting point in the Strand, you will immediately notice a large 'mount' in the vicinity. This is where we're heading.
Later on getting close to it, the easiest way to calibration it is from the high cliffs to the north (as you lot enter the area, hug the left wall to find a path going up). Double jump your way from at that place across to the 'mount'.
Make all your way up and grab the Atlas Skew on the peak.
Four more to go!
Strand Gazebo Statue Atlas Skew location
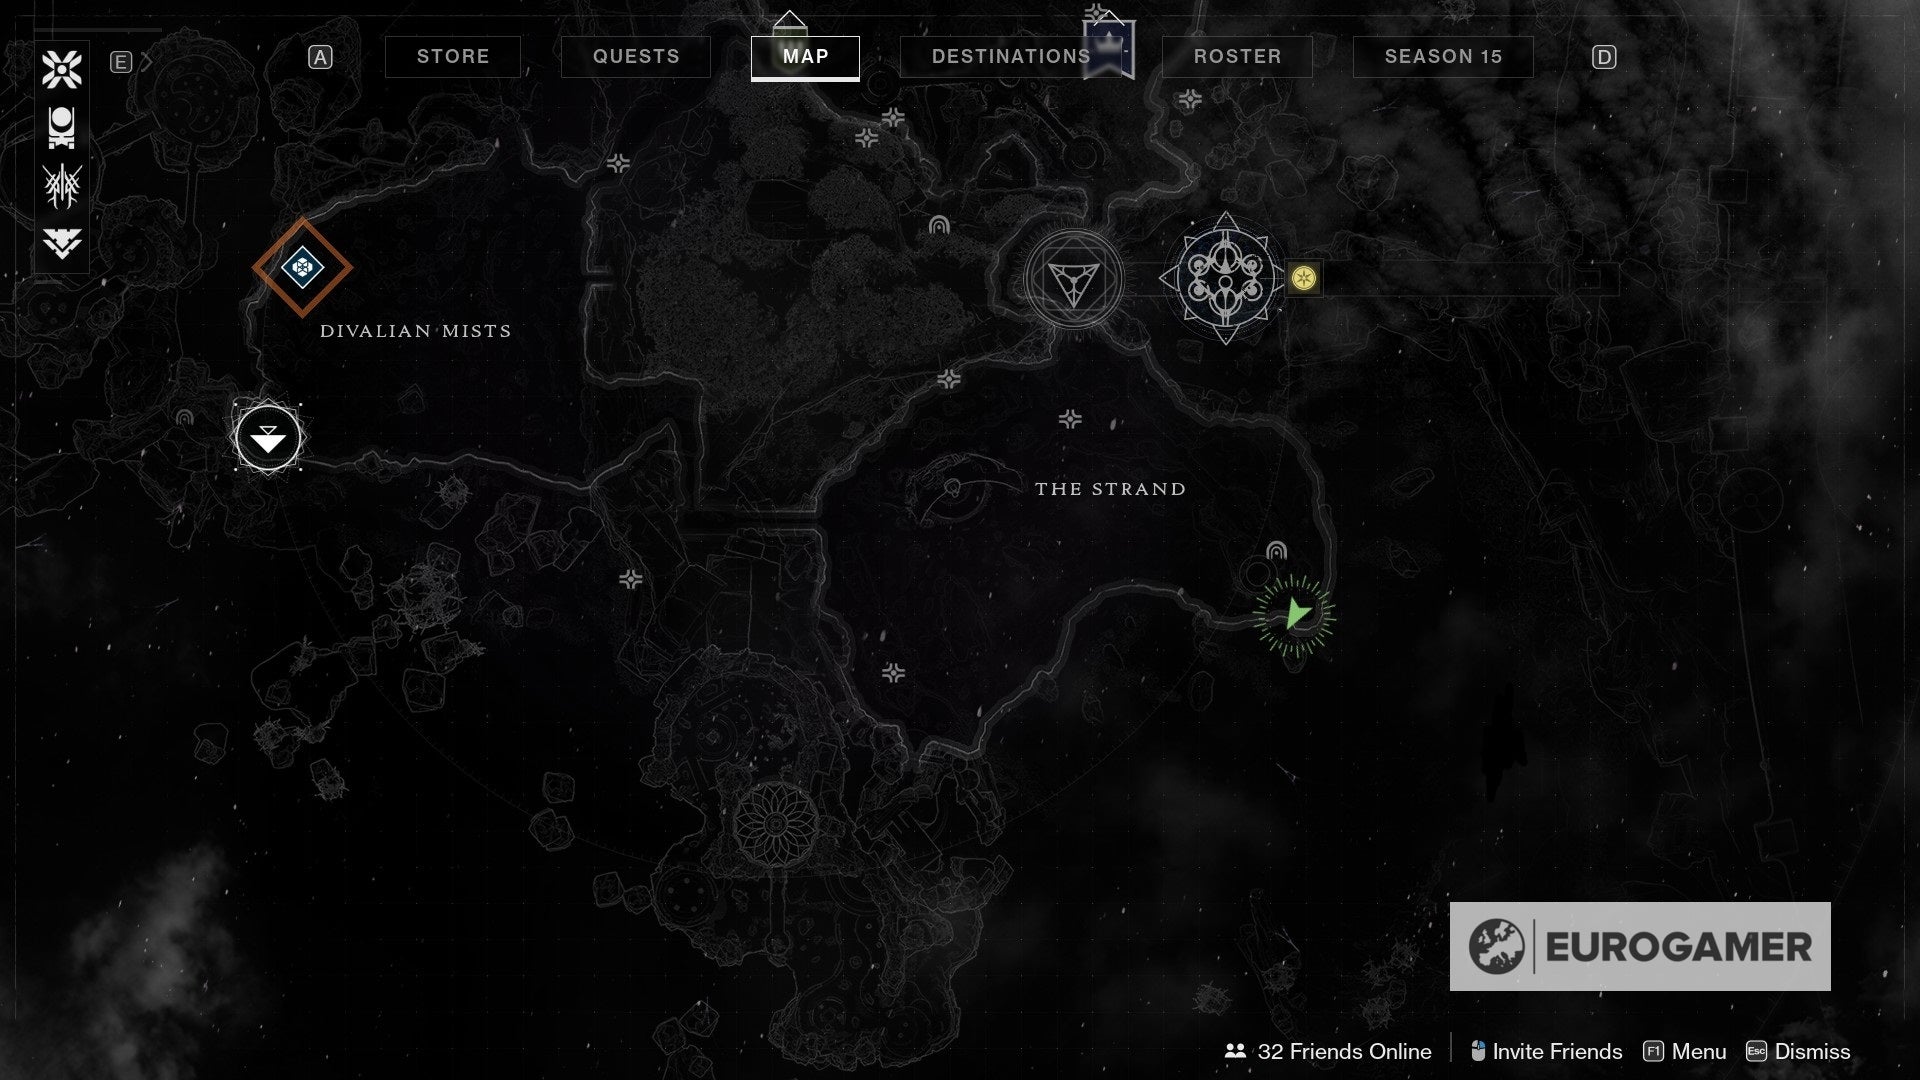
The second Atlas Skew can be found in the Strand as well, fairly close to where you just grabbed the first Atlas Skew.
Yous will notice a dome-shaped structure located in the southeastern corner of the expanse. Feel costless to summon your vehicle and head towards in that location.

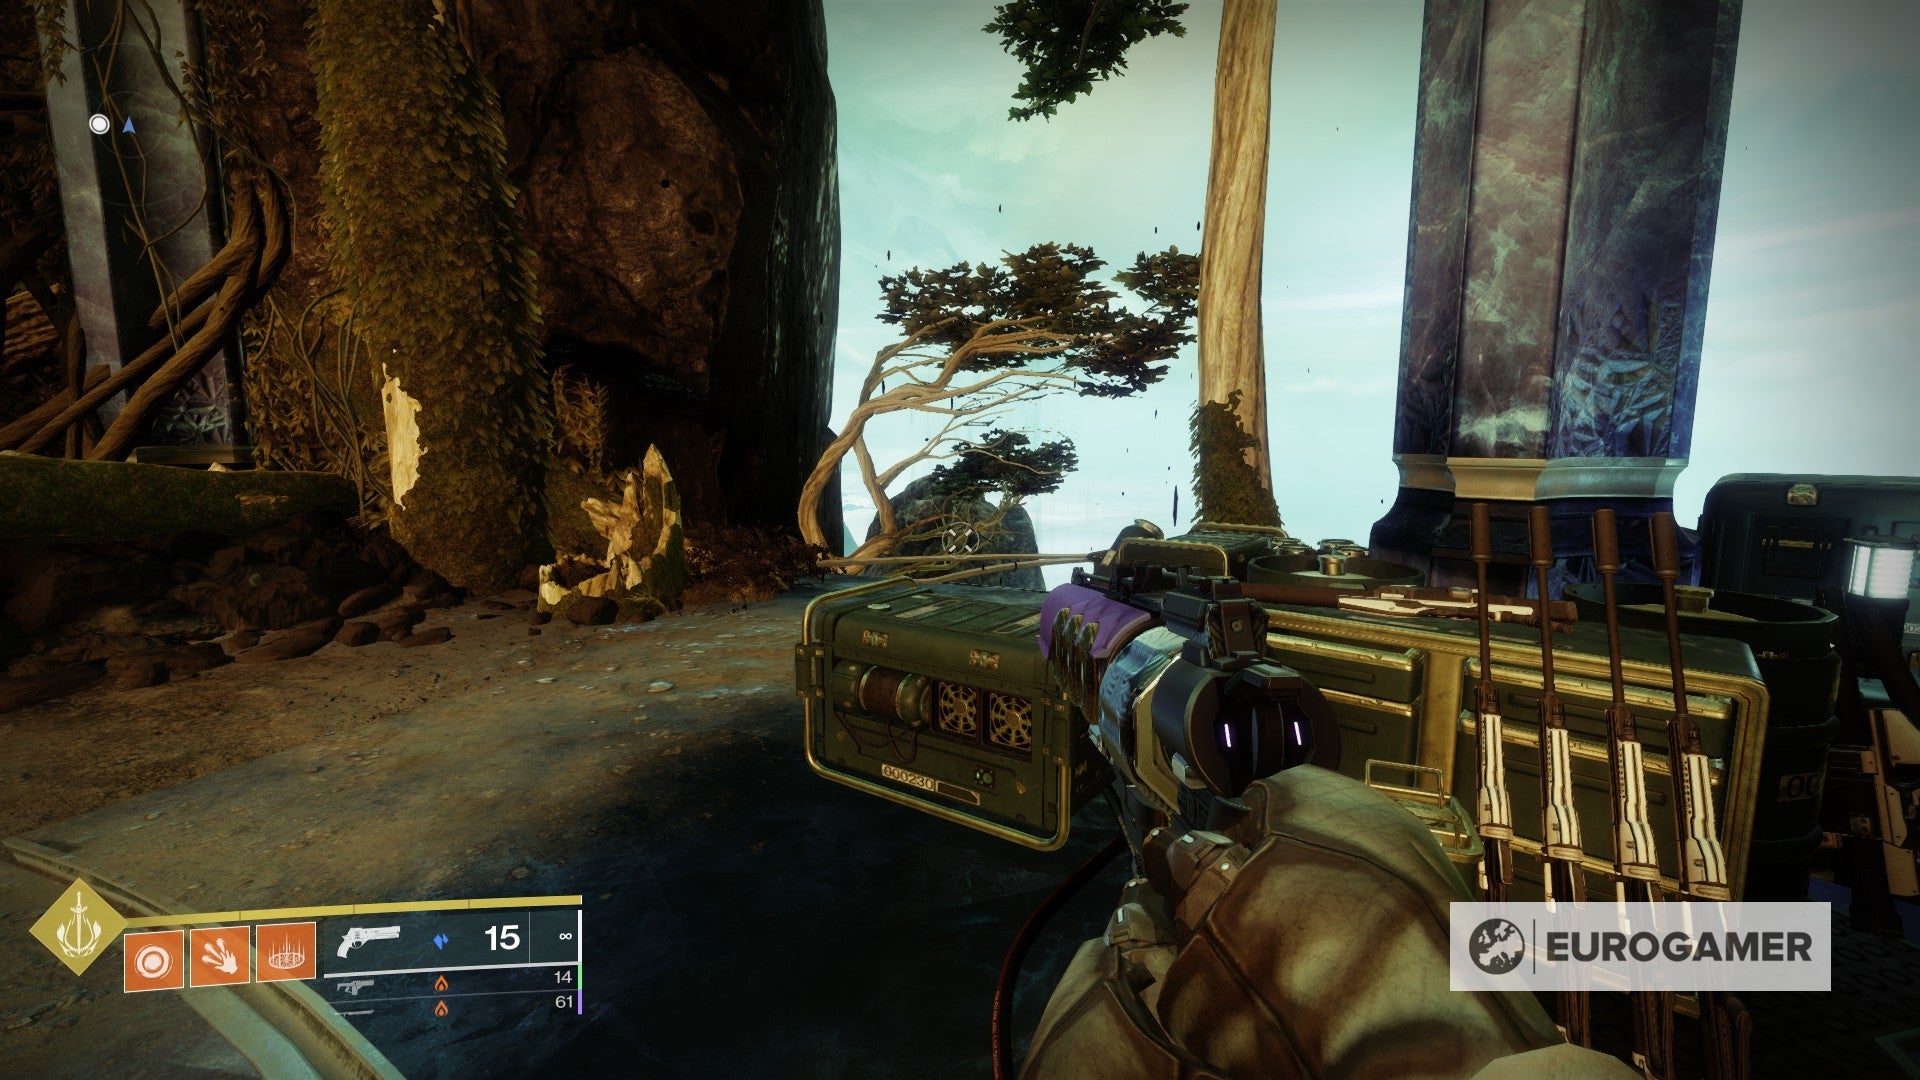
Upon arrival, you will notice a few devices and weapons on the floor around a column. You're going to go past that and towards the tree next to the cliff.

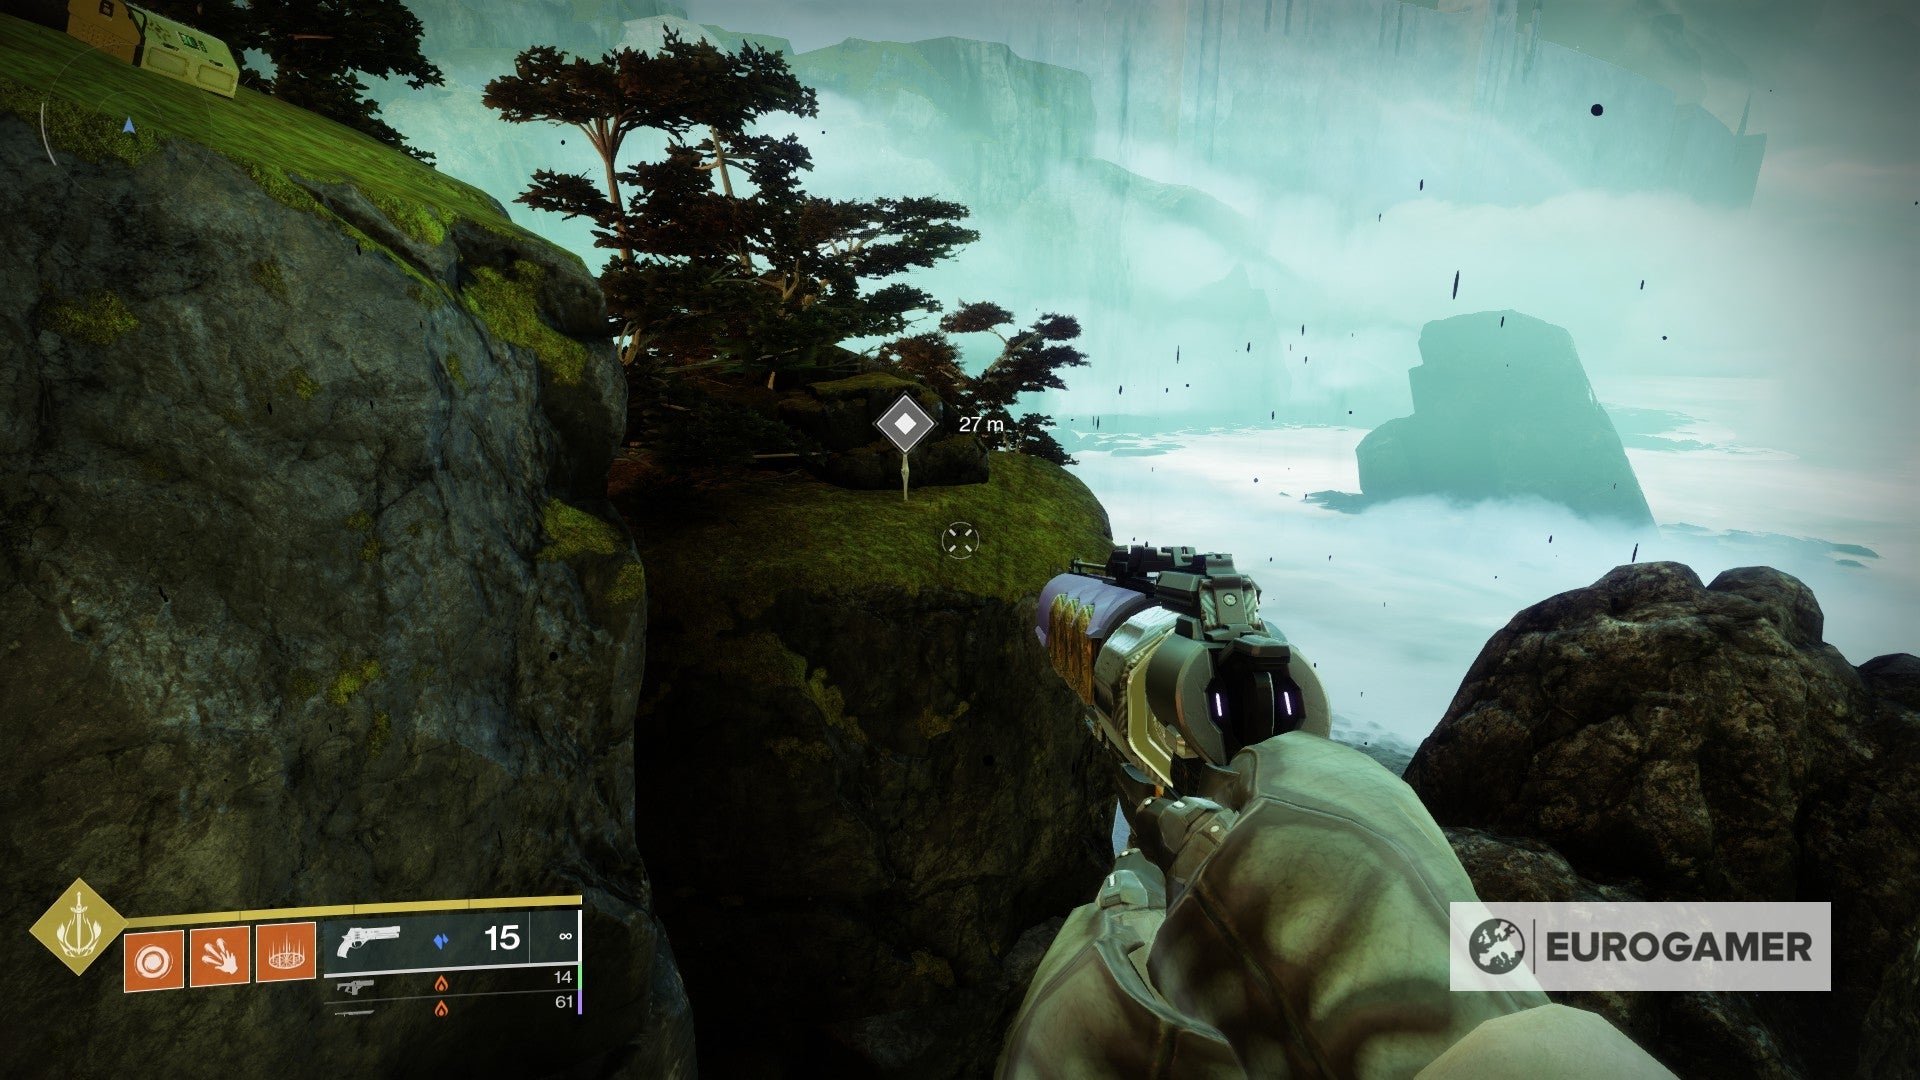
From there, you're going to double jump and levitate around the wall on your left. Doing so for a few seconds will reveal the location of the Atlas Skew in the vicinity.
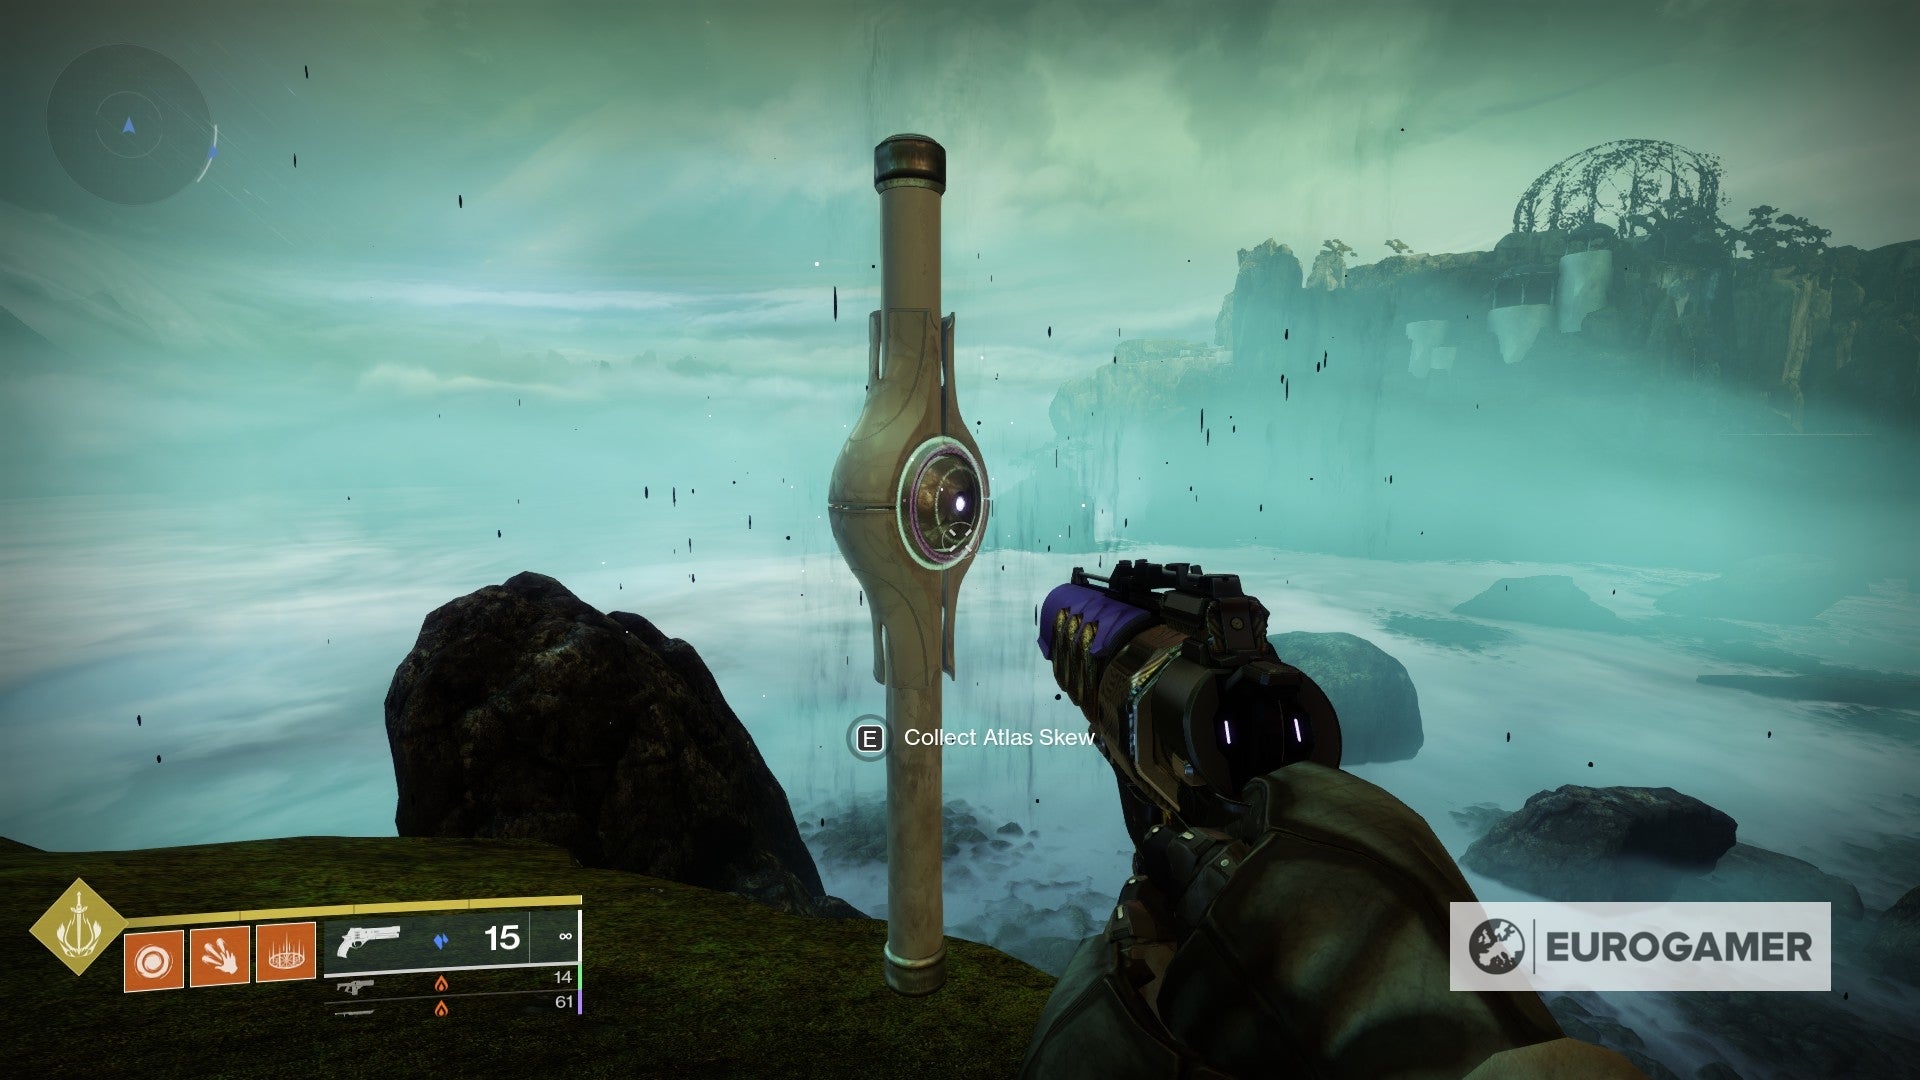
After you get to the other side, grab the Atlas Skew and you'll be set.
Three more to get!
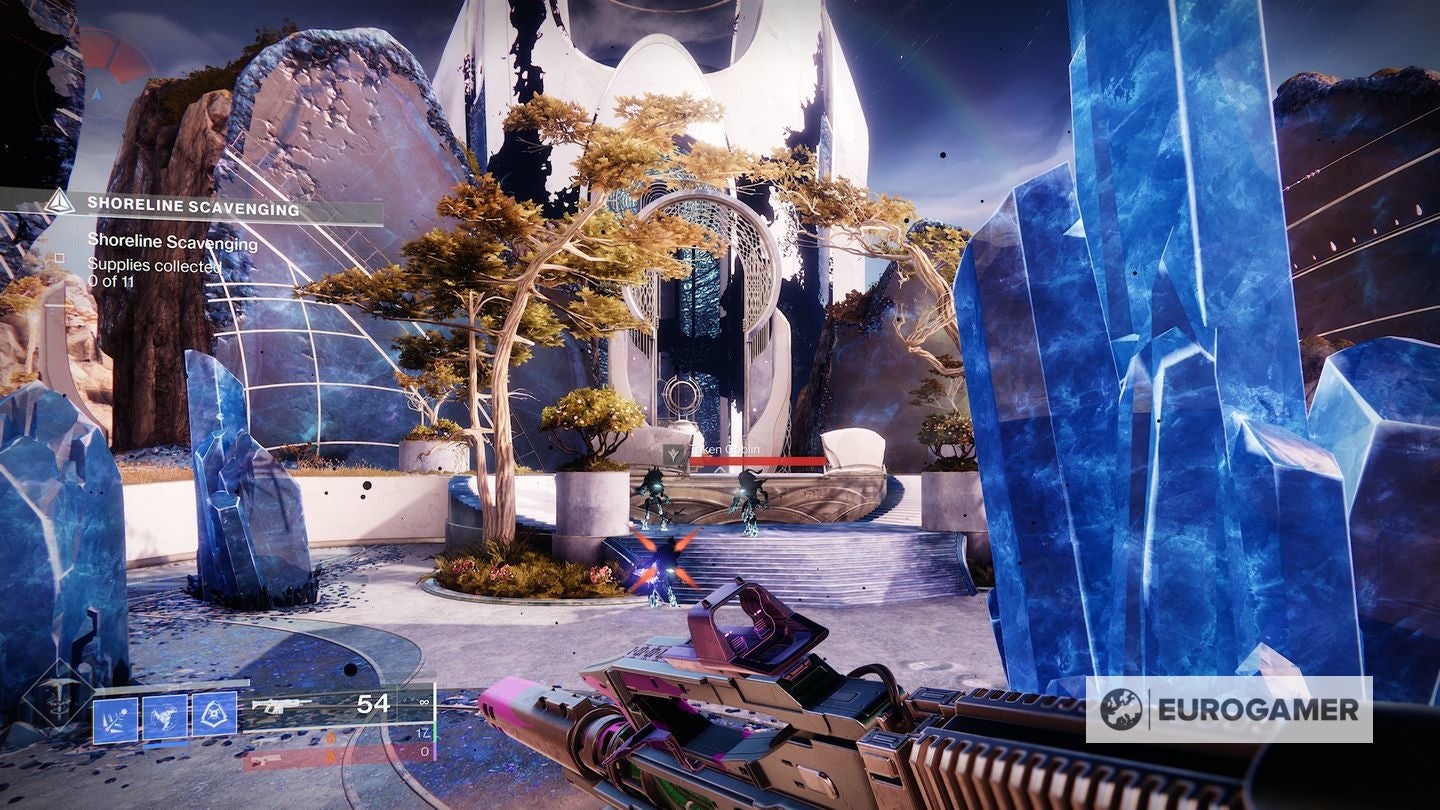
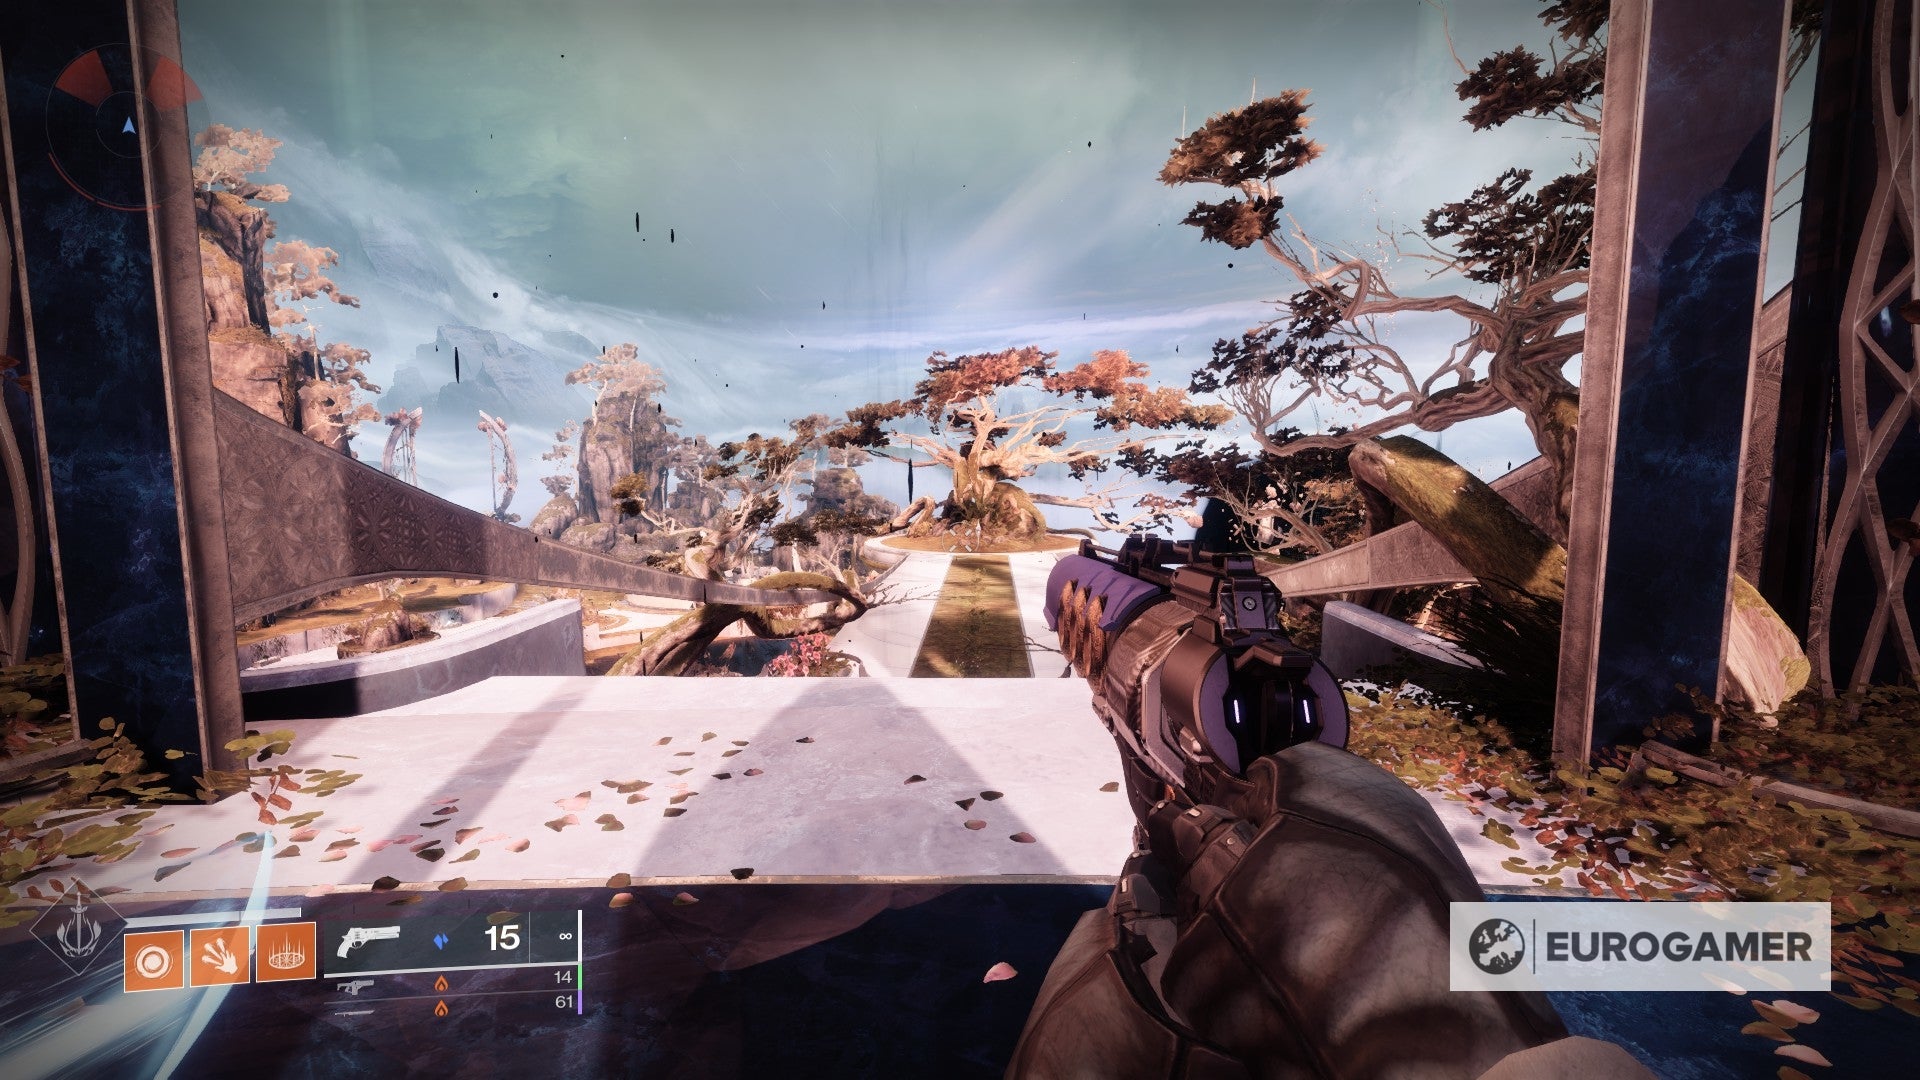
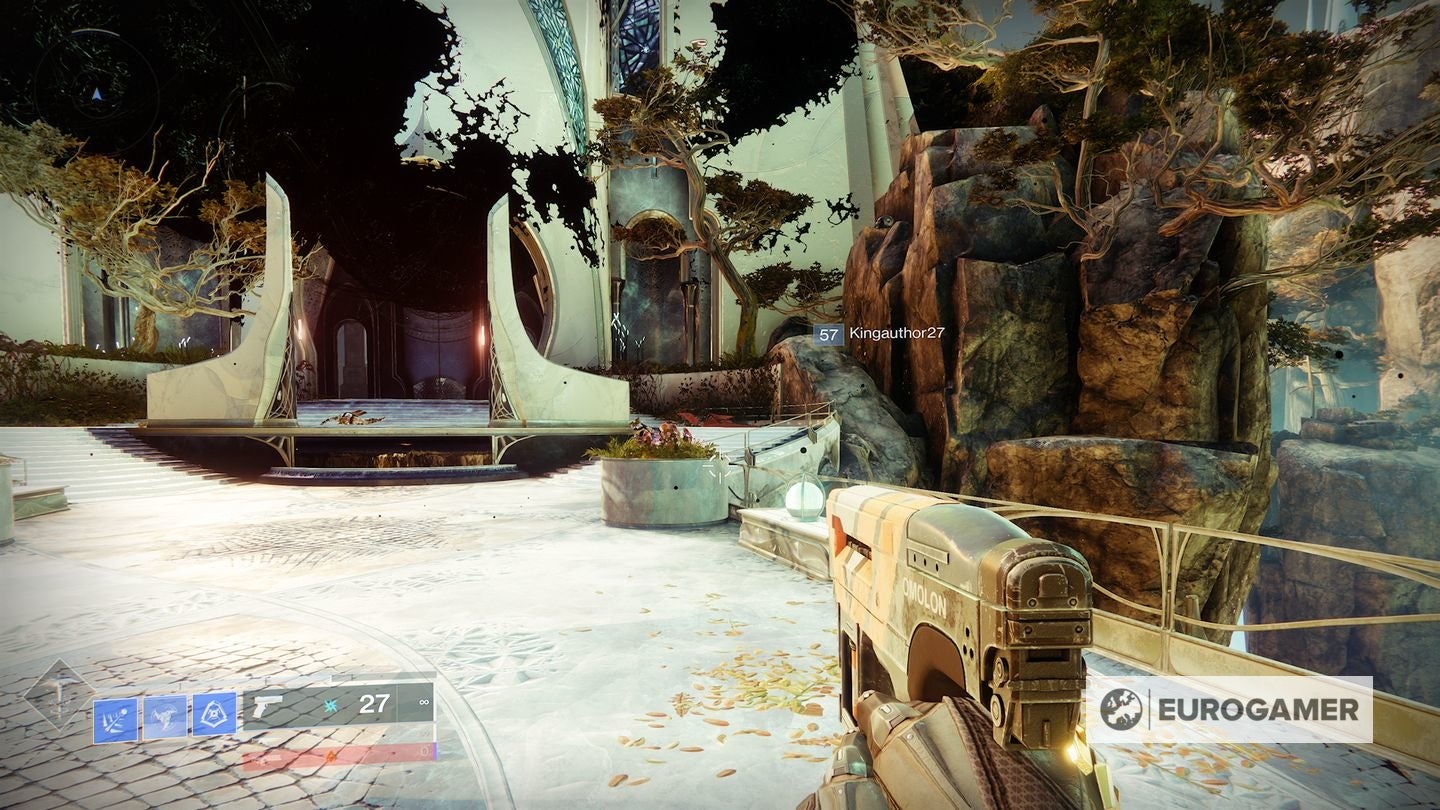
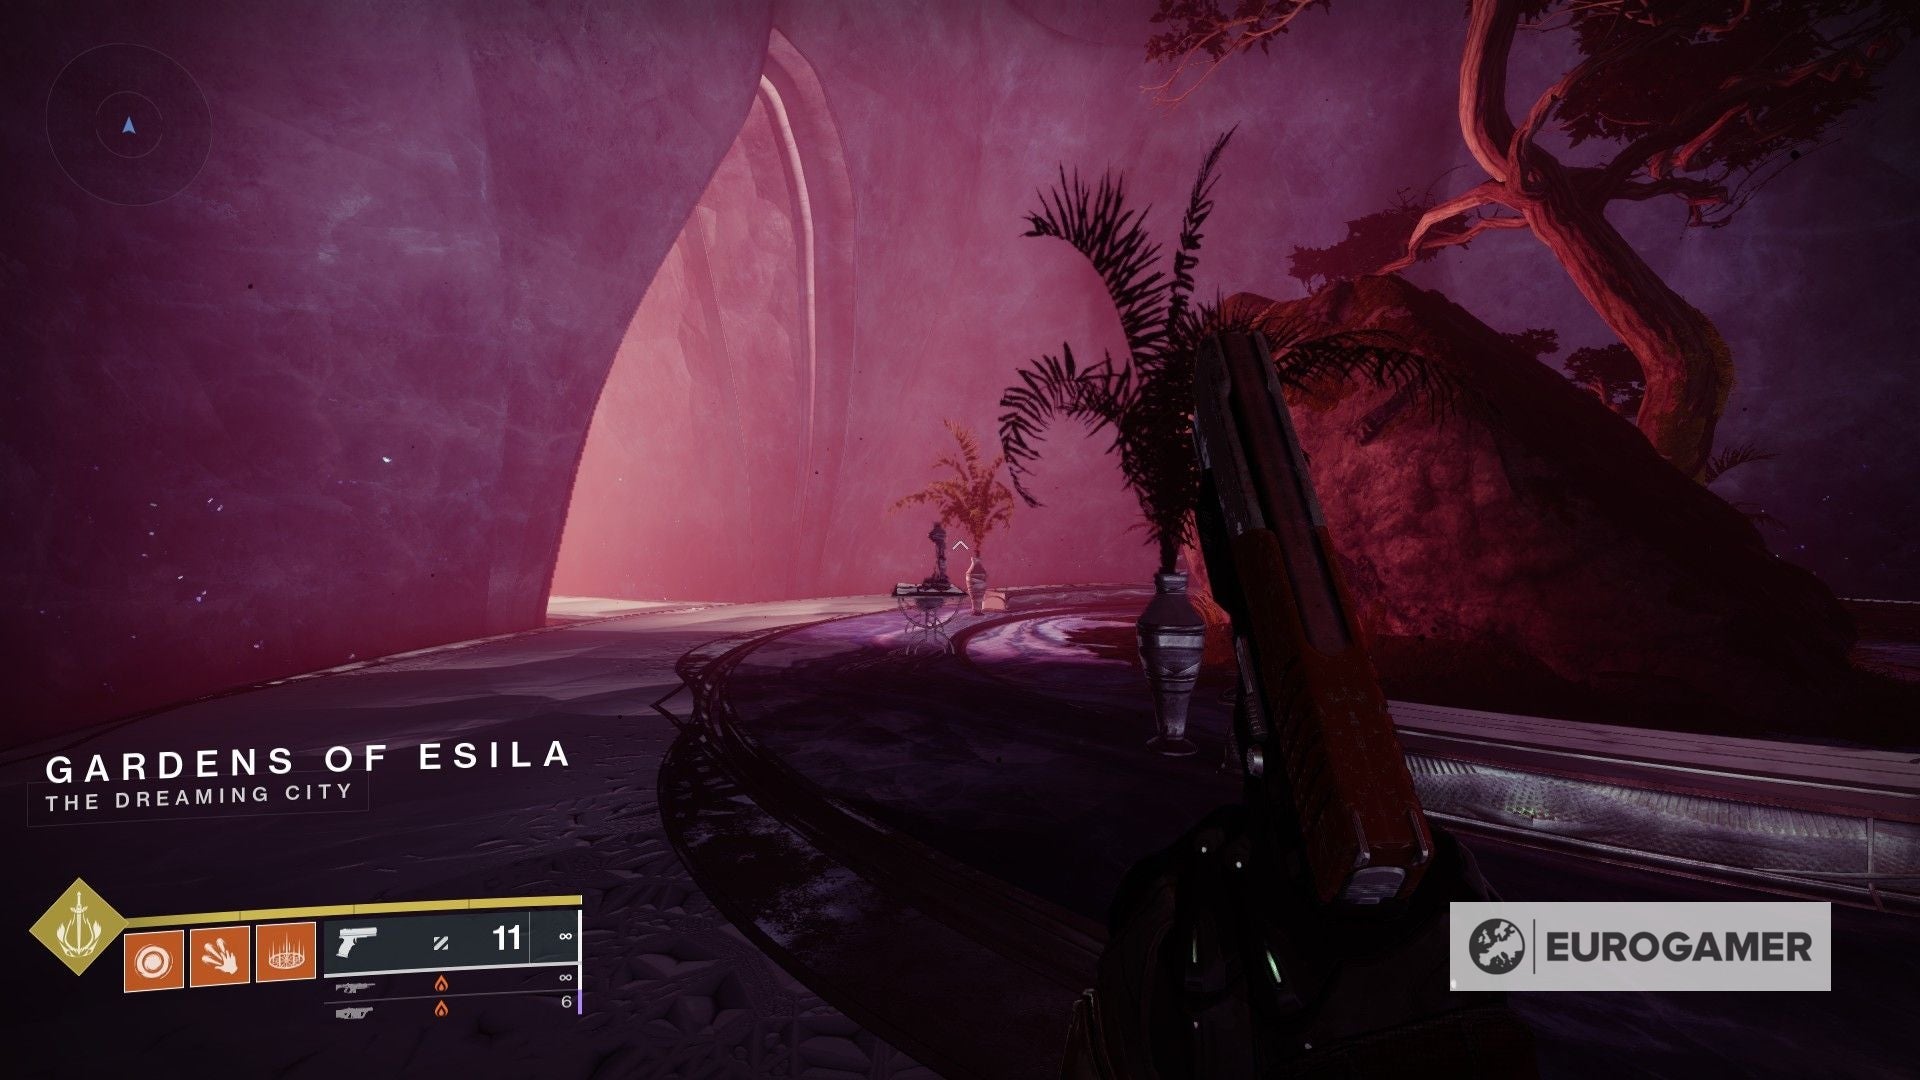
Garden Waterfall Atlas Skew location
The third Atlas Skew tin can be found in the Gardens of Esila, which is a big unnamed area in the Dreaming City.
Once y'all get in to the starting bespeak in the Strand, summon your vehicle and head all the way to the right.

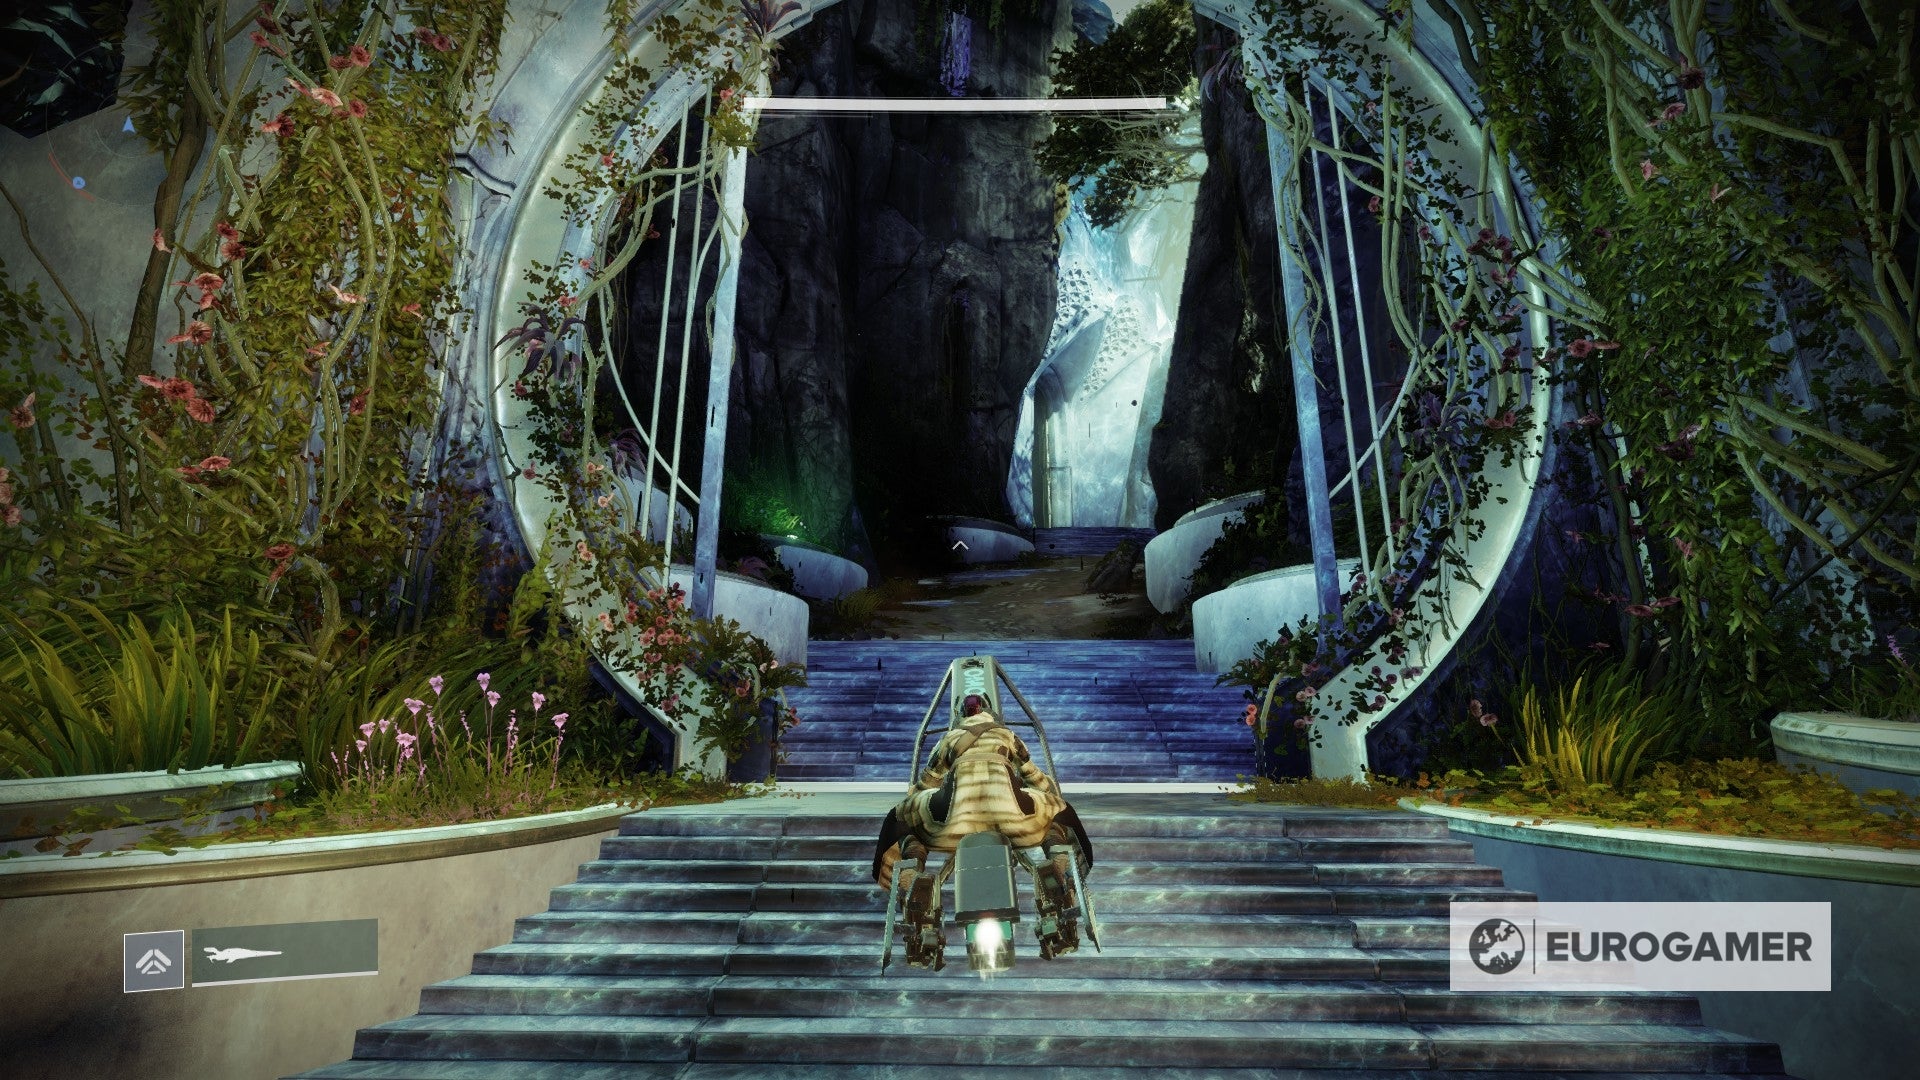
At one point you will stumble upon a staircase that leads towards a gate.
Following this path will accept you to the Gardens of Esila.
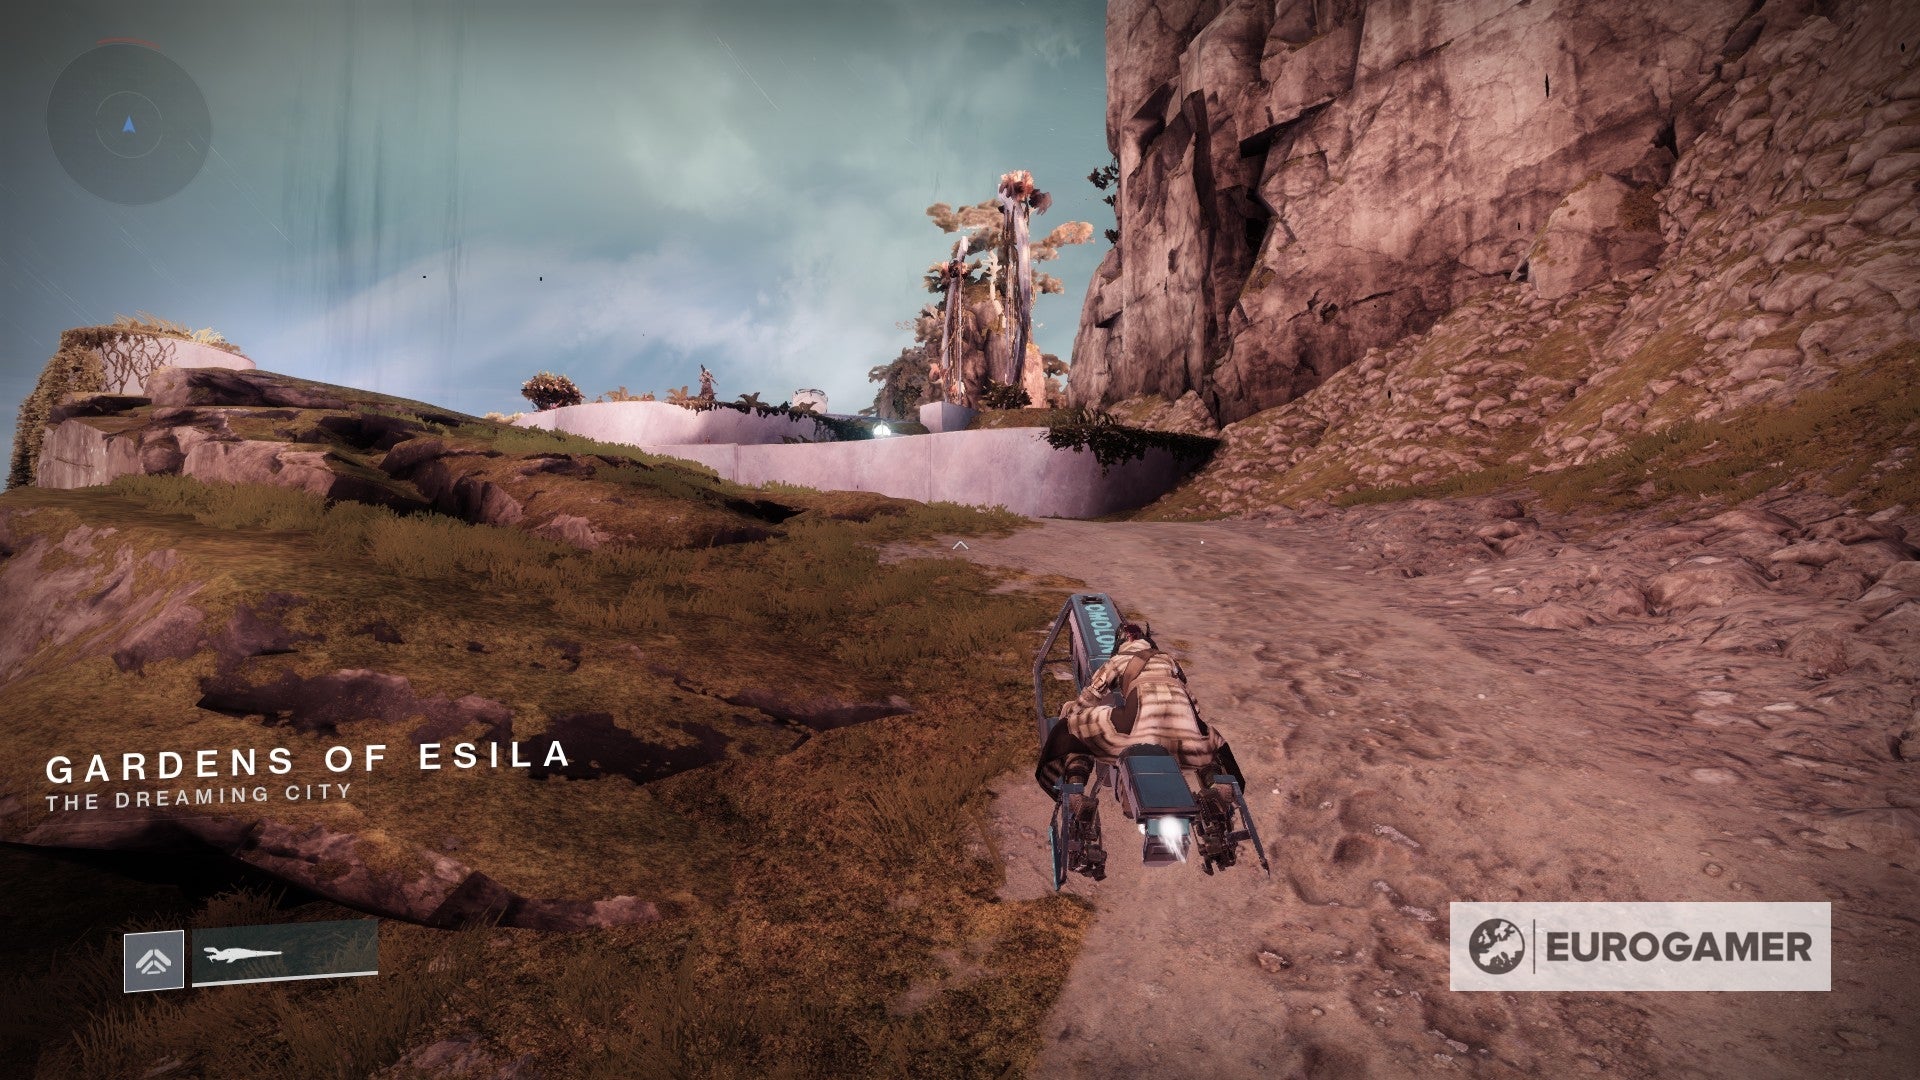
Later on either fighting your way through the enemies or ignoring them altogether, y'all will end up in a big open expanse.
From here, all that is left to do is head to the waterfall located on the correct side - you lot can't miss it.
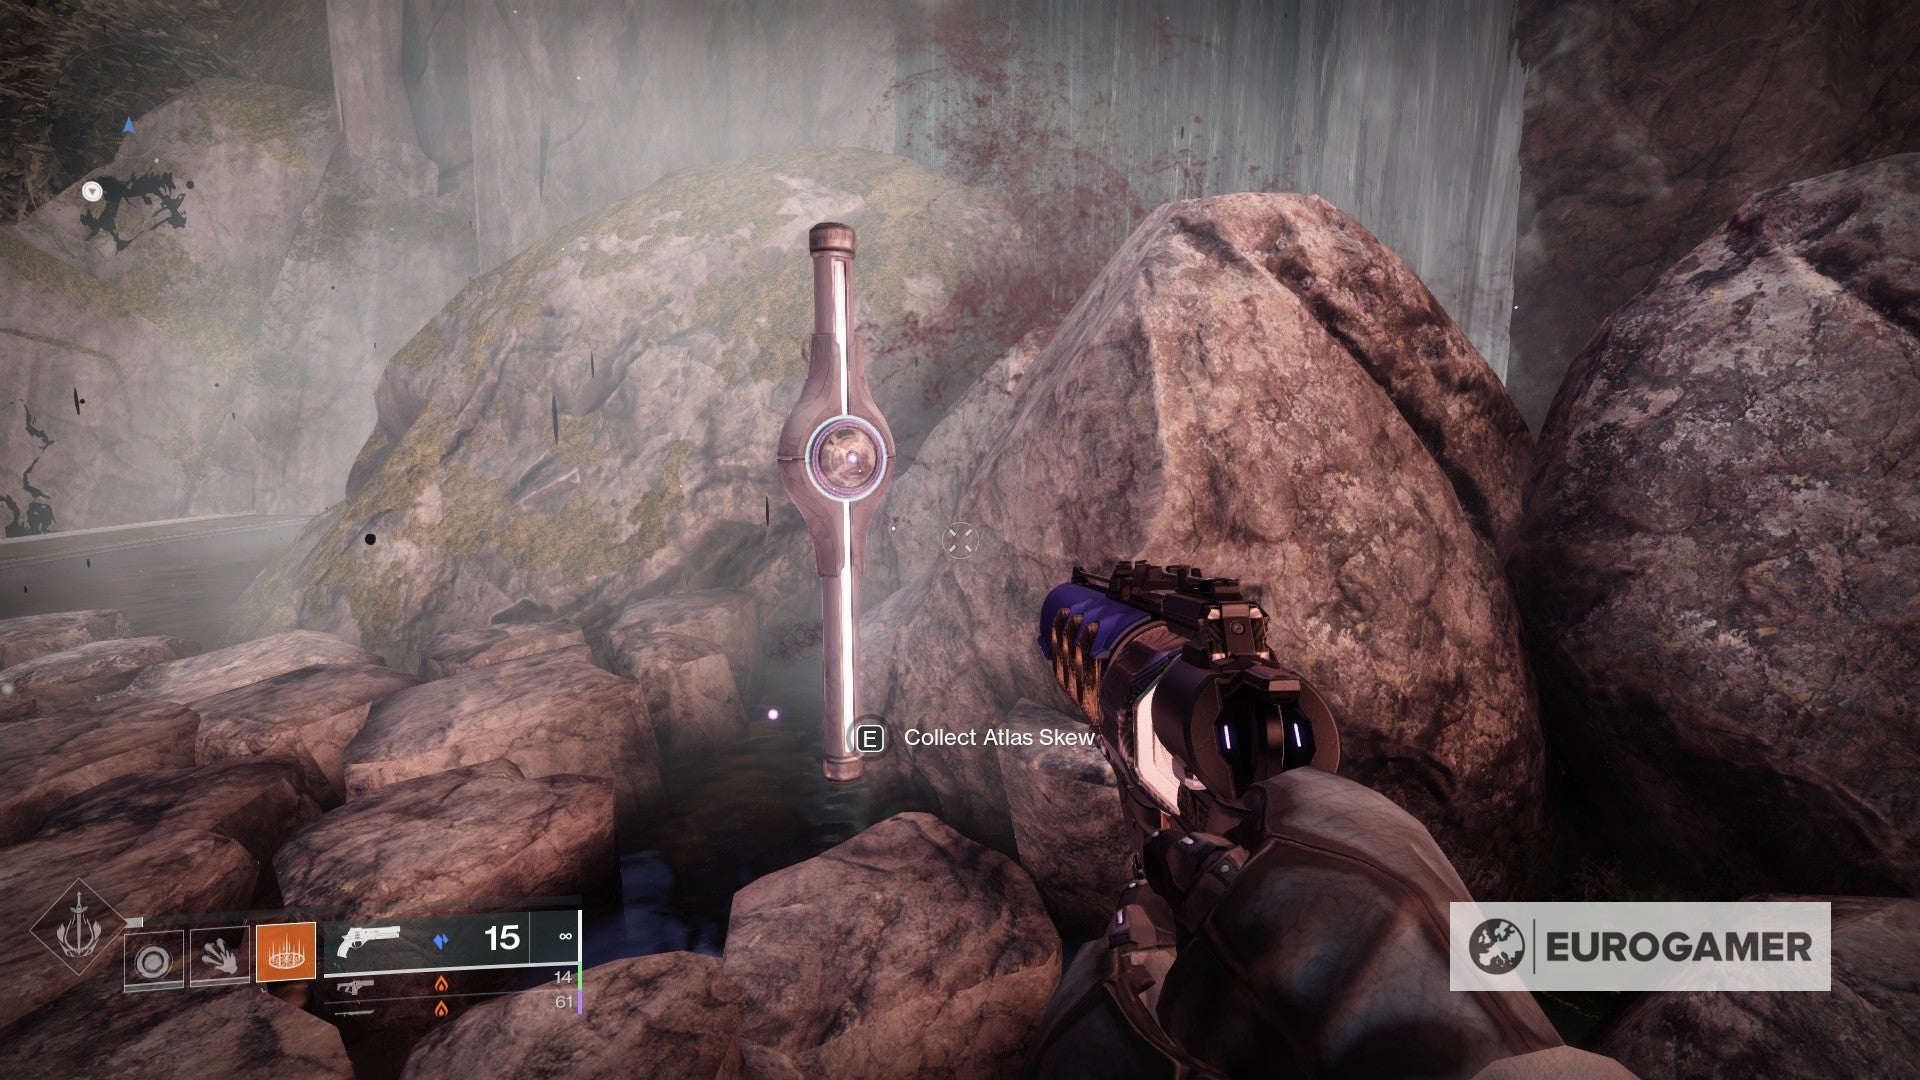
Ii more to go!
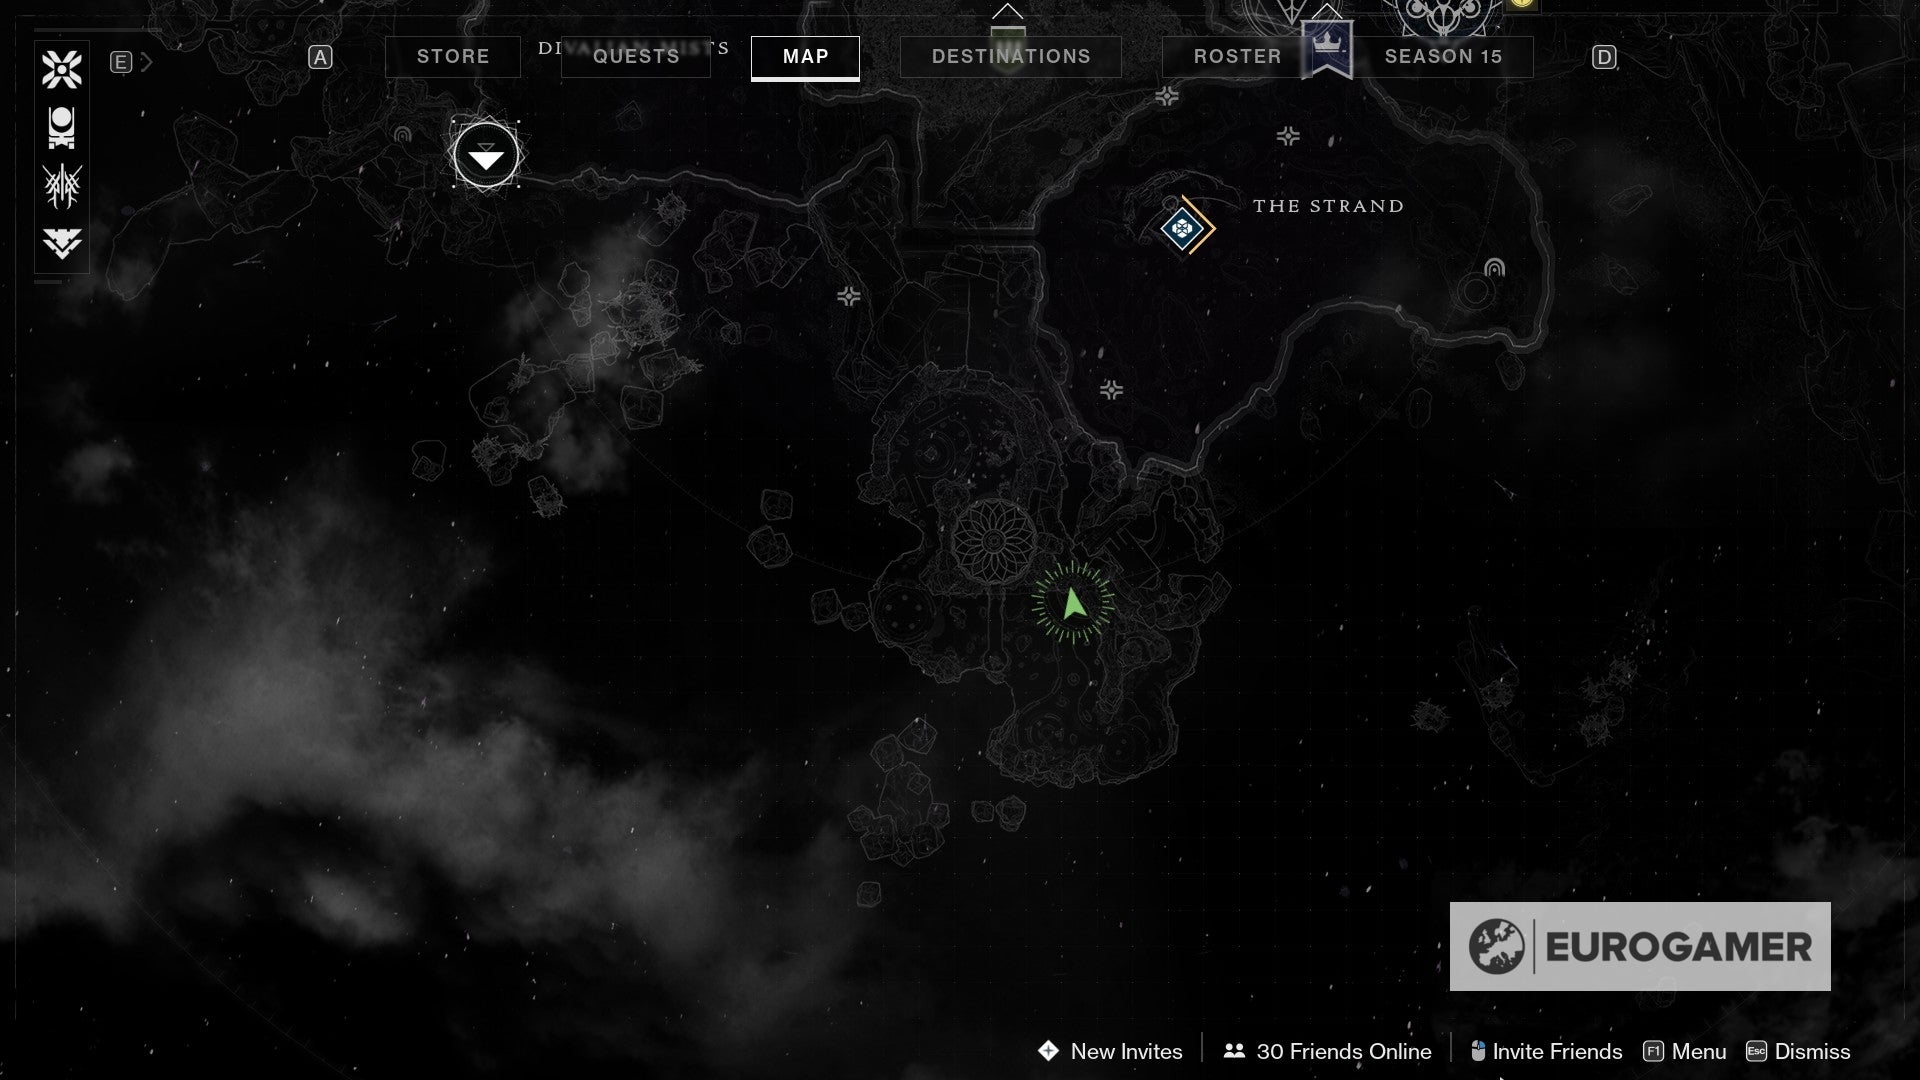
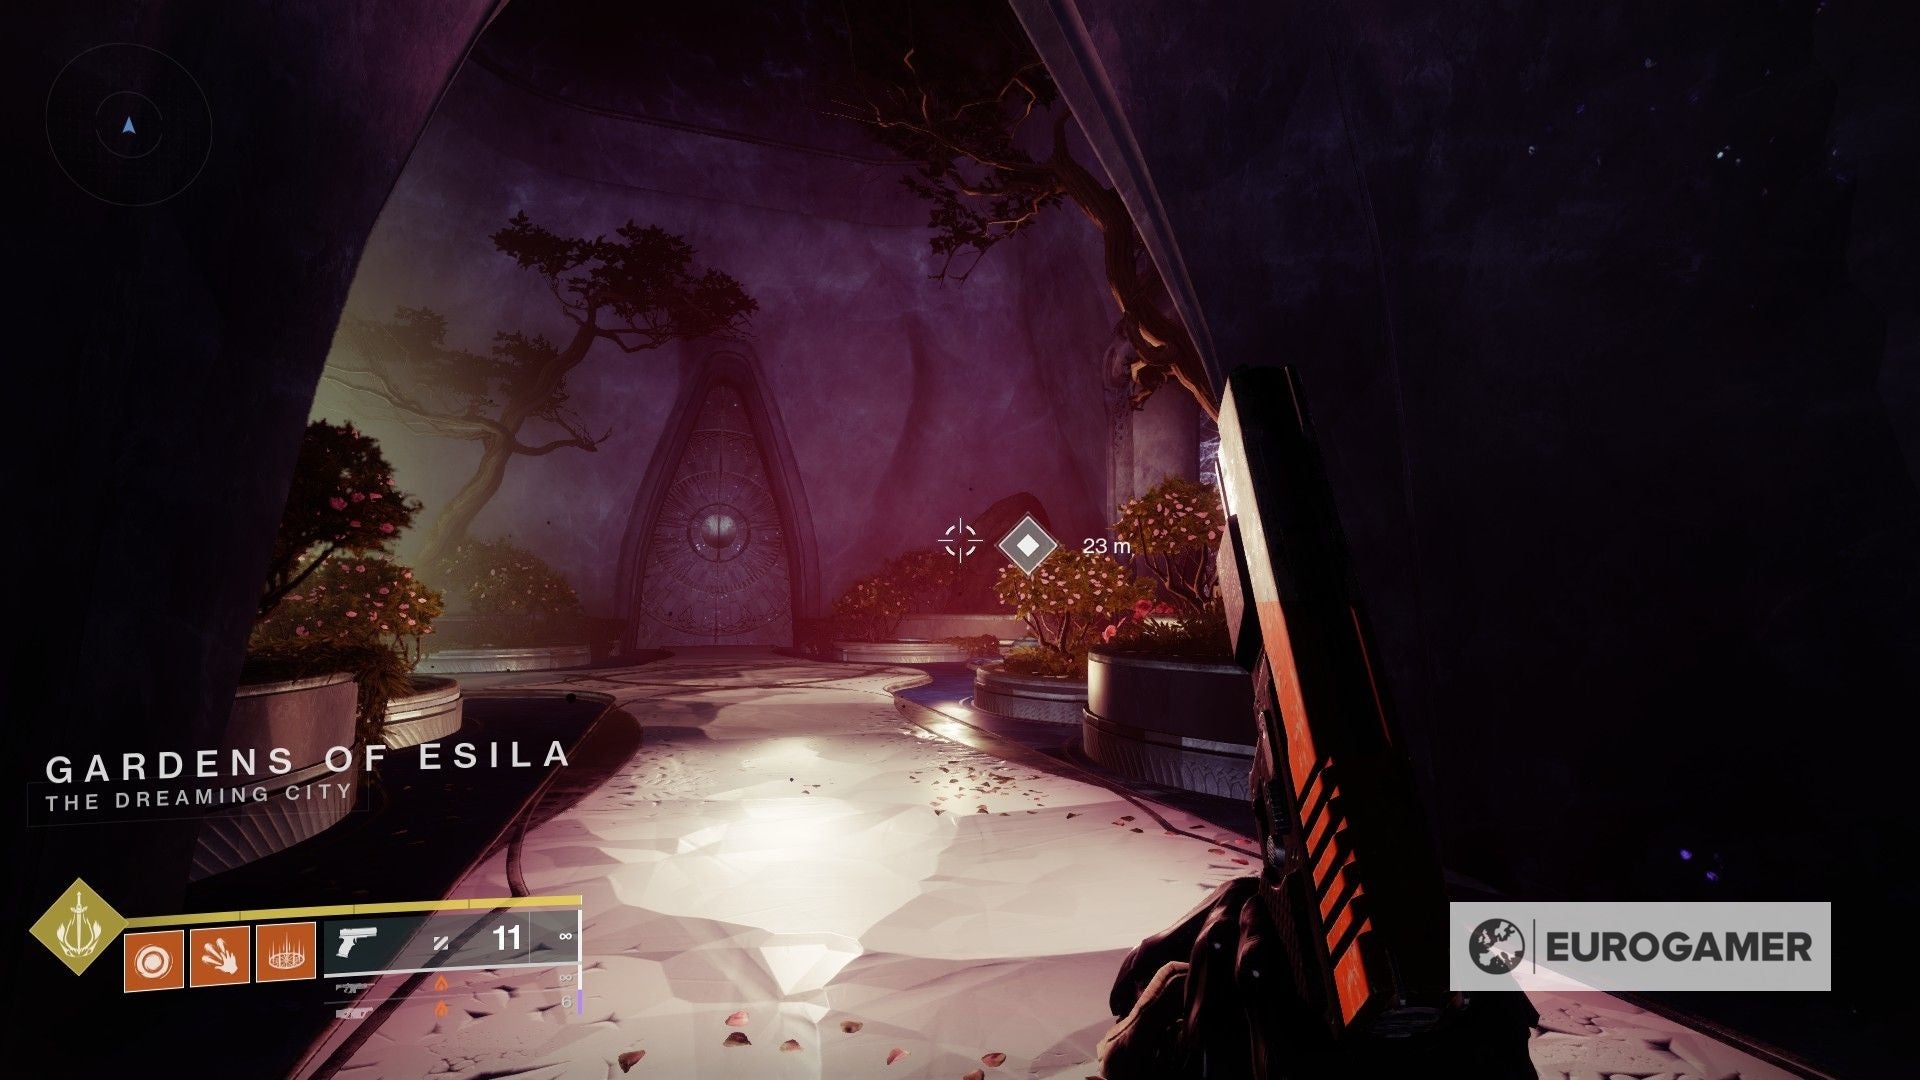
Garden Bridge Tree Atlas Skew location
The quaternary Atlas Skew can be found in the Garden of Esila also, fairly close to where you but grabbed the third Atlas Skew.
As the name implies, you'll have to get up that bridge - sadly, this can't be done in one go, which means y'all'll have to brand your way around the expanse.
Luckily, it'south not a super long trek. From where you just grabbed the third Atlas Skew, get by the bridge and movement towards those large vertical pillars that are grouped together.
From here, you'll take to continue the path. At that place'due south bound to exist a bunch of enemies effectually, and then thread carefully.
You will encounter more tall pillars in the vicinity, every bit well as a central area with a big dome in the heart.
From here, all you have to do is head to the correct, and y'all volition stop upwards facing the bridge itself from the other side.

Once there, only follow the bridge until you're facing the tree, which is where you'll find the Atlas Skew.
Only one left!
Aphelion Brazier Atlas Skew location
The fifth Atlas Skew can be found inside the Aphelion'south Rest Lost Sector. This is located southeast, and information technology's close to where yous picked up the second Atlas Skew.


Once you brand it to the entrance of the Lost Sector, run all the way inward. This is a rather straightforward and linear path, and then y'all can't actually miss it.
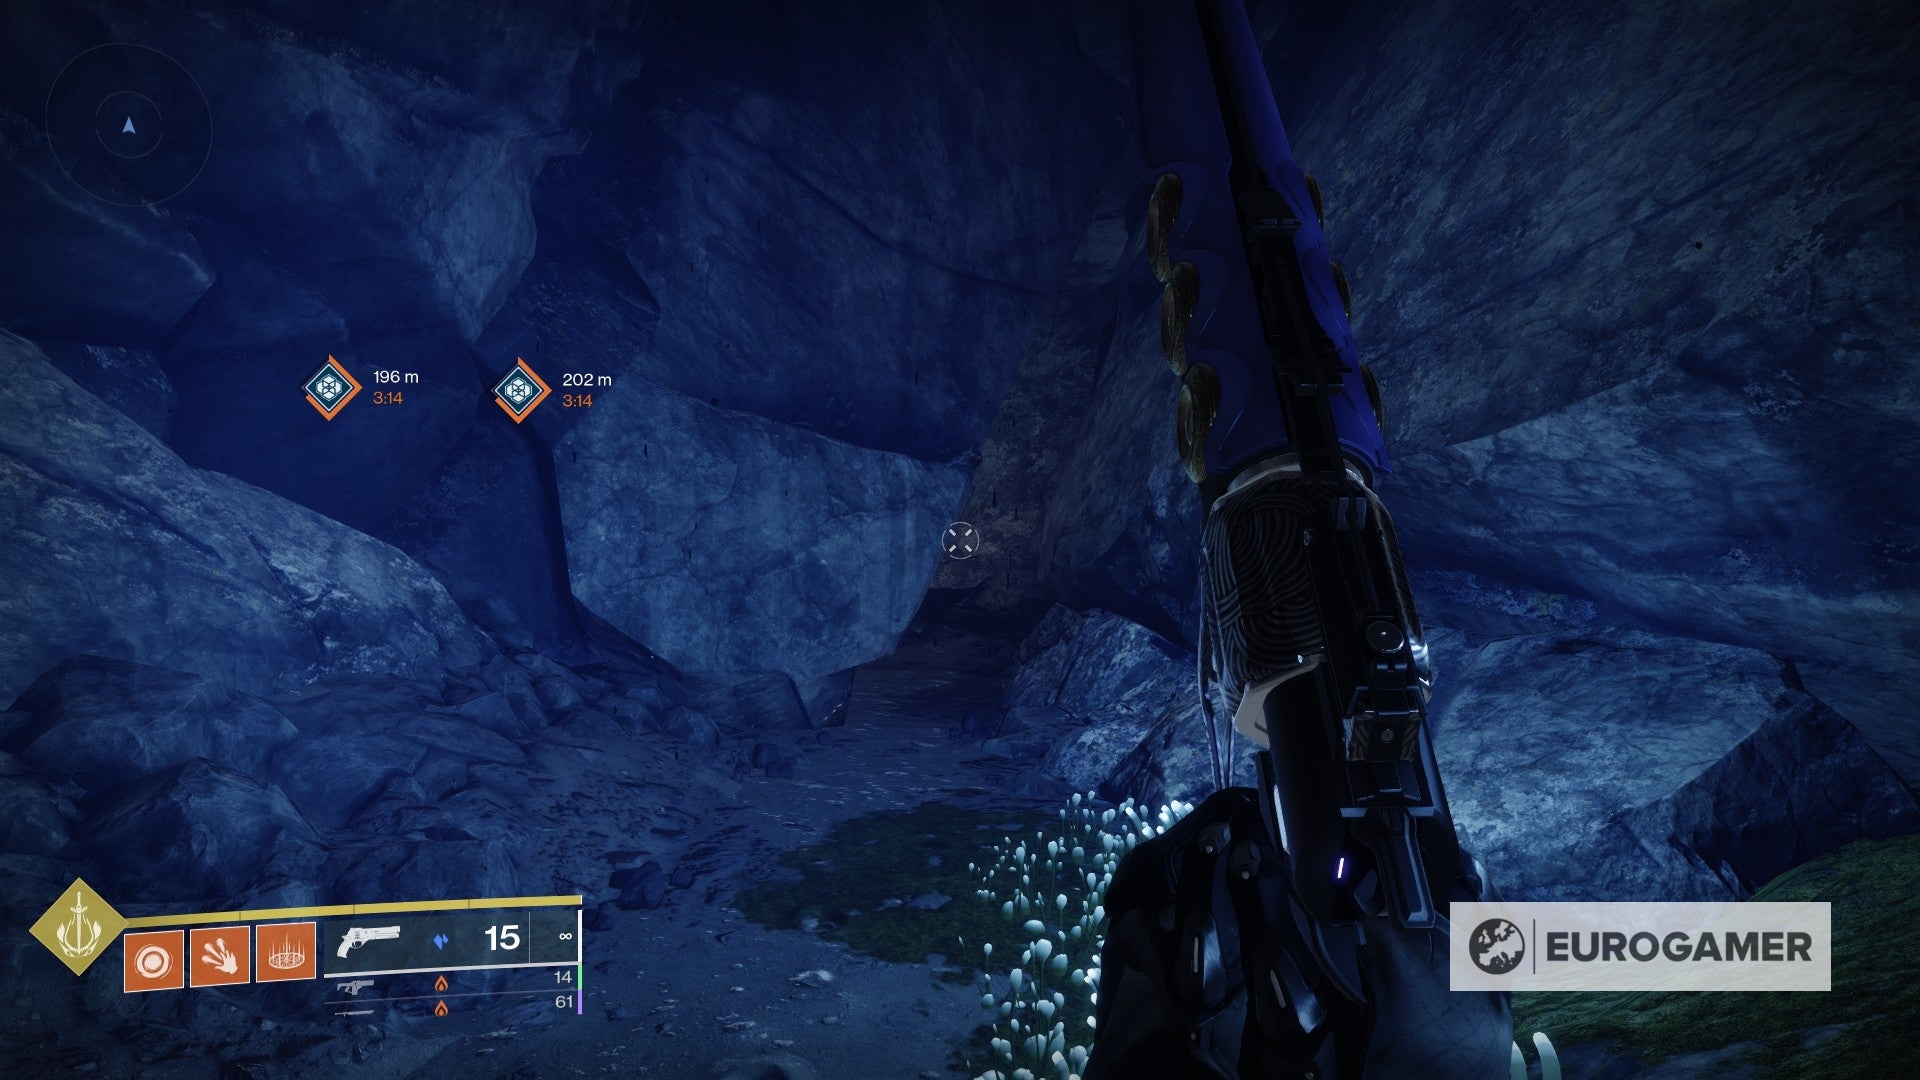
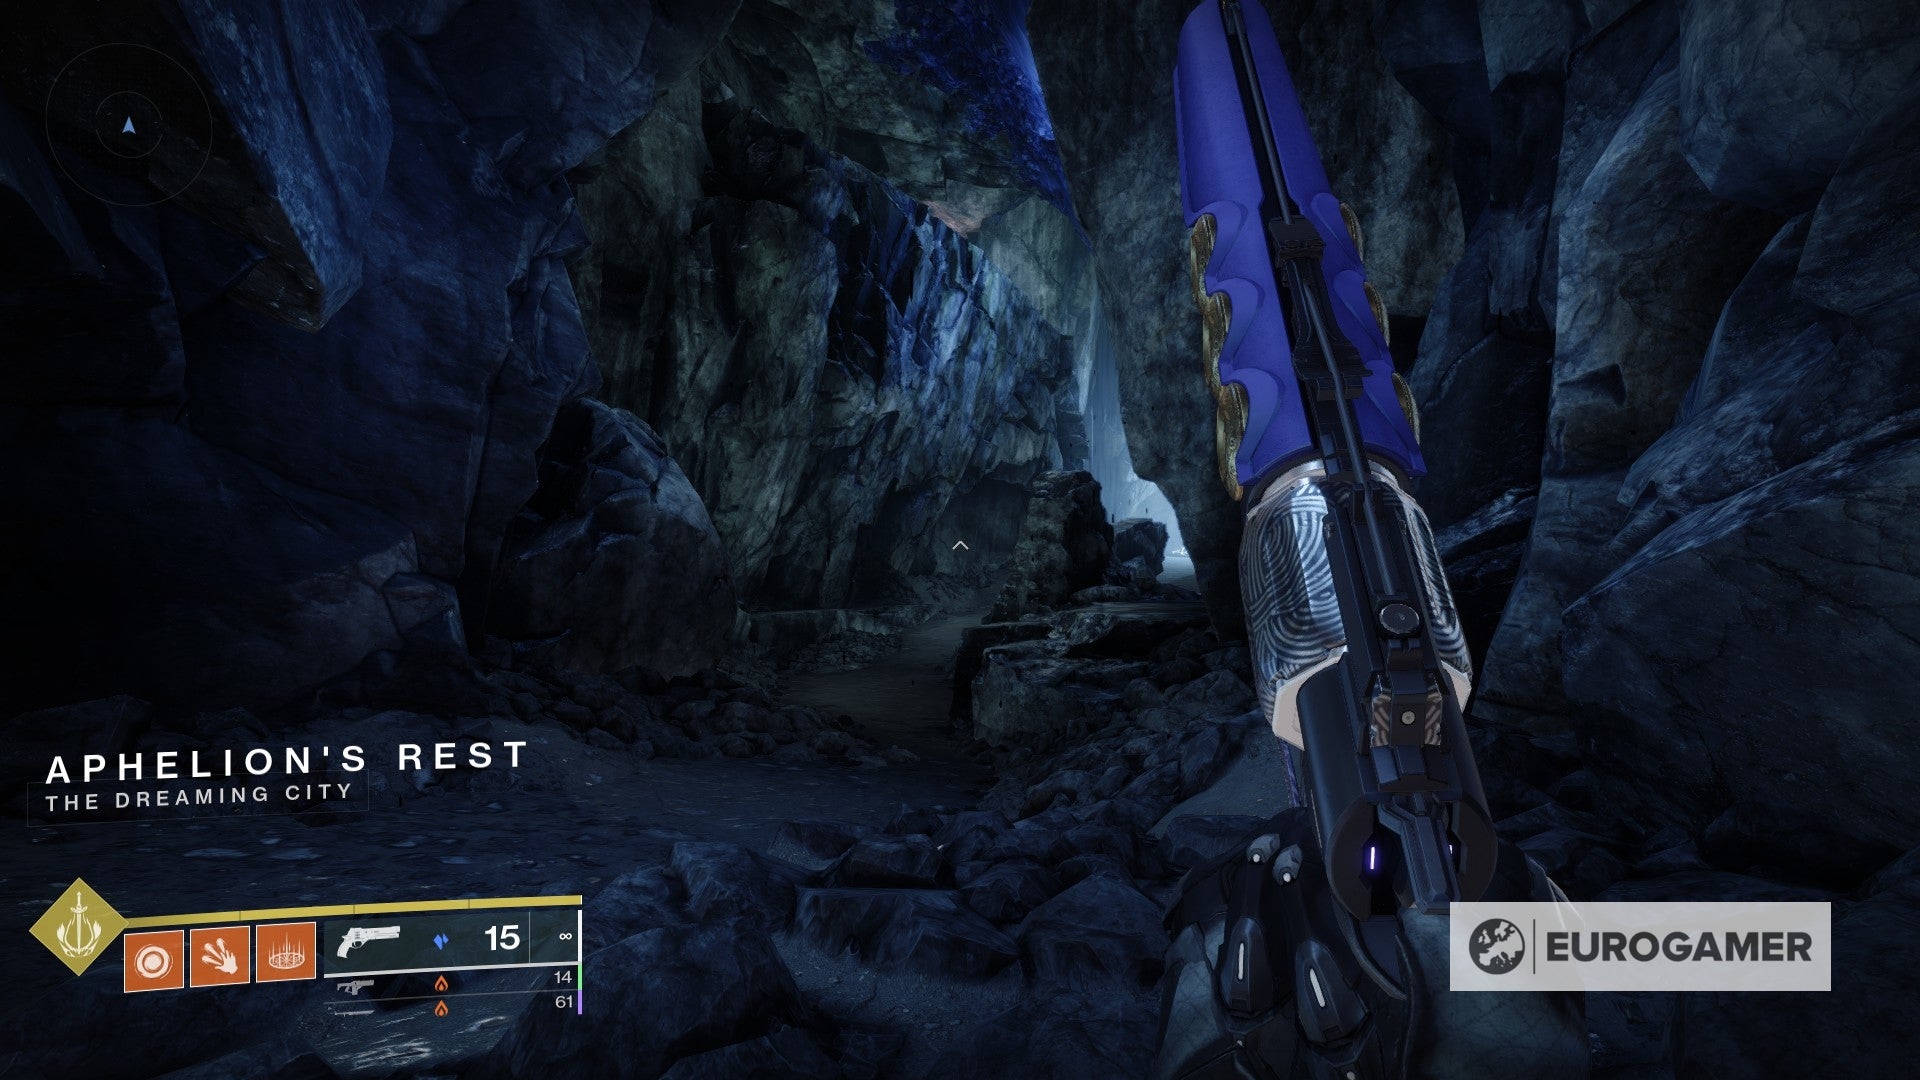
Of course, expect an array of enemies inside, so get prepared beforehand.
Reach the very finish of the Lost Sector, where the Atlas Skew volition be behind the statue above the chest which opens when you defeat the boss.
Grab the Atlas Skew and you'll be all prepare.
Congratulations on collecting all Atlas Skews in The Strand!
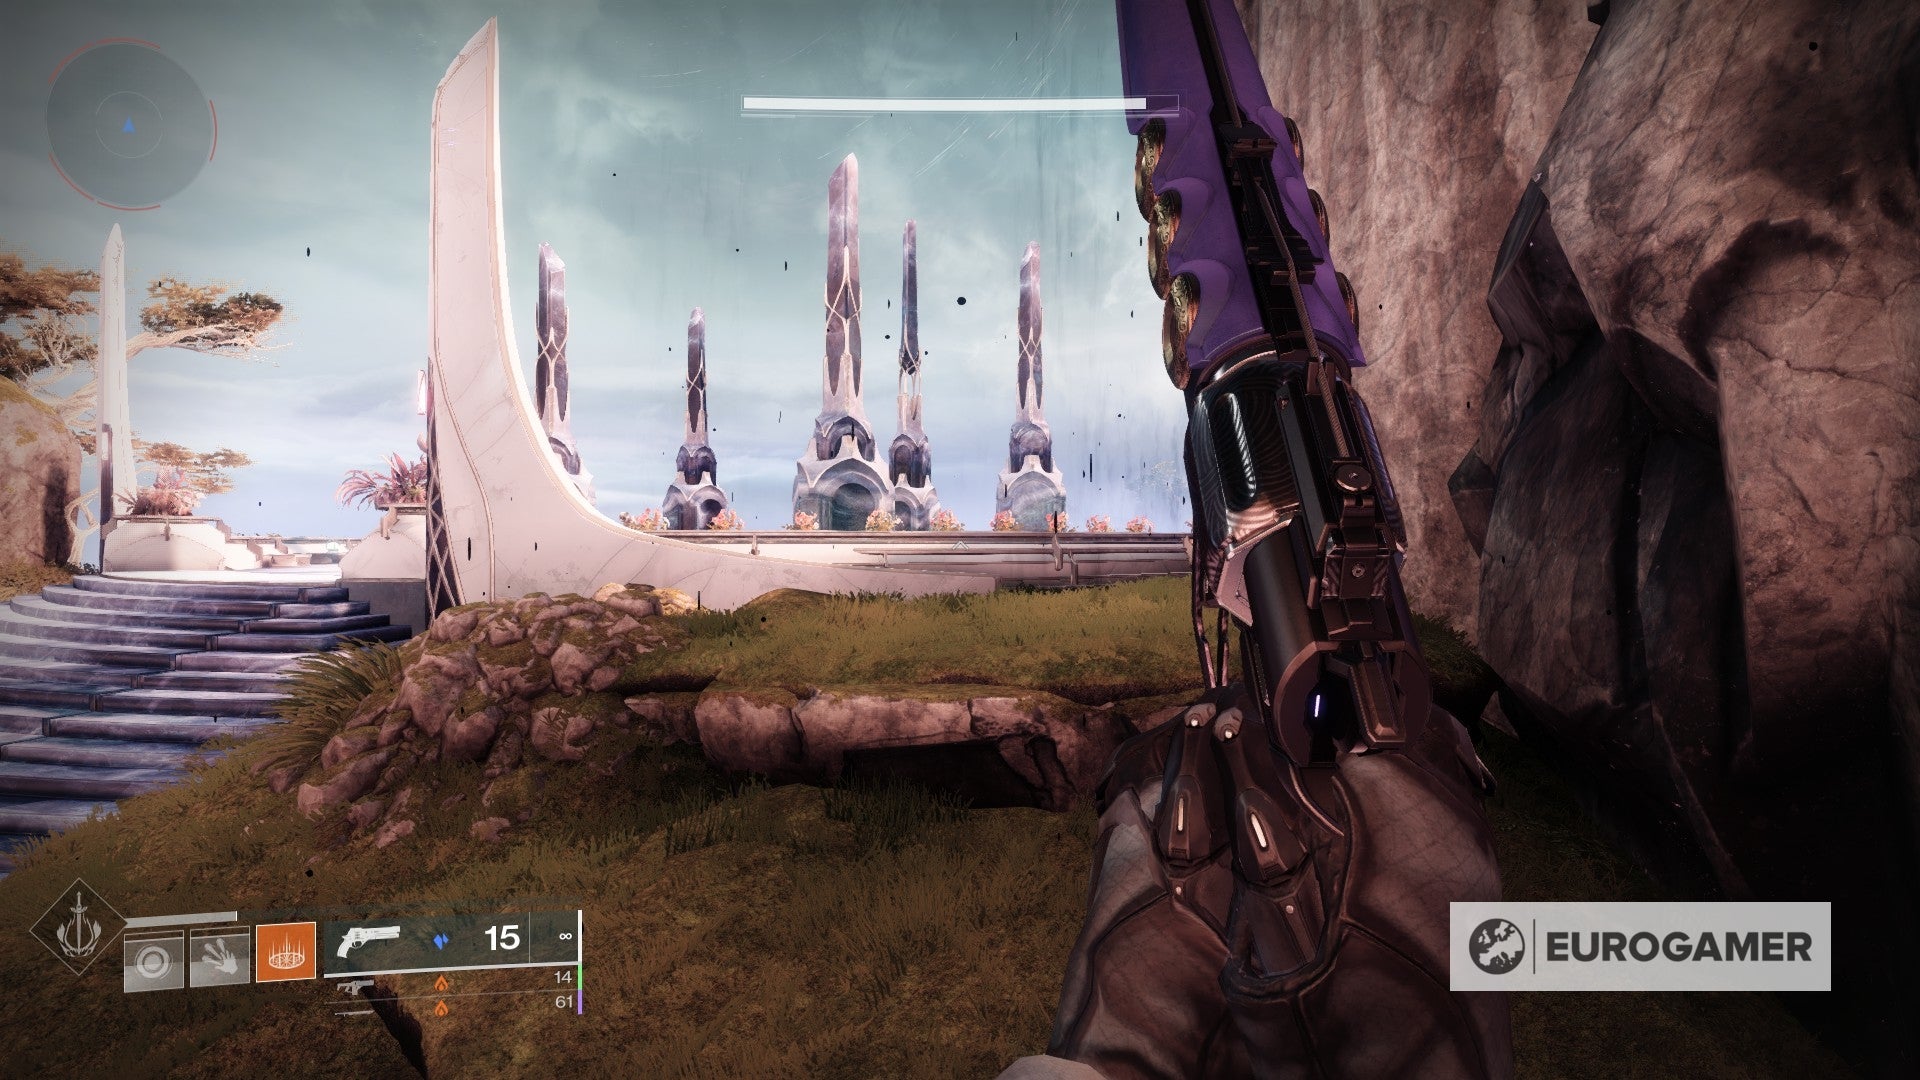
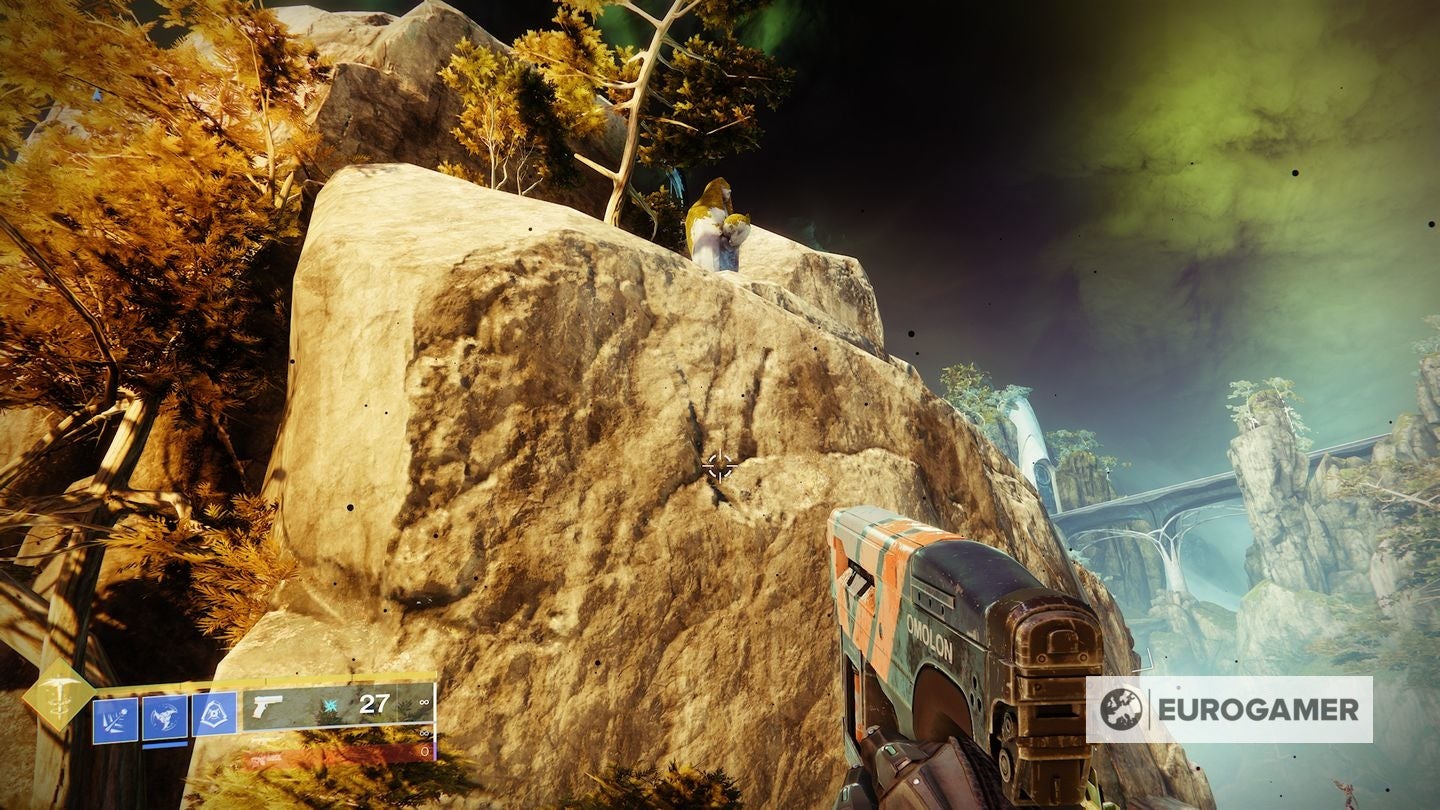
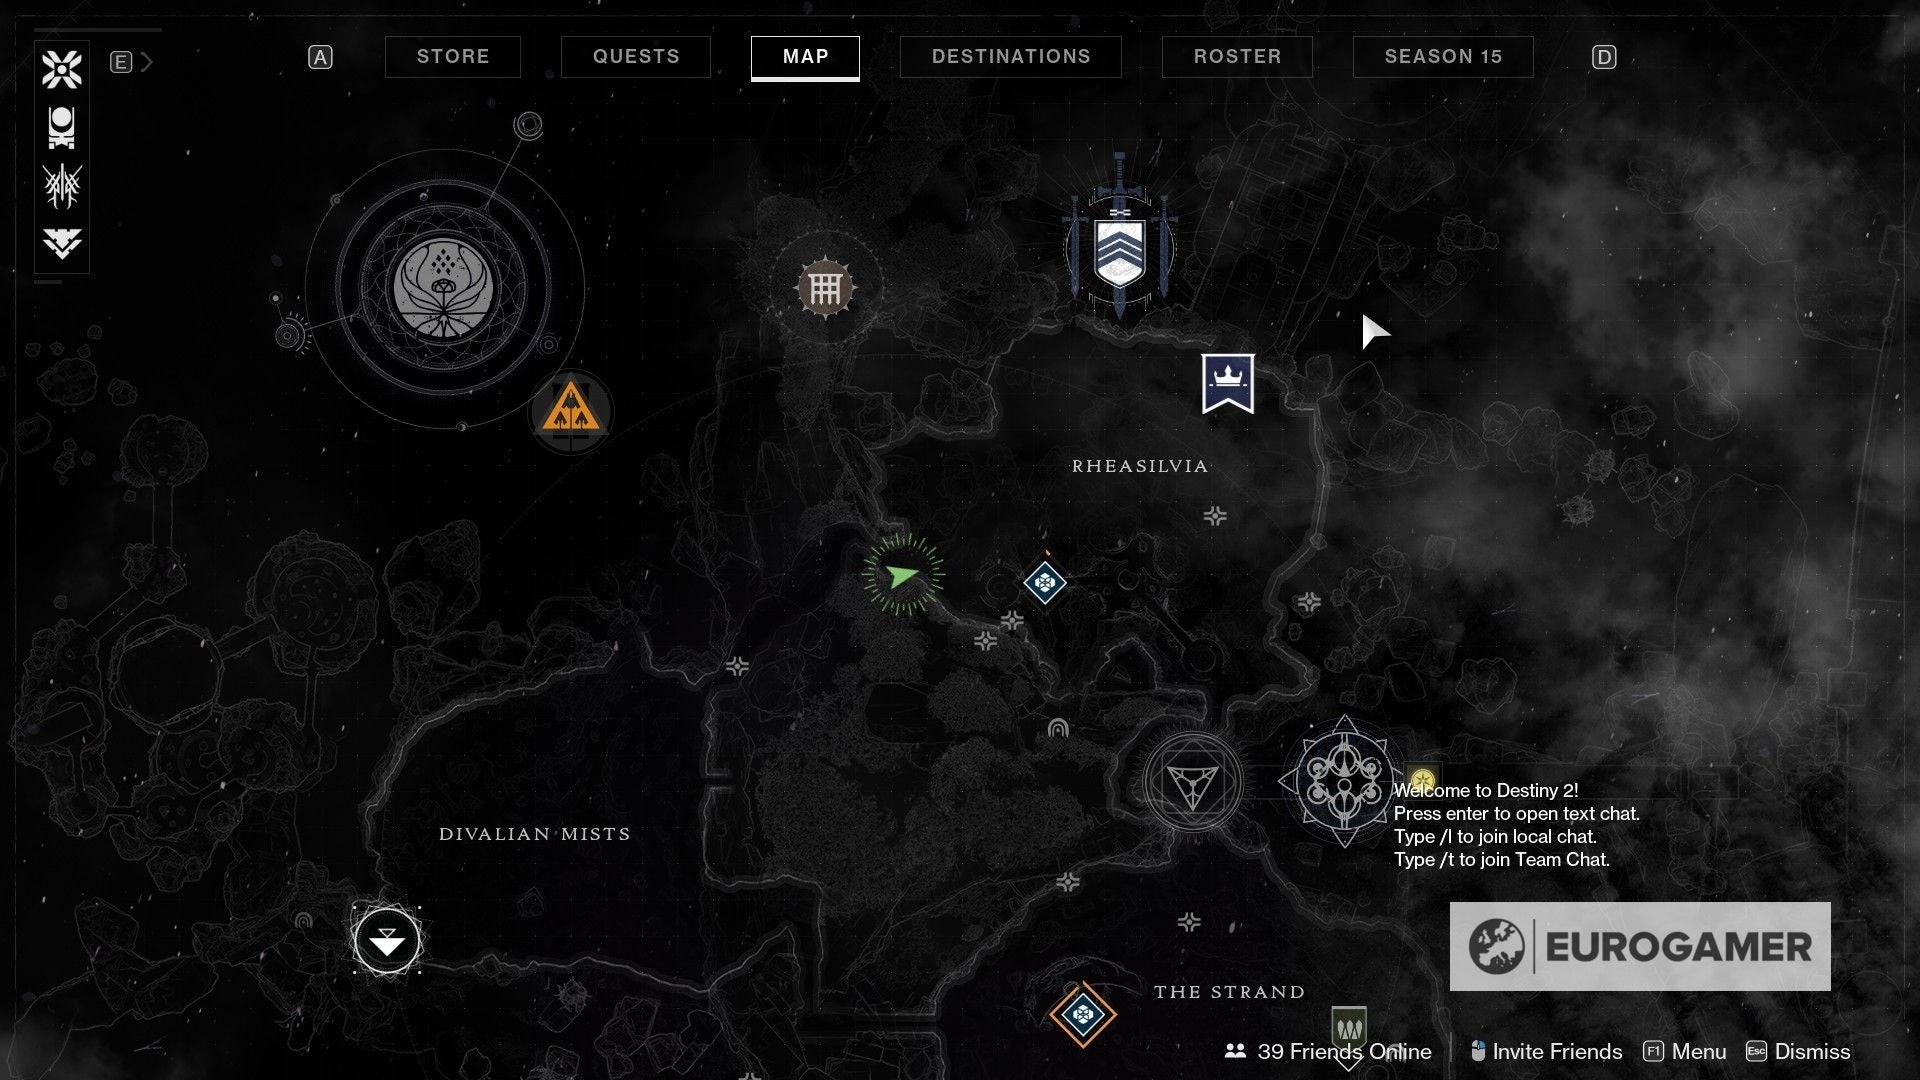
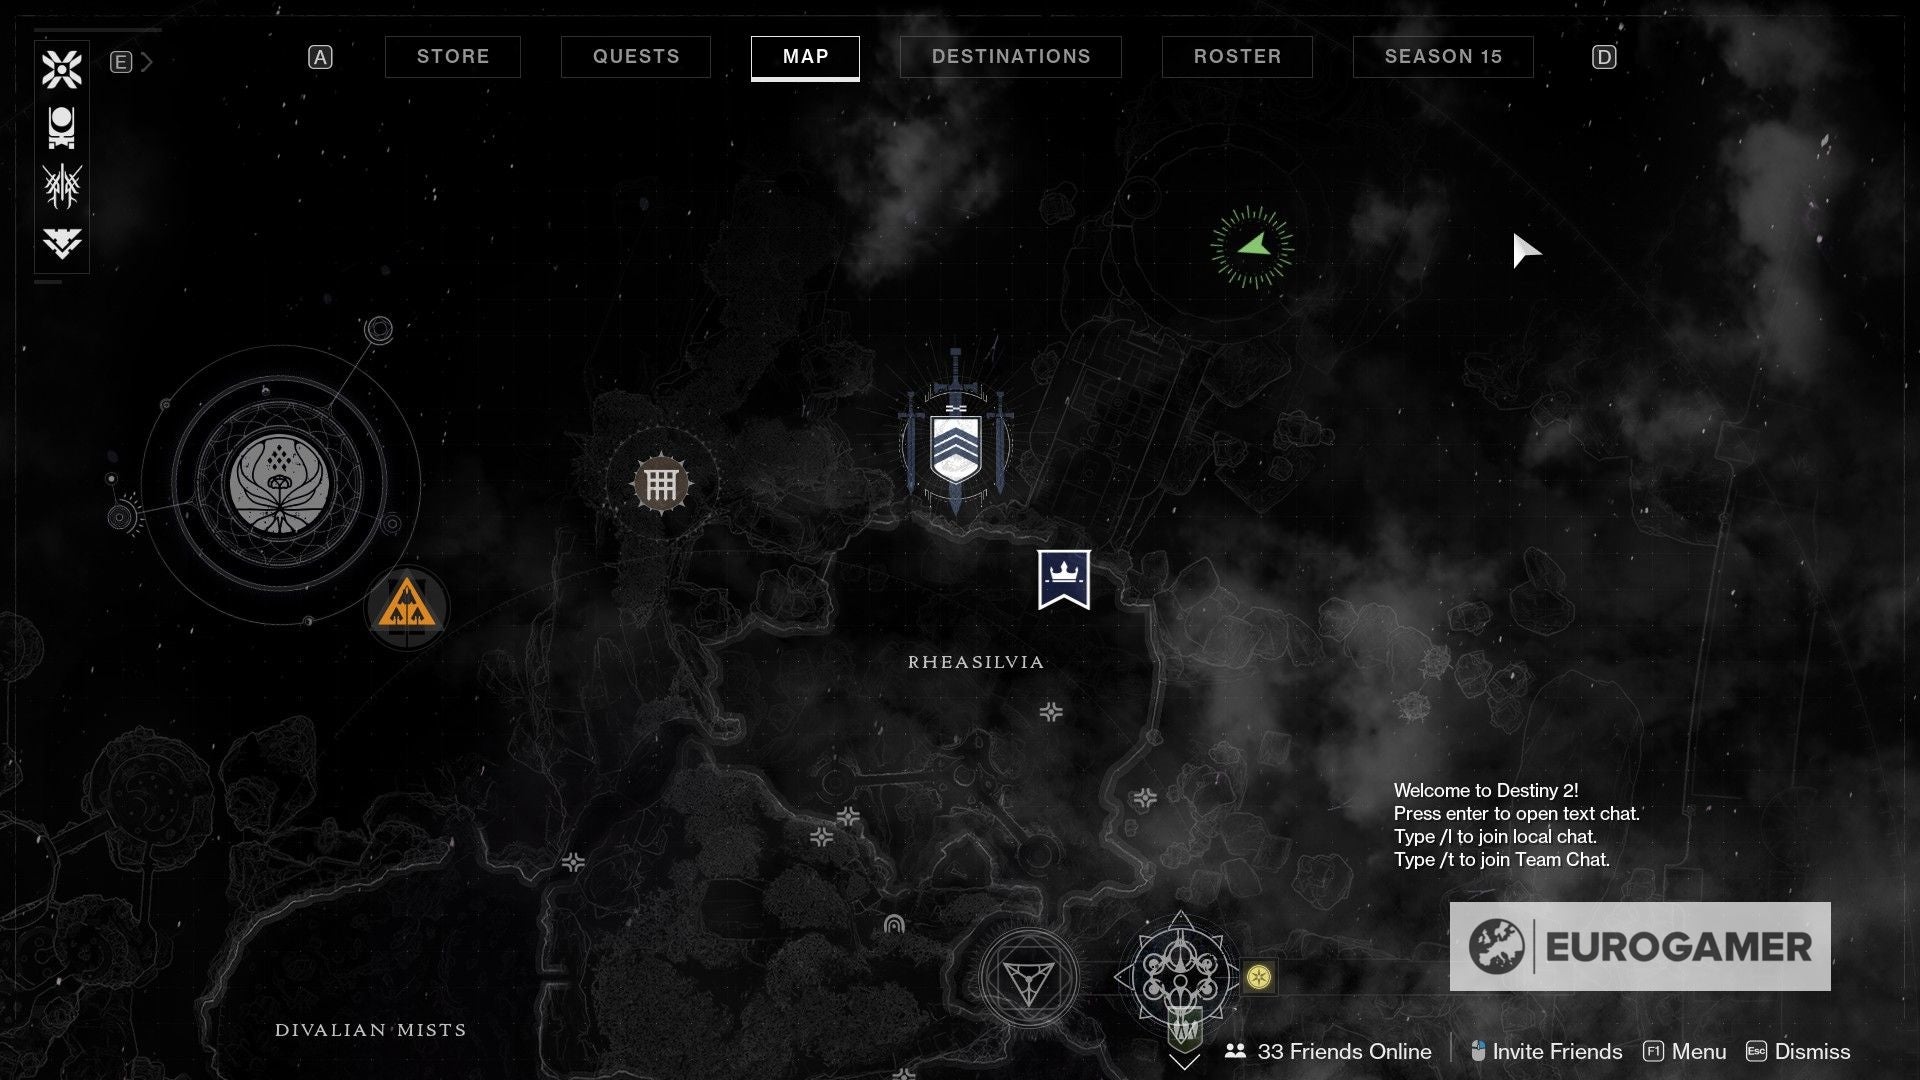
Rheasilvia Secluded Statue Atlas Skew location
The first Atlas Skew can be found in Rheasilvia, which is one of the big named areas in the Dreaming City.
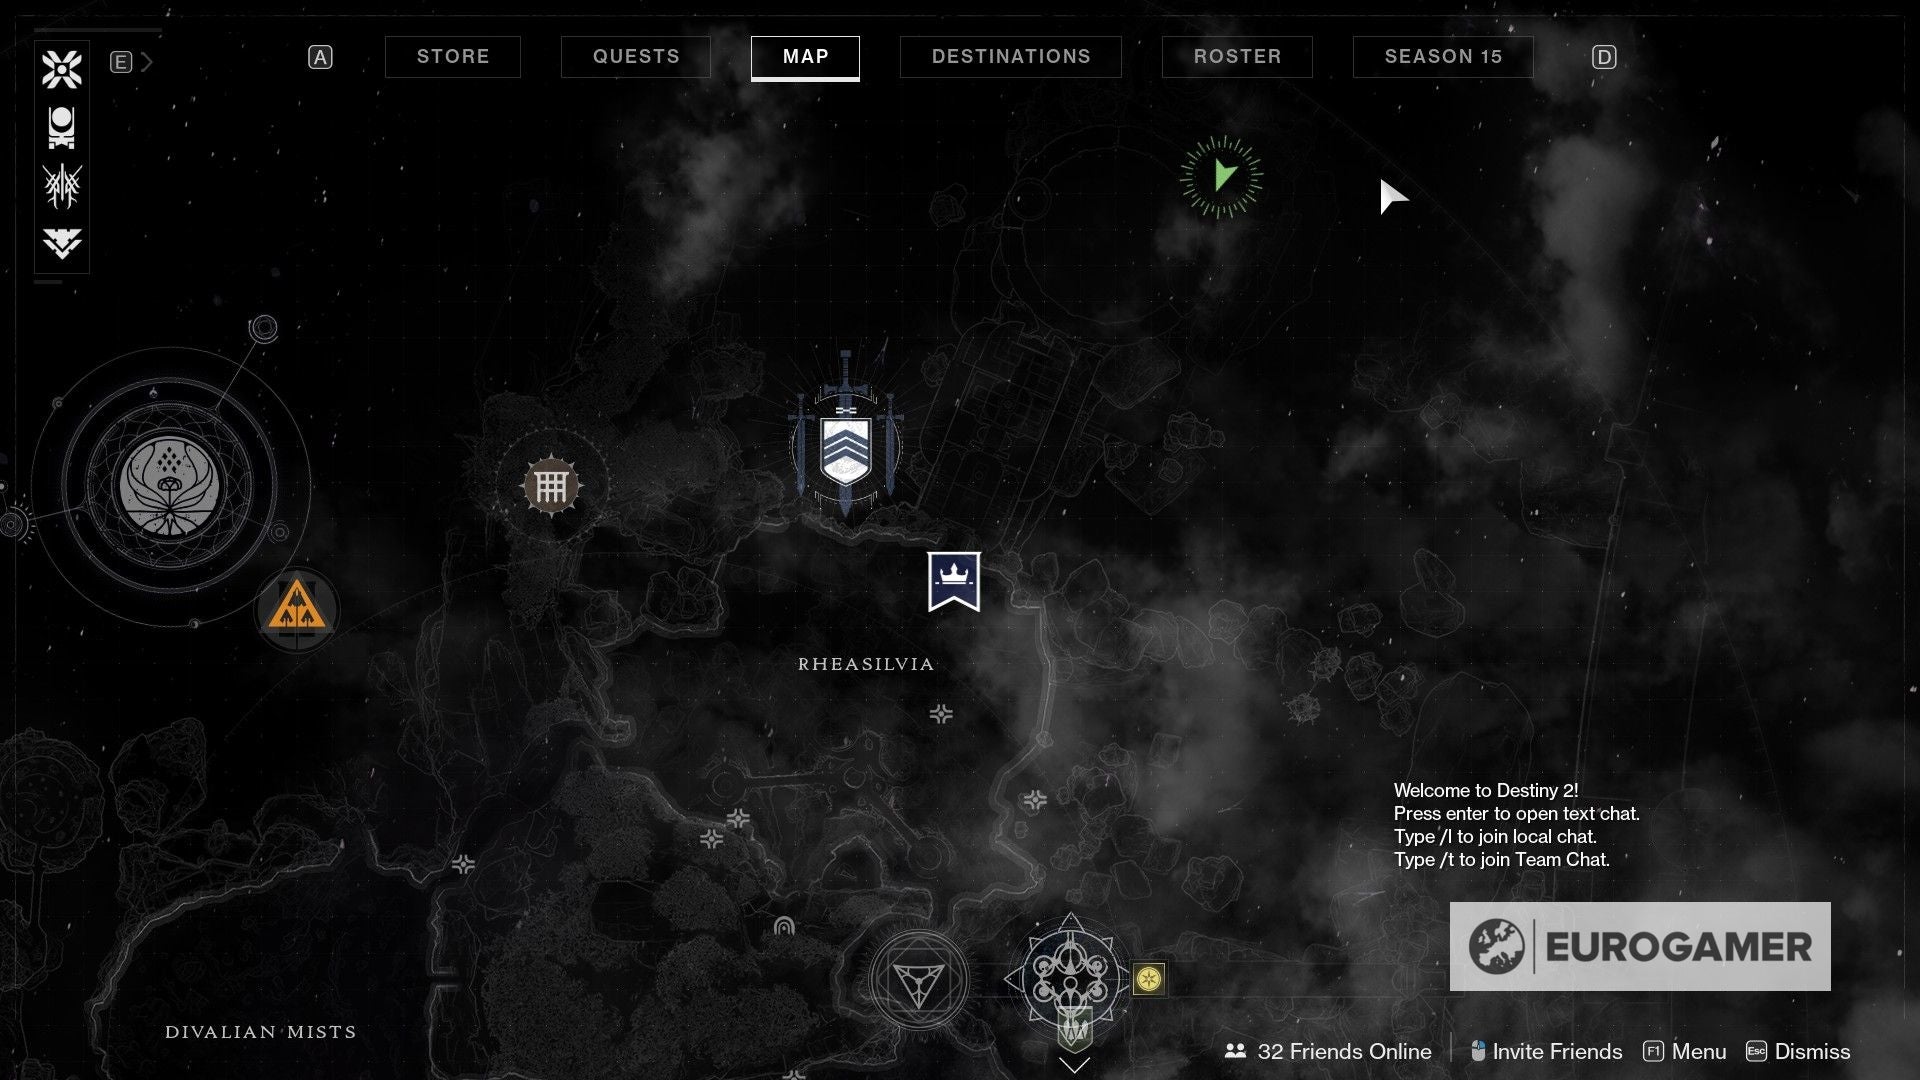
Caput to the far north-eastward of the area, to where there's a structure that leads out of the area to Straw's Seclude.
We'll exist non heading inside however. Instead, proceed heading to the right around the cliffs (illustrated equally a path of 'rocks' in the map).
From hither, brace yourself for a series of jumps. Whenever you see a rock that can serve equally a surface, hop on information technology.
Standing on the rock betwixt the two cliffs, if you look upward to the east, you'll see the statue on the mountain top we're aiming for.
The ease of scaling this depends on your form. We found that later on jumping to beneath the cliff, there is a small rock on the wall you can spring onto.
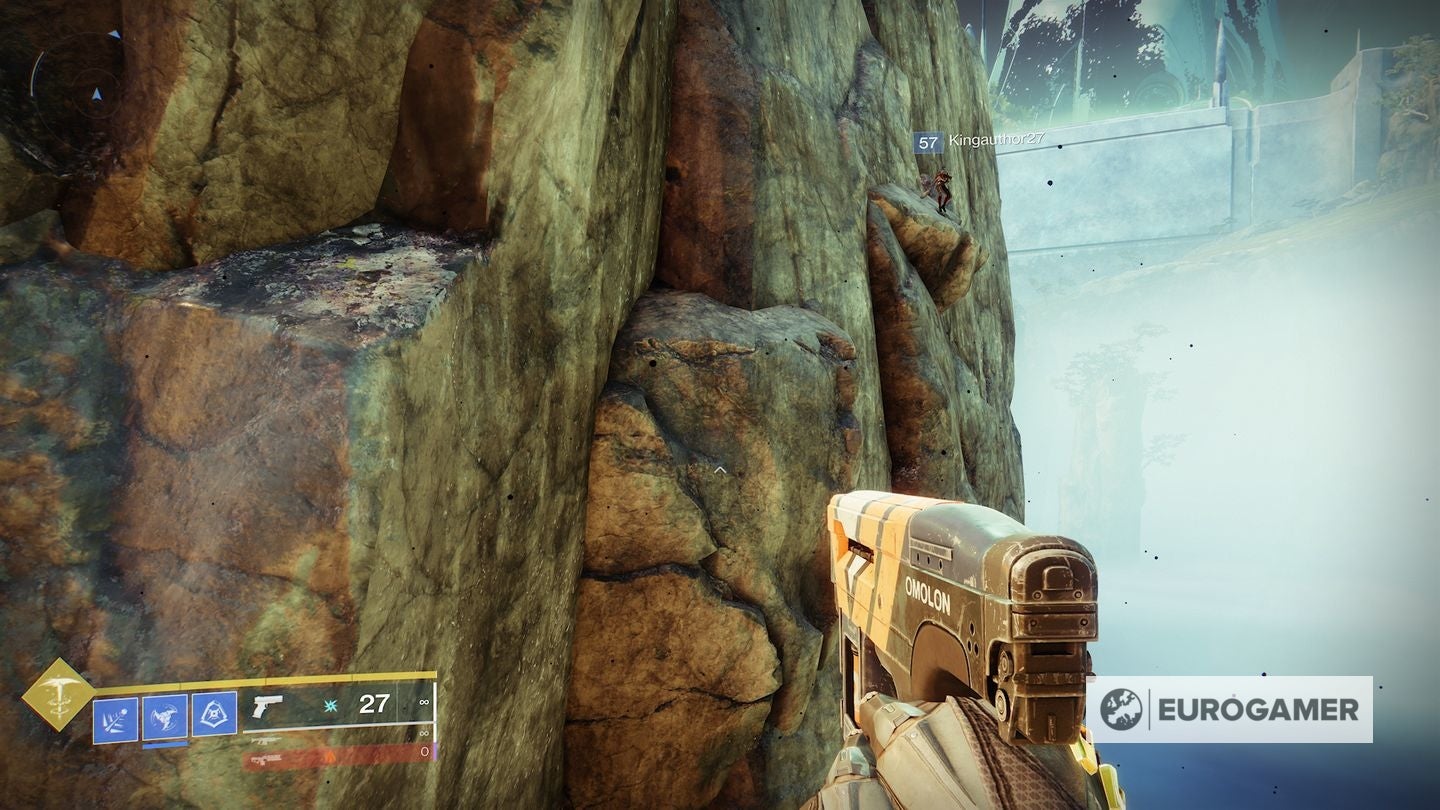
From there, jump upwardly and right to scale the cliff border higher up, allowing you to achieve the top level. Here'southward how we managed it:
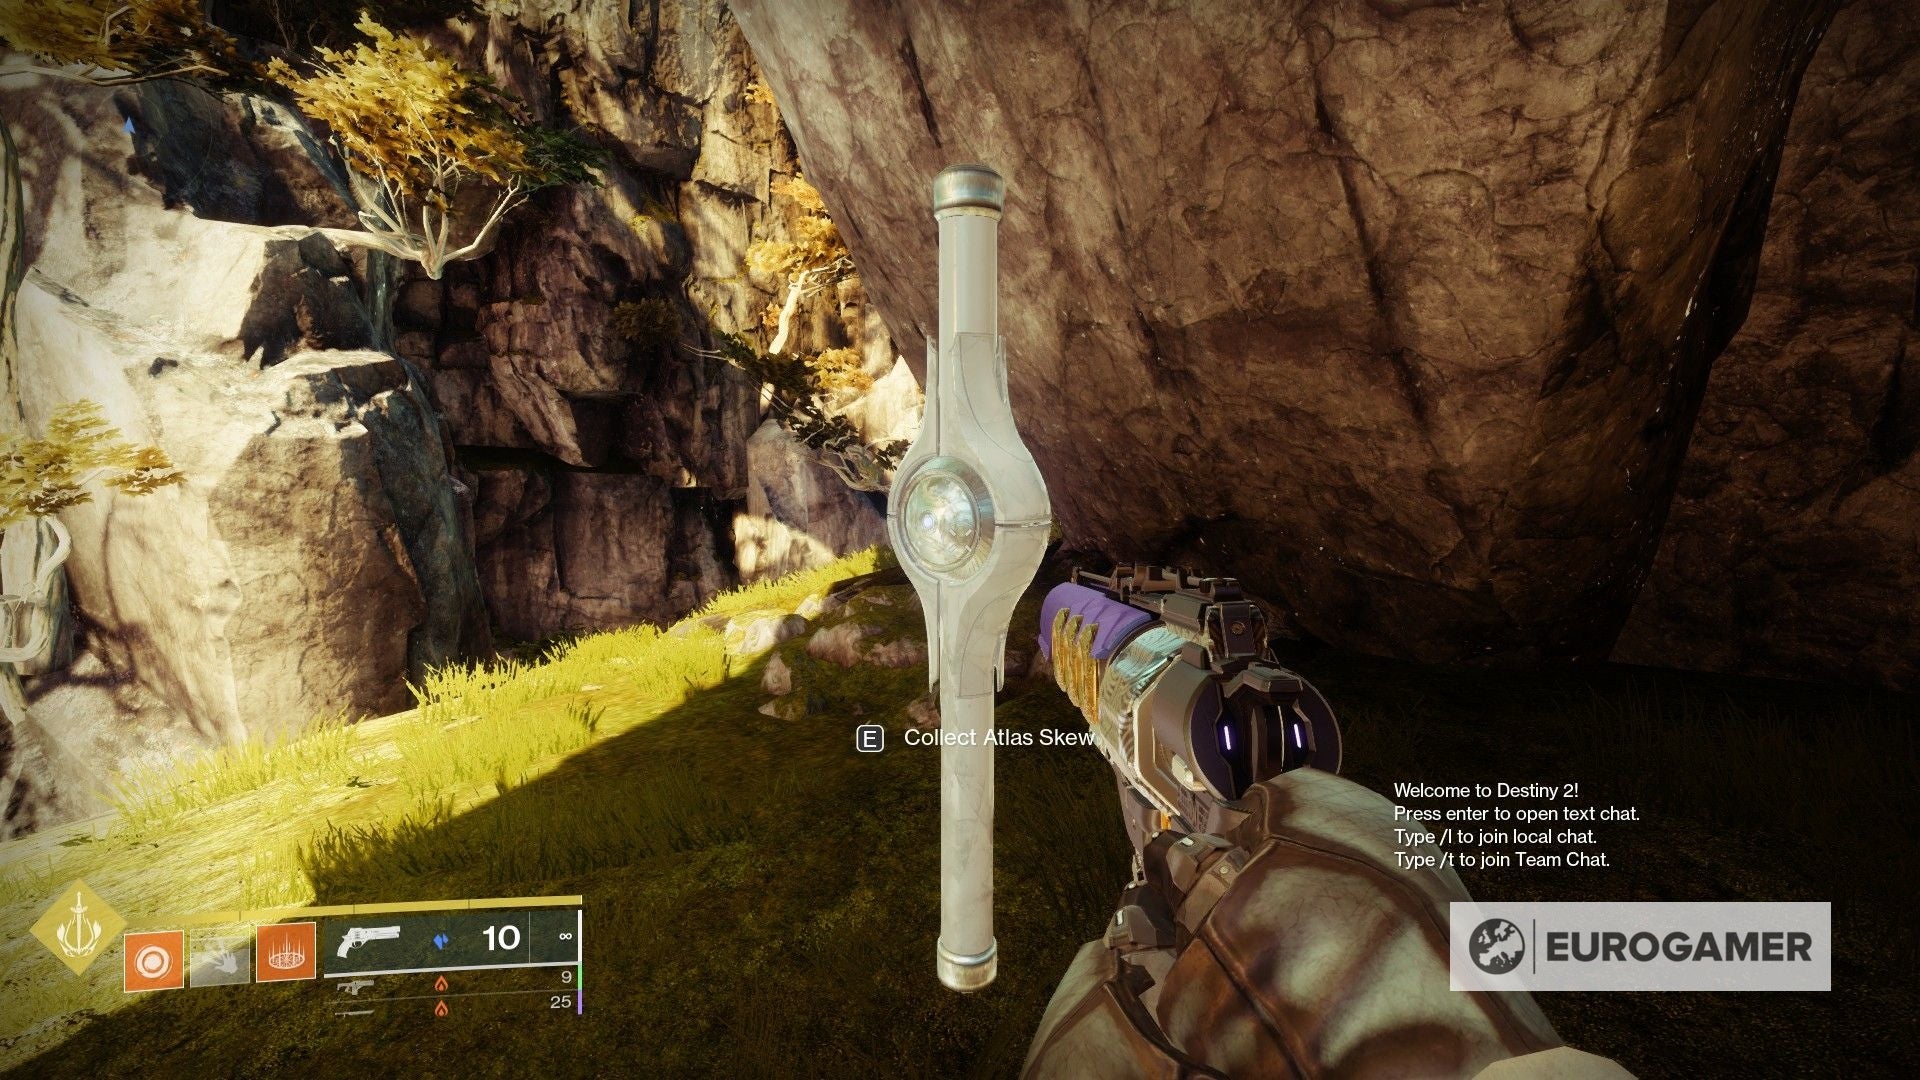
All that's left is for you to grab the Atlas Skew.

Four more than to go!
Rheasilvia Lower Level Atlas Skew location
The second Atlas Skew tin can be plant in Rheasilvia also, fairly close to the starting betoken.
Using the map as reference, head slightly southeast towards the first span yous meet. It's large and shiny, so y'all won't miss information technology.

One time you arrive, all you have to do is become to the lower level. Just leap off the ledge and prepare to slow the fall once you're close to the ground.
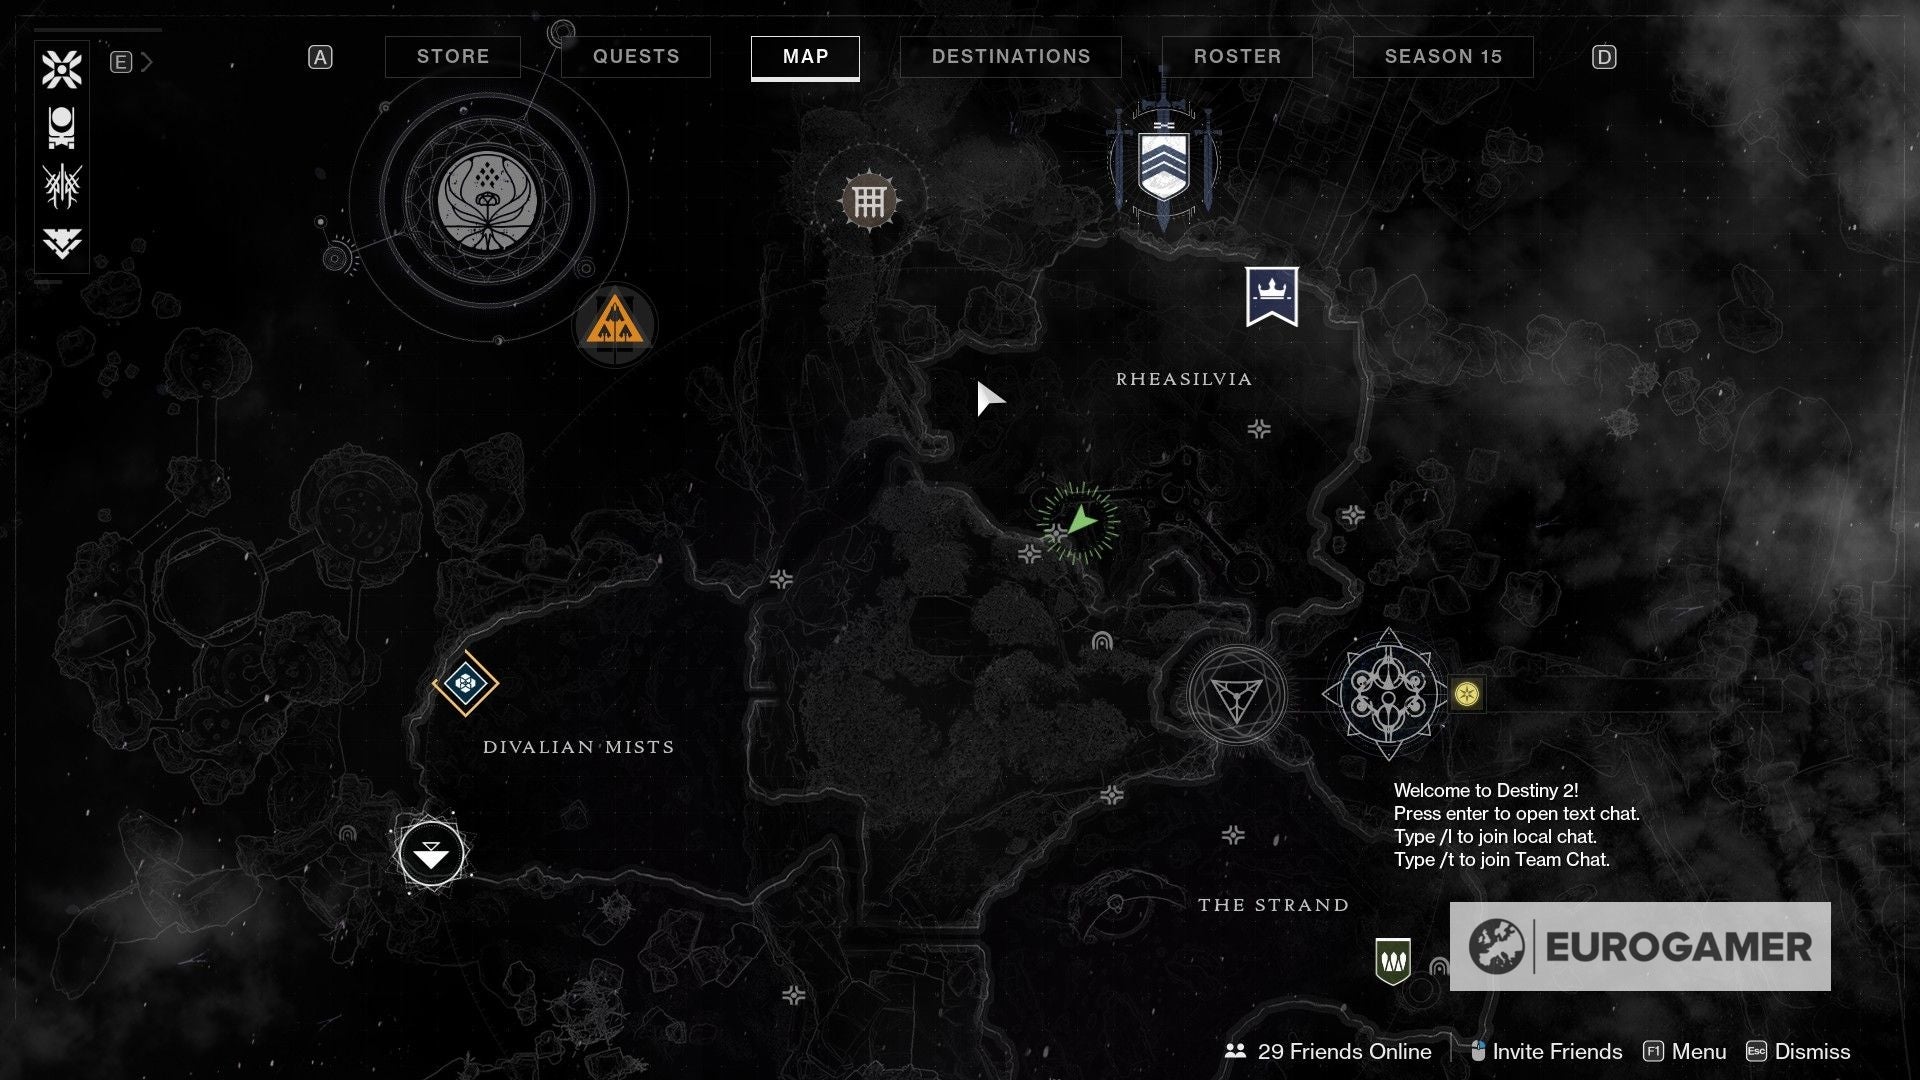
Grab the Atlas Skew from one of the cavern entrances and you'll be set up.
Three more than to go!
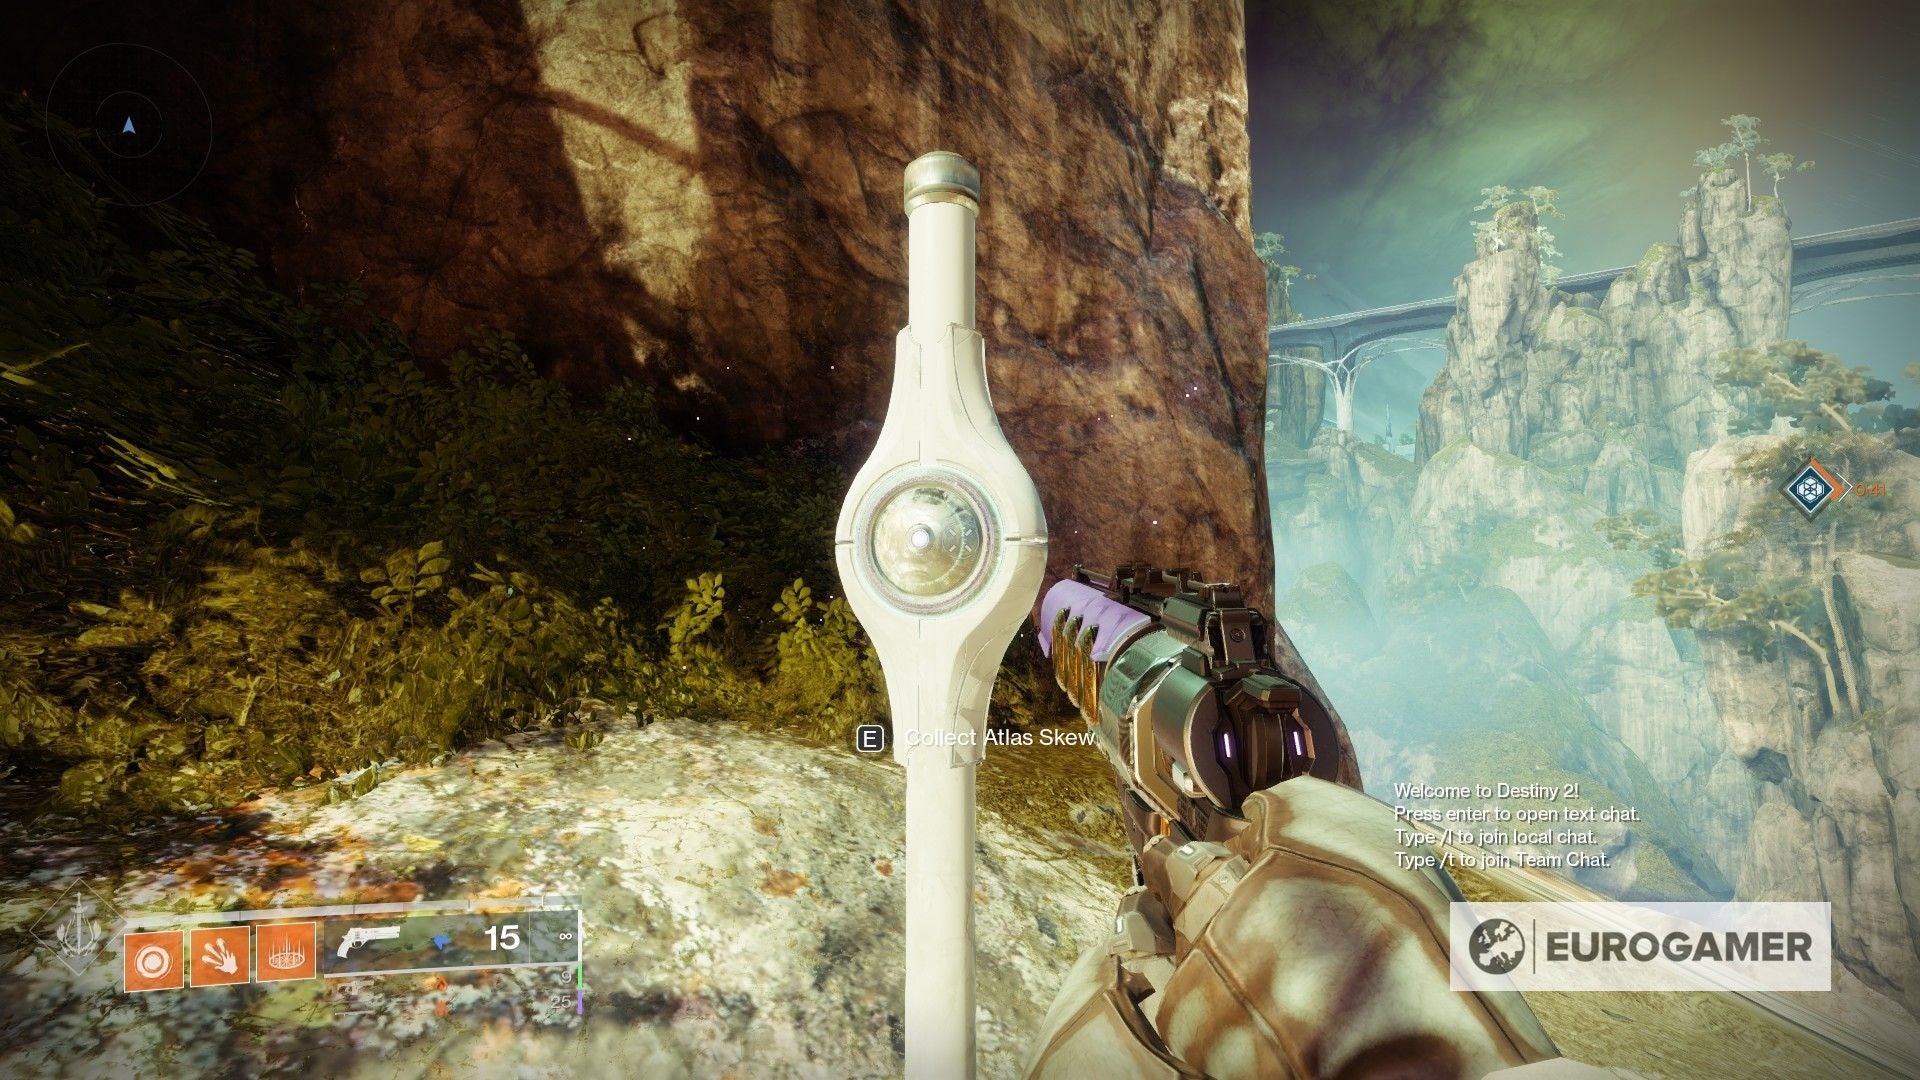
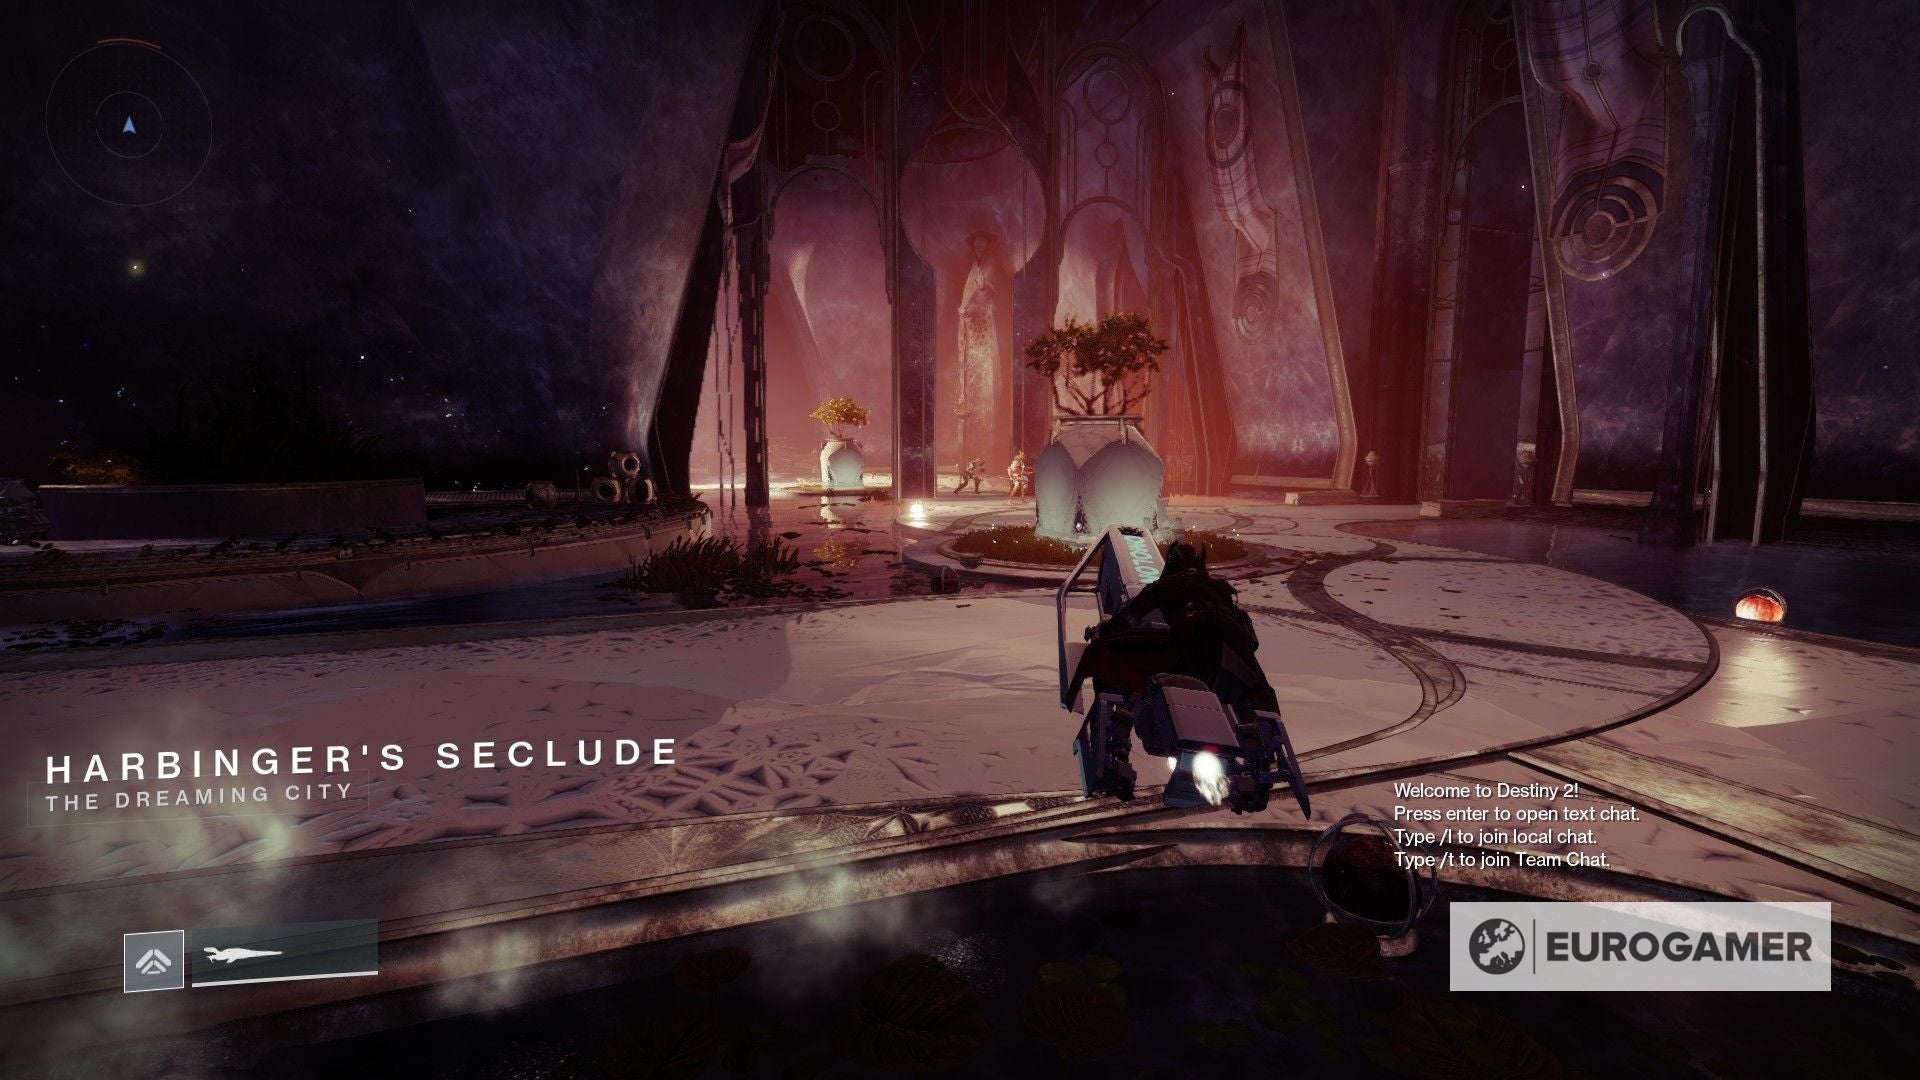
Rheasilvia Temple Overlook Atlas Skew location
The third Atlas Skew can be plant in Temple Overlook, which is a spot that's close from both the starting point and the location of the second Atlas Skew you've only picked up.
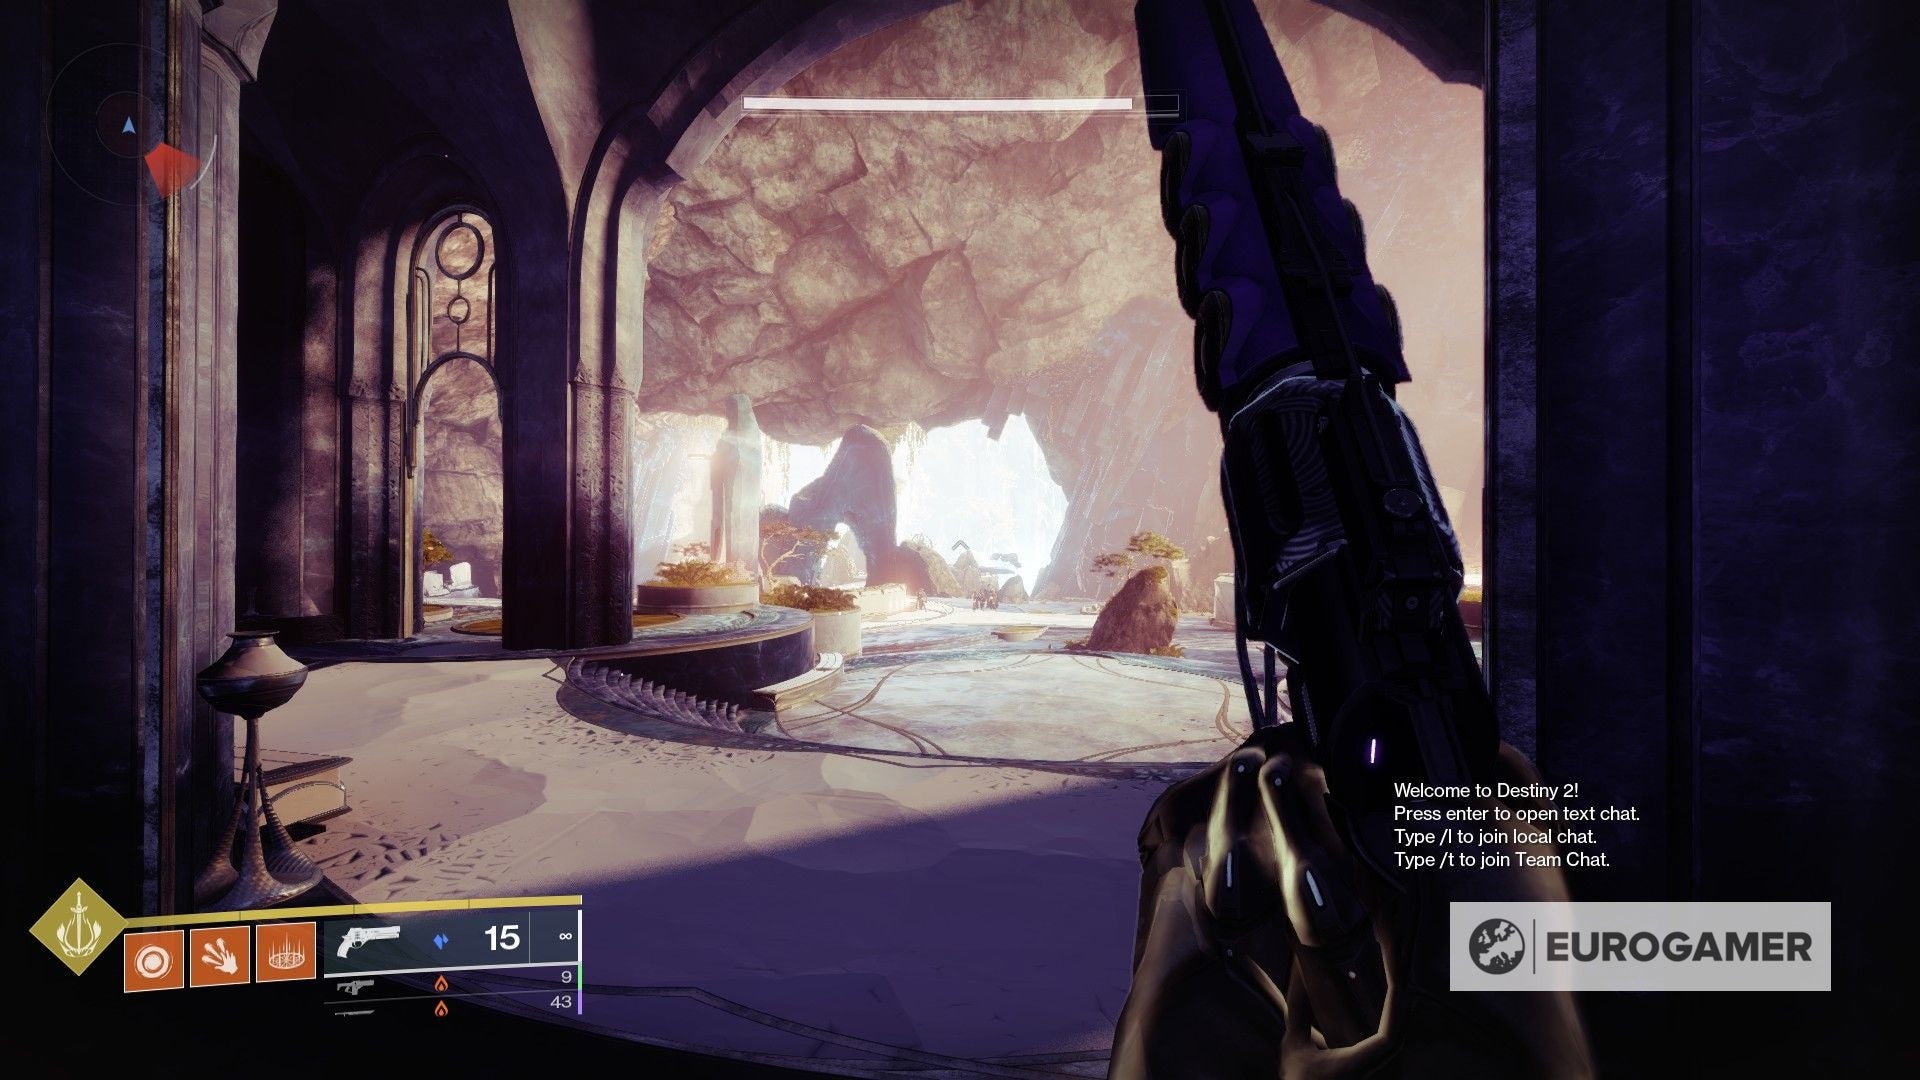
Regardless of which one of the two you choose to get at that place, it's adequately straightforward. As you're heading towards the Harbinger's Seclude, you lot will notice an surface area with plenty of rocky surfaces and trees effectually information technology.
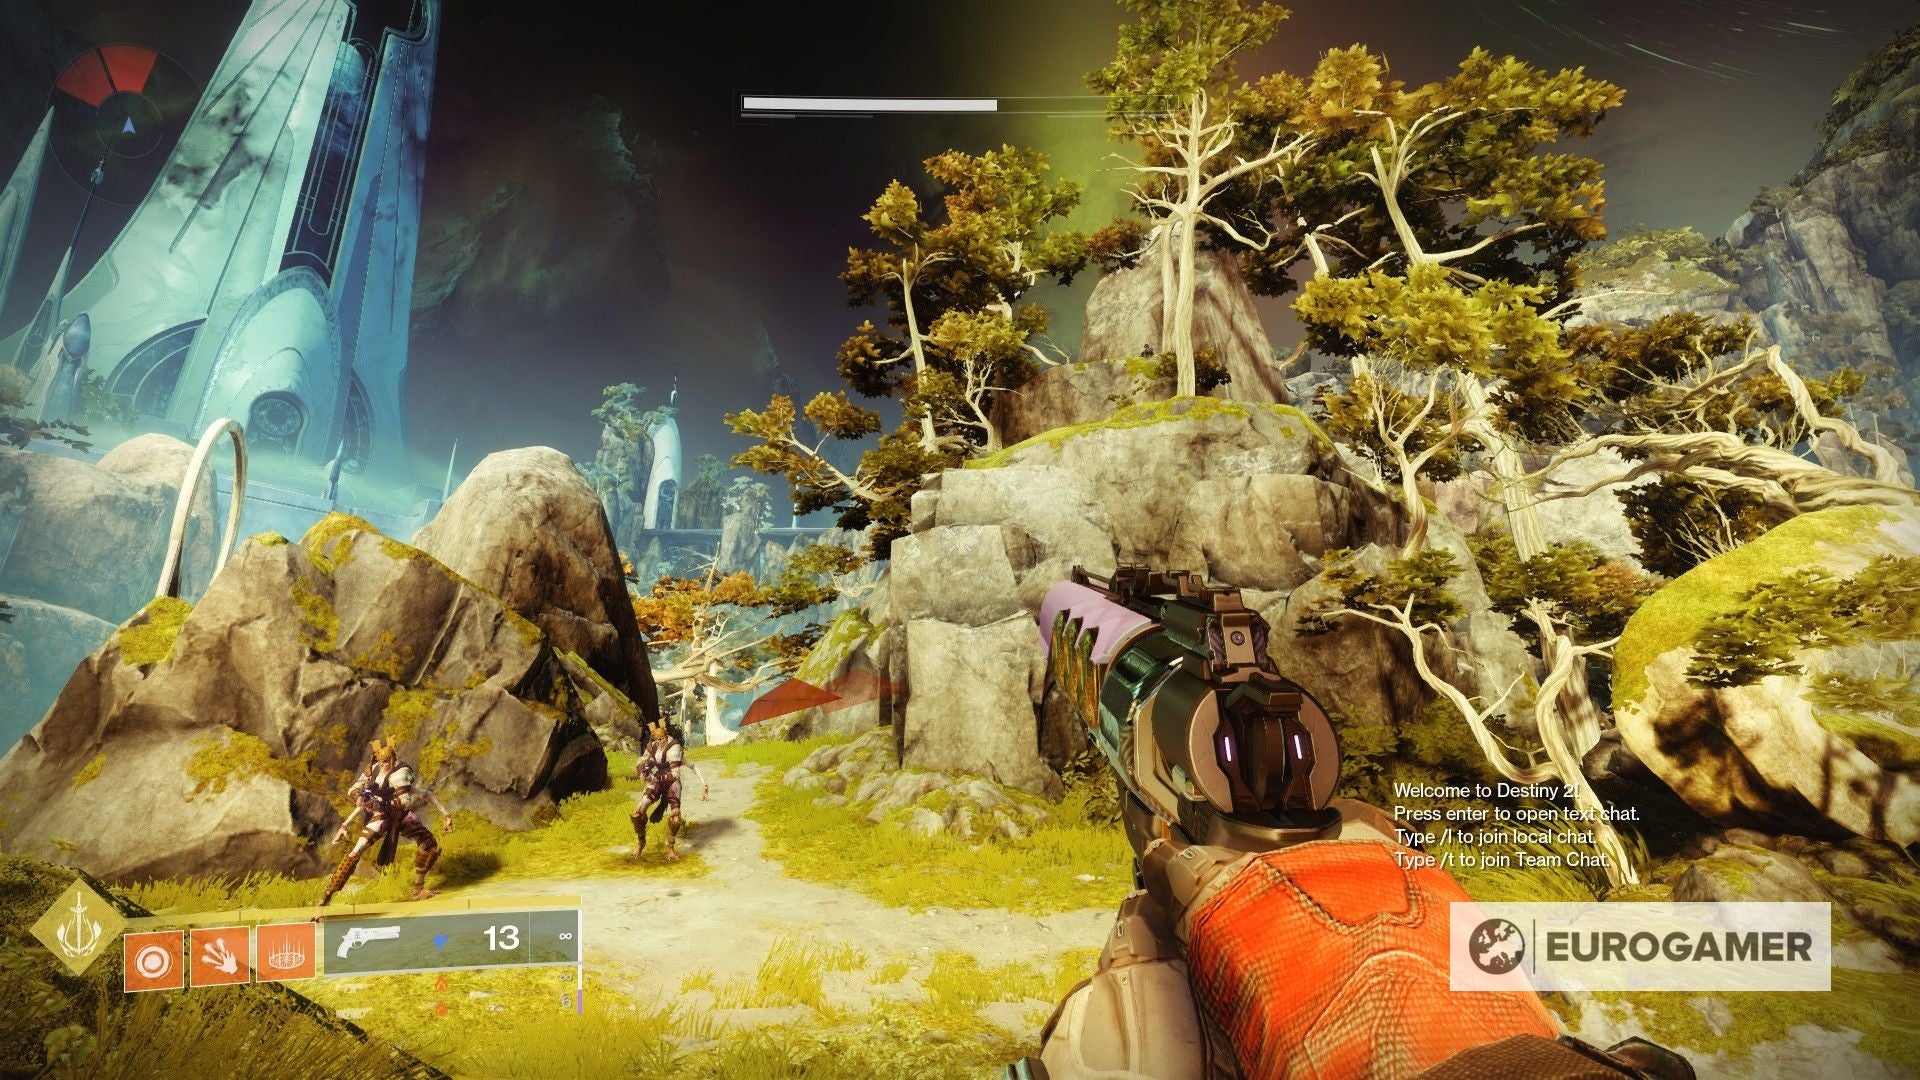
This is close to the middle of Rheasilvia. From hither, all y'all accept to do is climb your way before the summit, simply next to a patrol.

Grab the Atlas Skew and yous'll be fix.
Two more than to go!
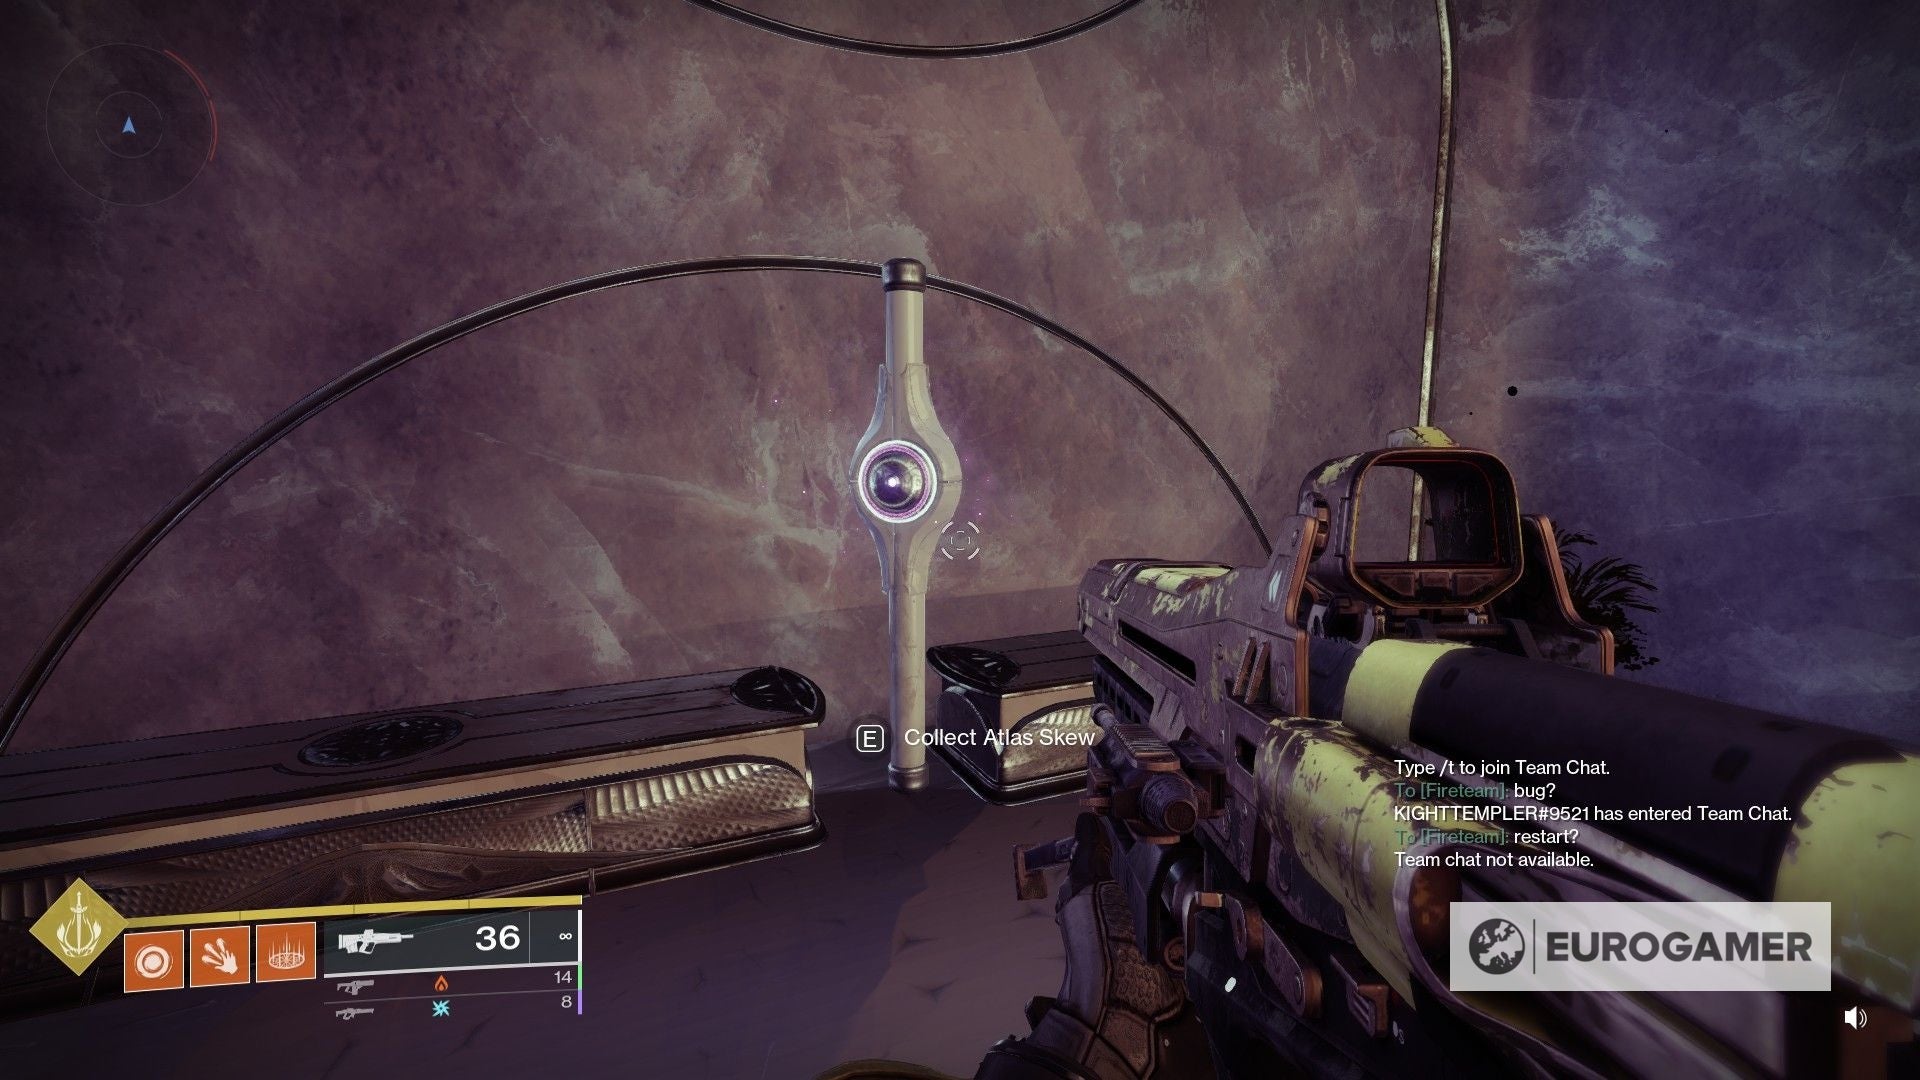
Straw Sidehall Statue Atlas Skew location
The quaternary Atlas Skew can exist found in the Harbinger'south Seclude Sidehall, pregnant that you tin can either take the starting indicate as reference or the spot where you're at at present after grabbing the third Atlas Skew.
This is a long trek, so don't even carp to endeavor and practice it on foot (unless you're really interested in taking downwardly enemies every bit you go). Summon your vehicle and head inside the Straw's Seclude.

One time within, the focus hither is to get all the way ahead of you, except for one specific turn.
Once you make information technology to the hall that divides itself in paths to each side, accept the ane on the correct.
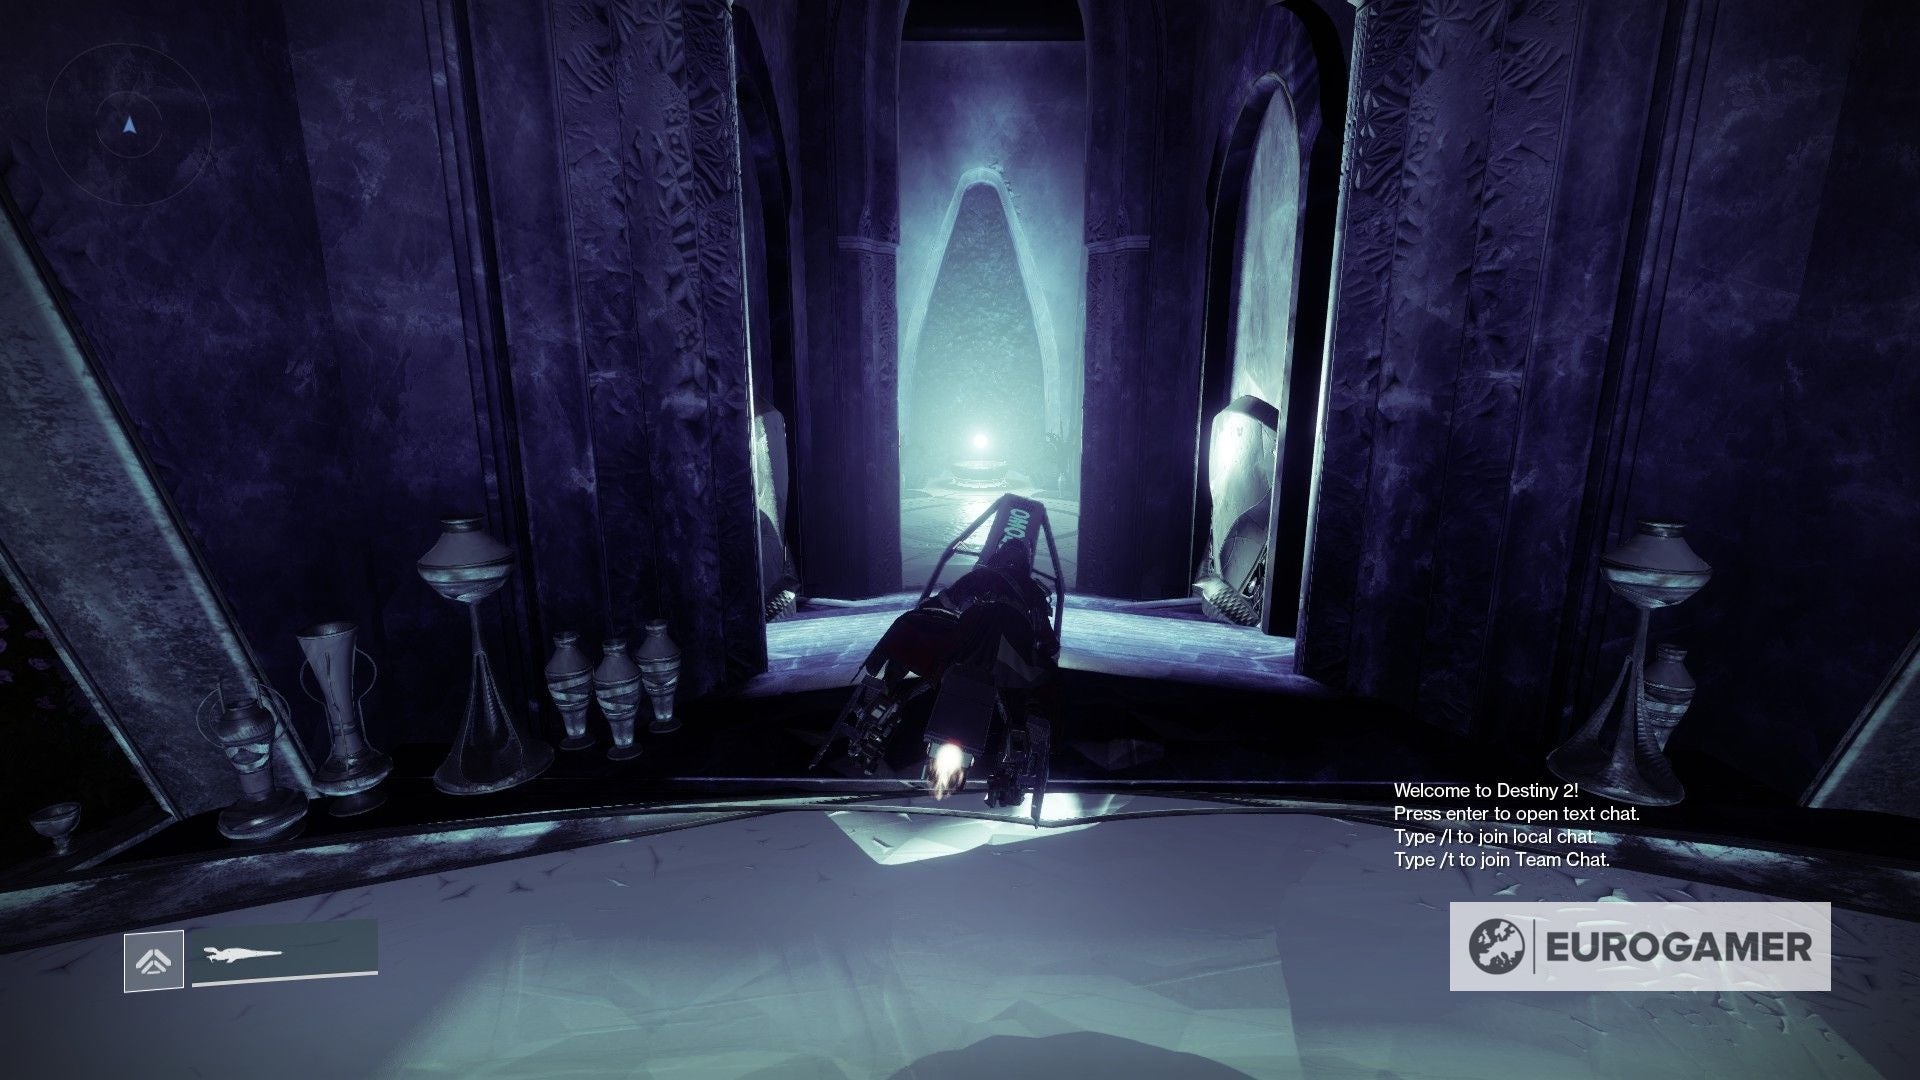
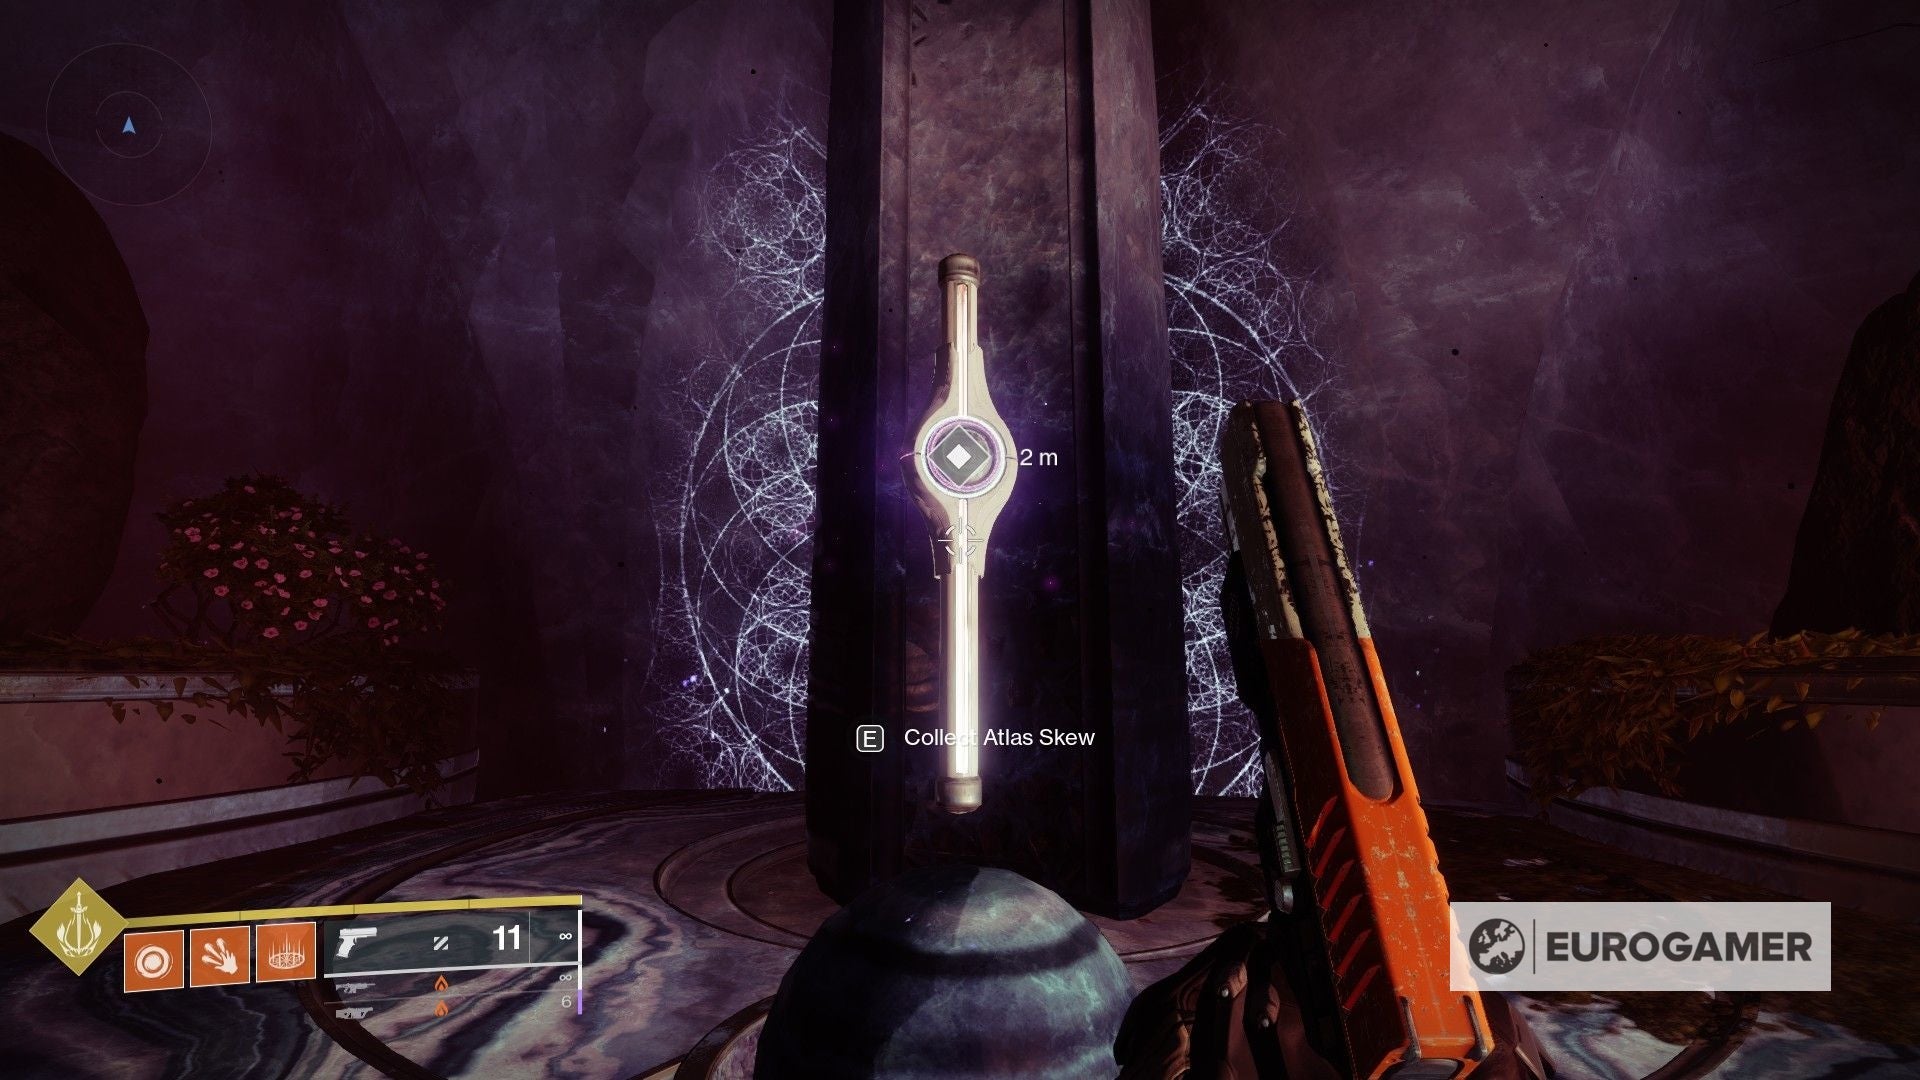
Keep on keeping on until you find yourself in a big hall. Head to the right and inside the structure there, up until the indicate where you're inside the rather nighttime room with the monolith floating in the middle.
Once there, you'll find the Atlas Skew correct past it.
But one left!
Harbinger Ahamkara Skulls Atlas Skew location
The fifth Atlas Skew can be found within the Straw as well. Since it's super close to the quaternary Atlas Skew, we'll be using that spot as a starting point.
Basically, from the primary hall inside the Harbinger's Seclude, you're going to left instead of correct - if you're exiting from grabbing the fourth Atlas Skew, then head across the hall.
You will notice a large bridge-like structure that leads to the cliff - apply that every bit a reference to know where to fall down to the right, every bit we're heading deep below towards a cave entrance.
Once within the cave, information technology's unlikely that yous'll get lost. Just go along post-obit the path until you detect yourself in a massive room.
From there, head all the mode due north towards the Ahamkara Skulls on the wall - the Atlas Skew can be plant at the centre of each wall.
Congratulations on collecting all Atlas Skews in Rheasilvia!
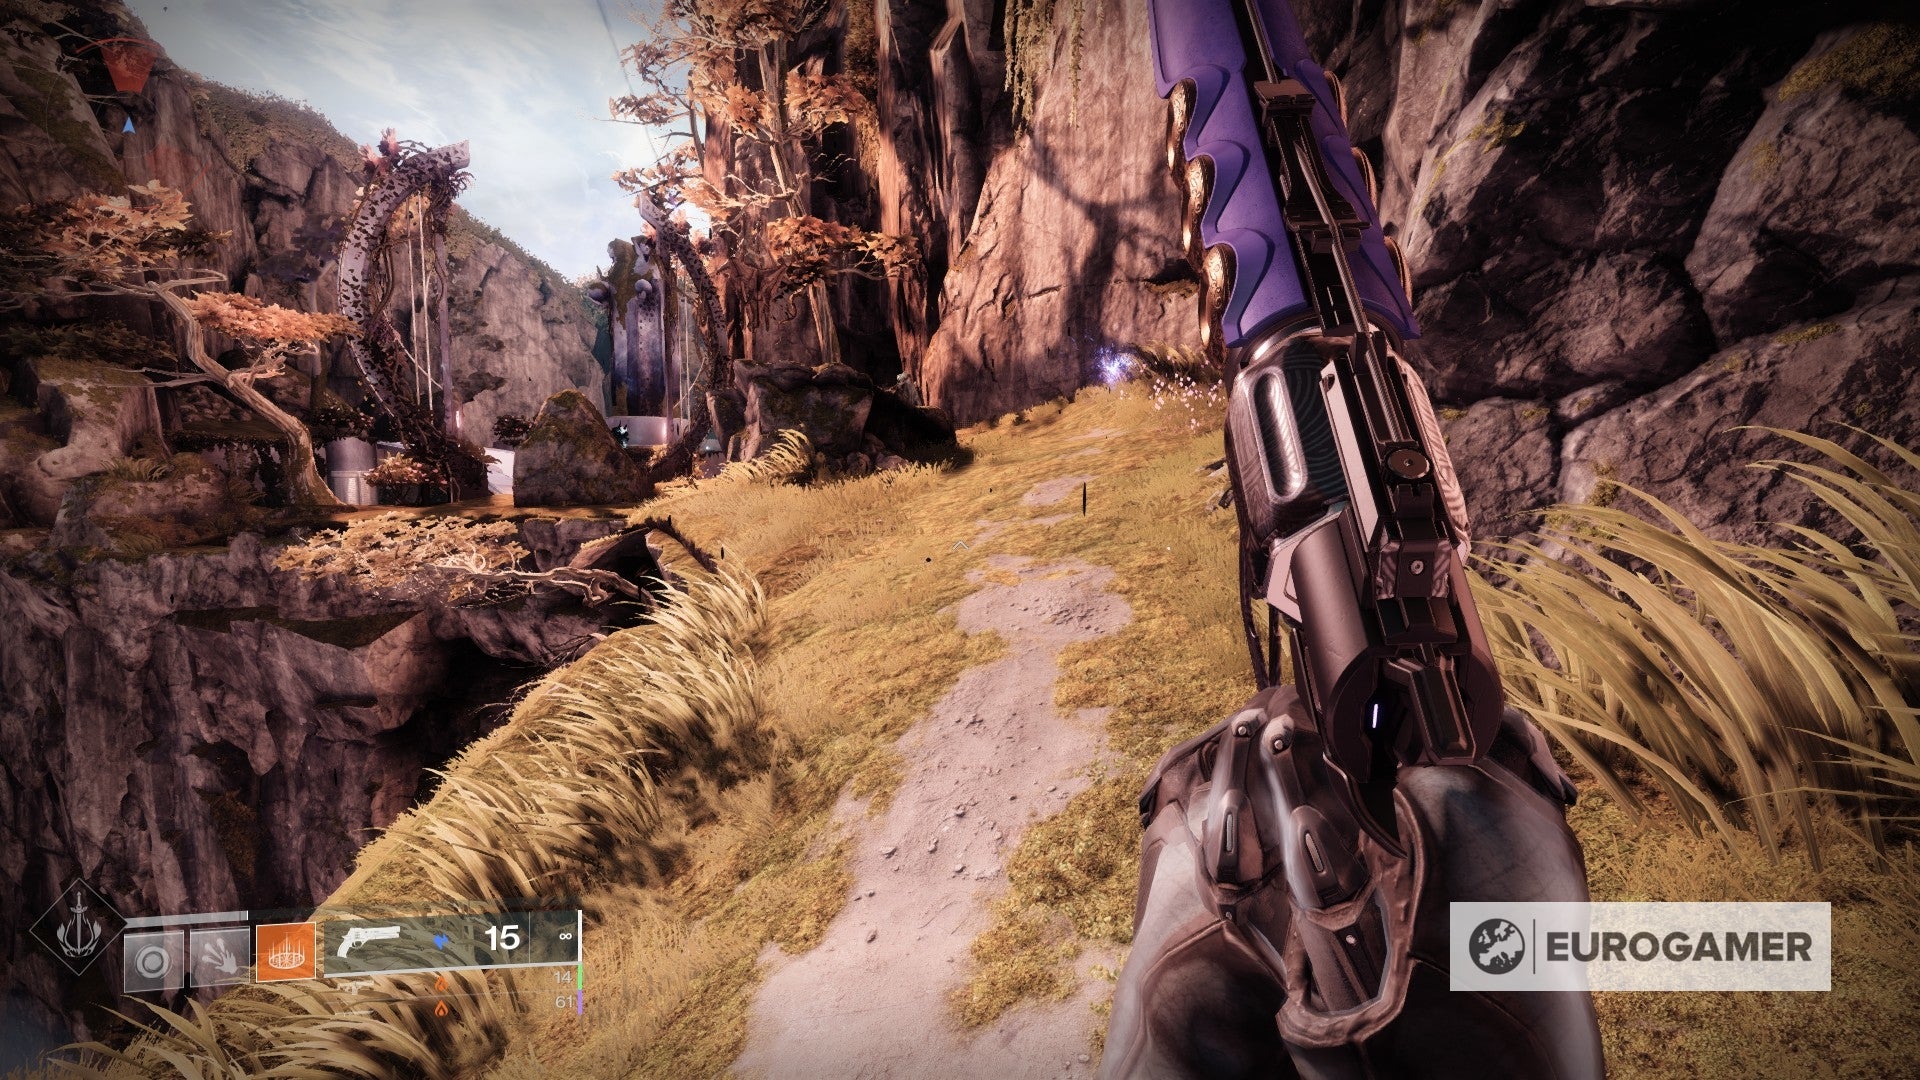
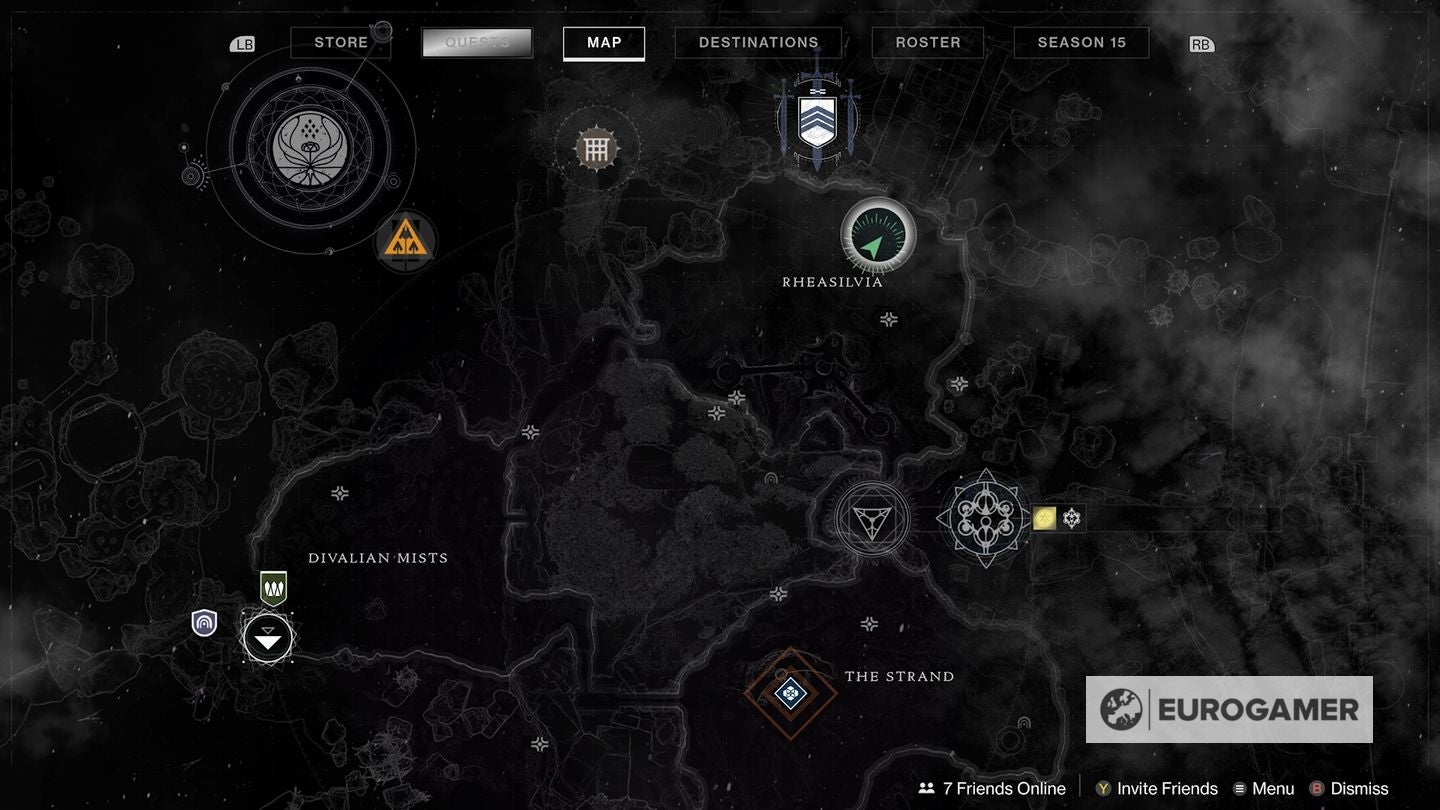
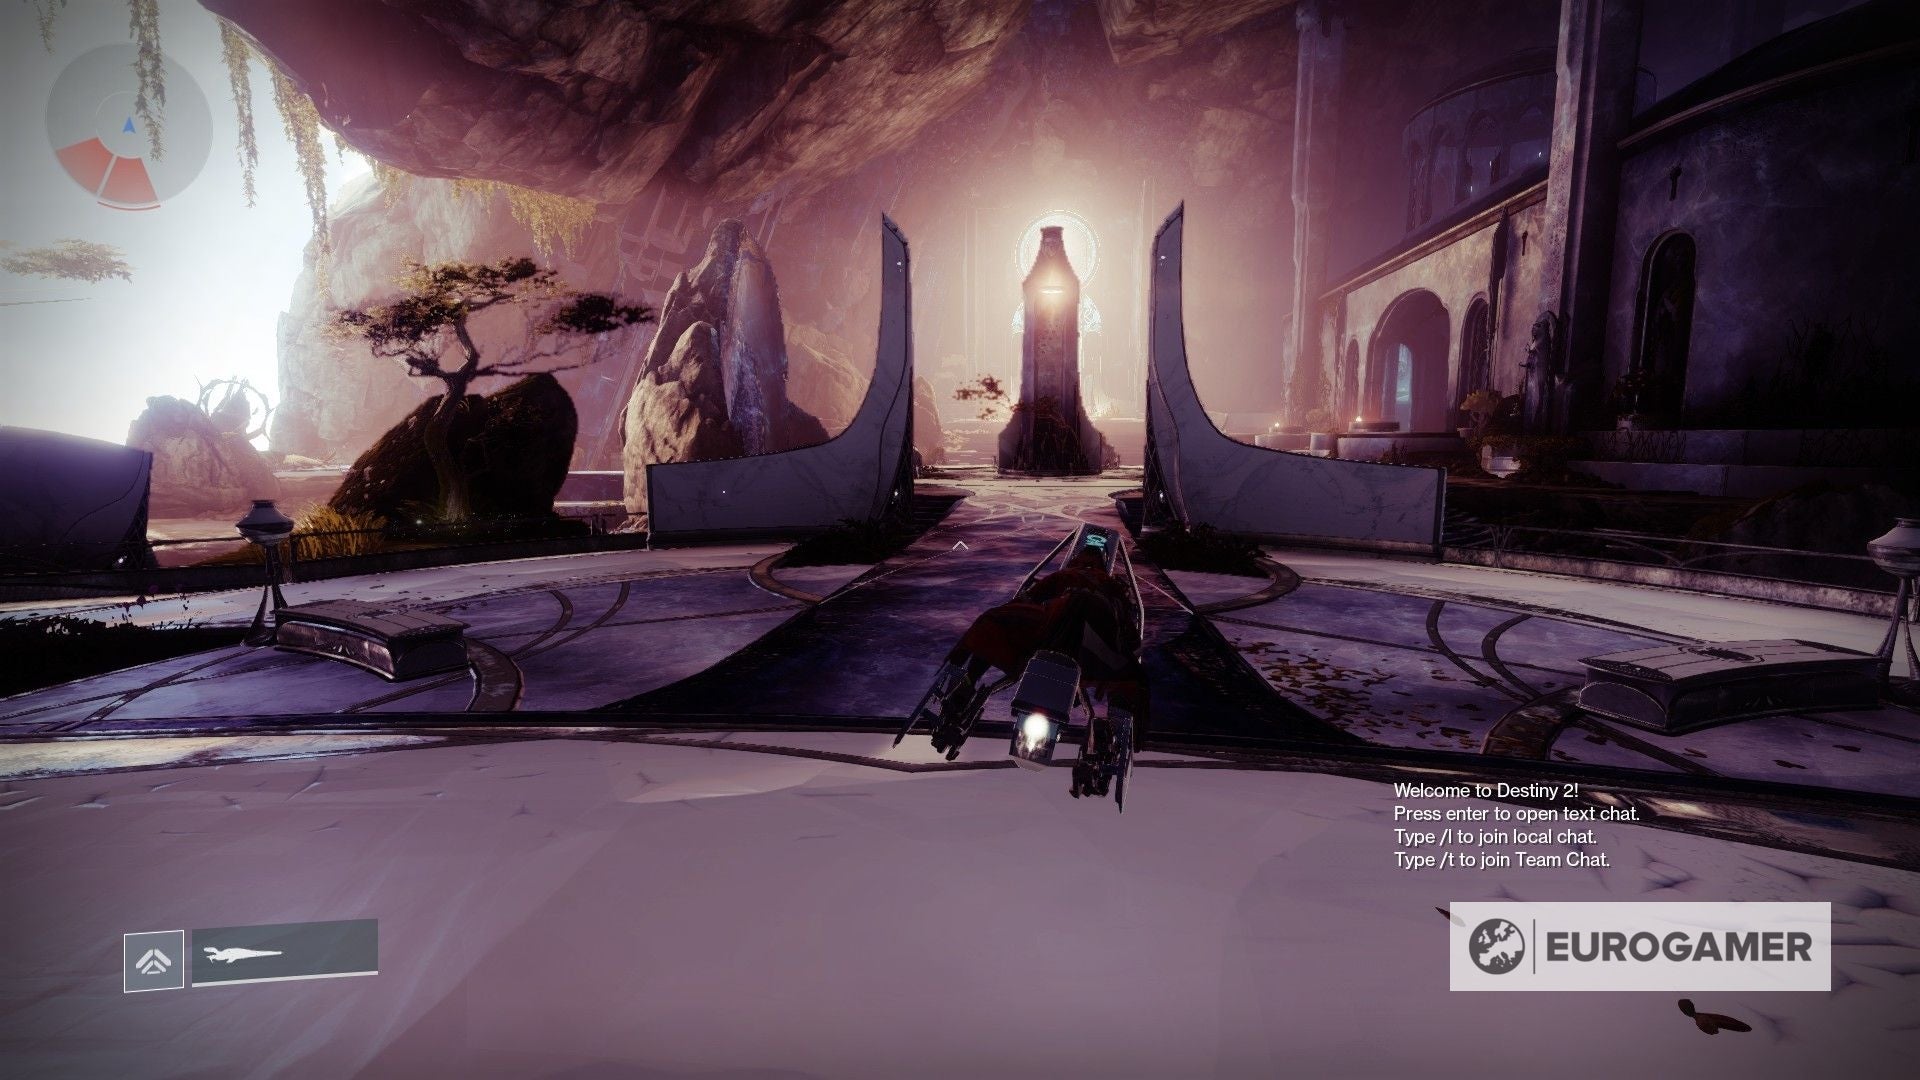
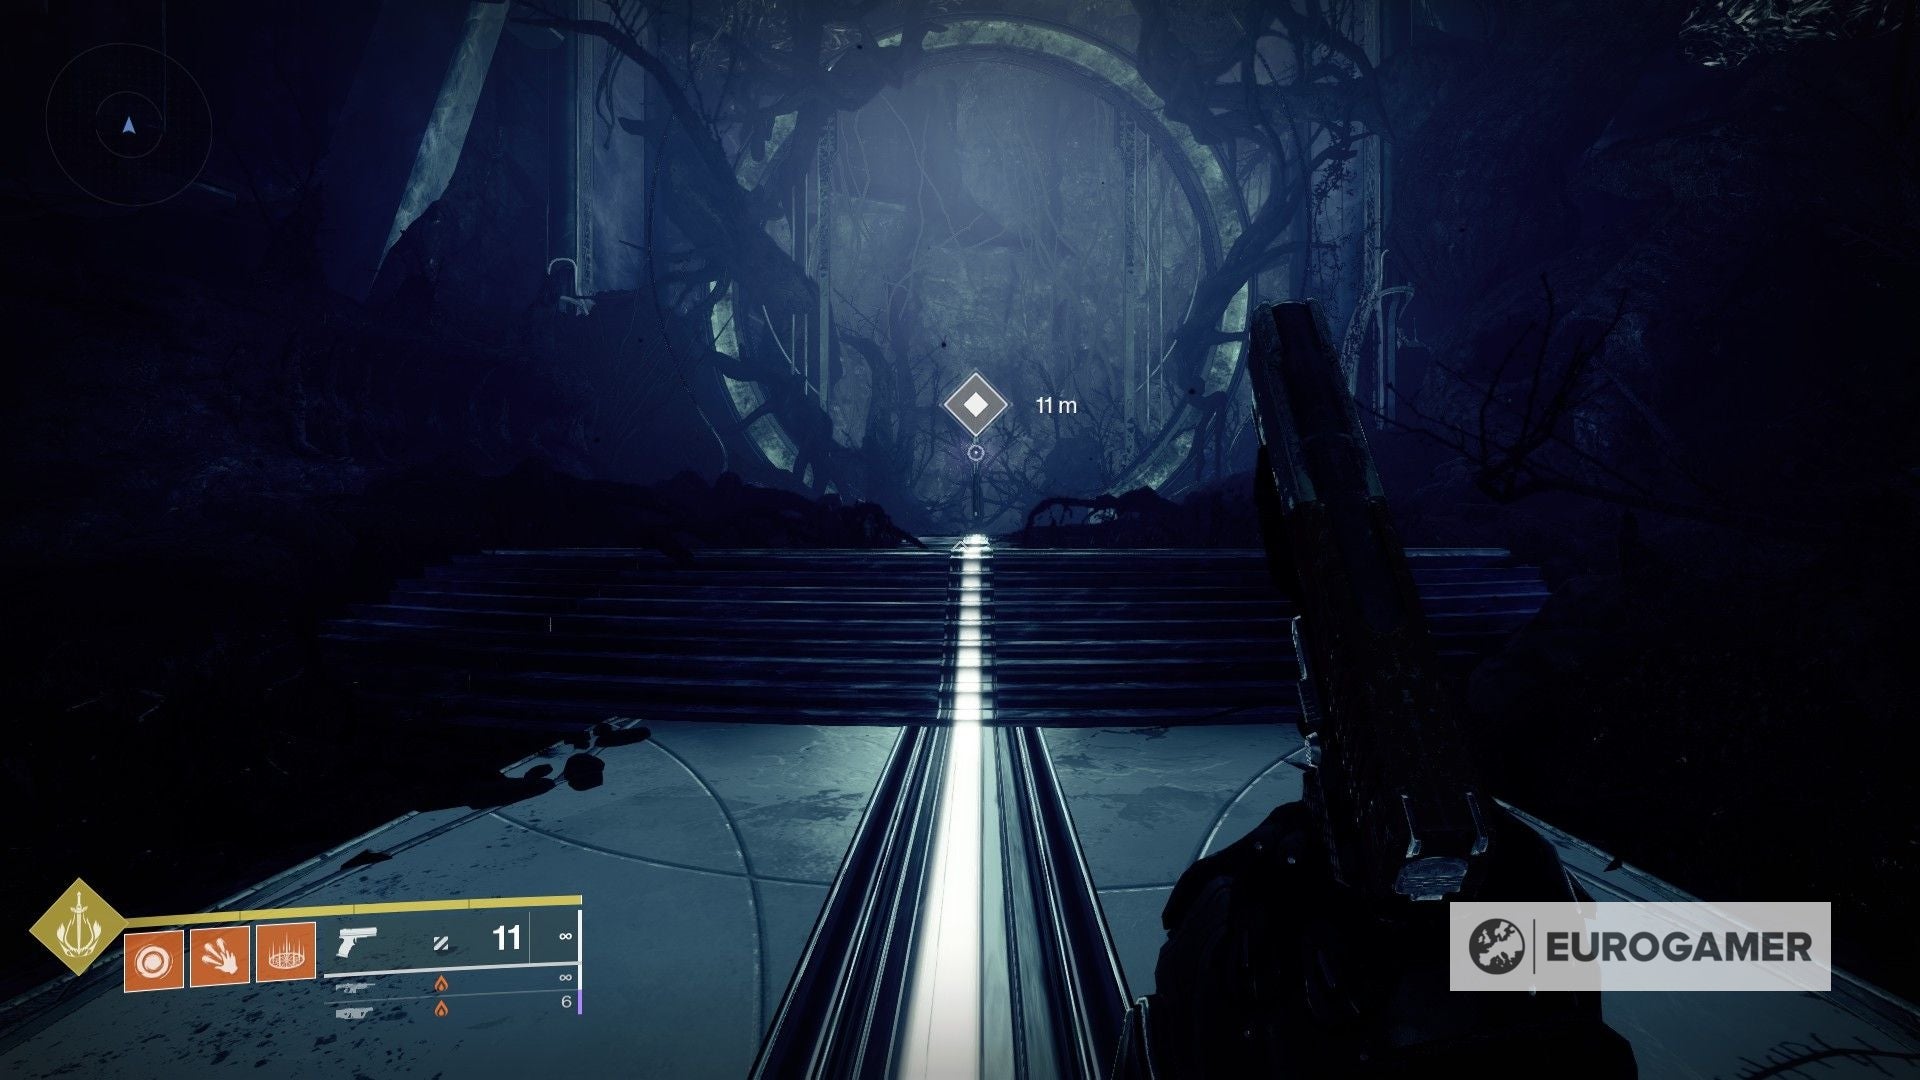
How to detect The Confluence location explained
While The Confluence is an area within the Dreaming City, you lot'll demand an actress pace in society to admission information technology by finding a portal that takes y'all there.
There is one in the Spine of Keres, and so we're heading there. If you look at the map of the Dreaming Urban center, you will detect a route up north of Divalian Mists - that's the one y'all're going to take.
One time you encounter the ice passage, traverse through it and onto the other stop, where a destroyed route awaits. Jump all the way beyond and enter the area.
From here, the rest is rather straightforward. Head over to the bridge that leads to the castle, but instead of going inside, you're going to plough to your right.

Spring over the span and down to the slopes until you're on the ground below. Once there, simply plow around the corner slightly, where you will observe a cavern archway.
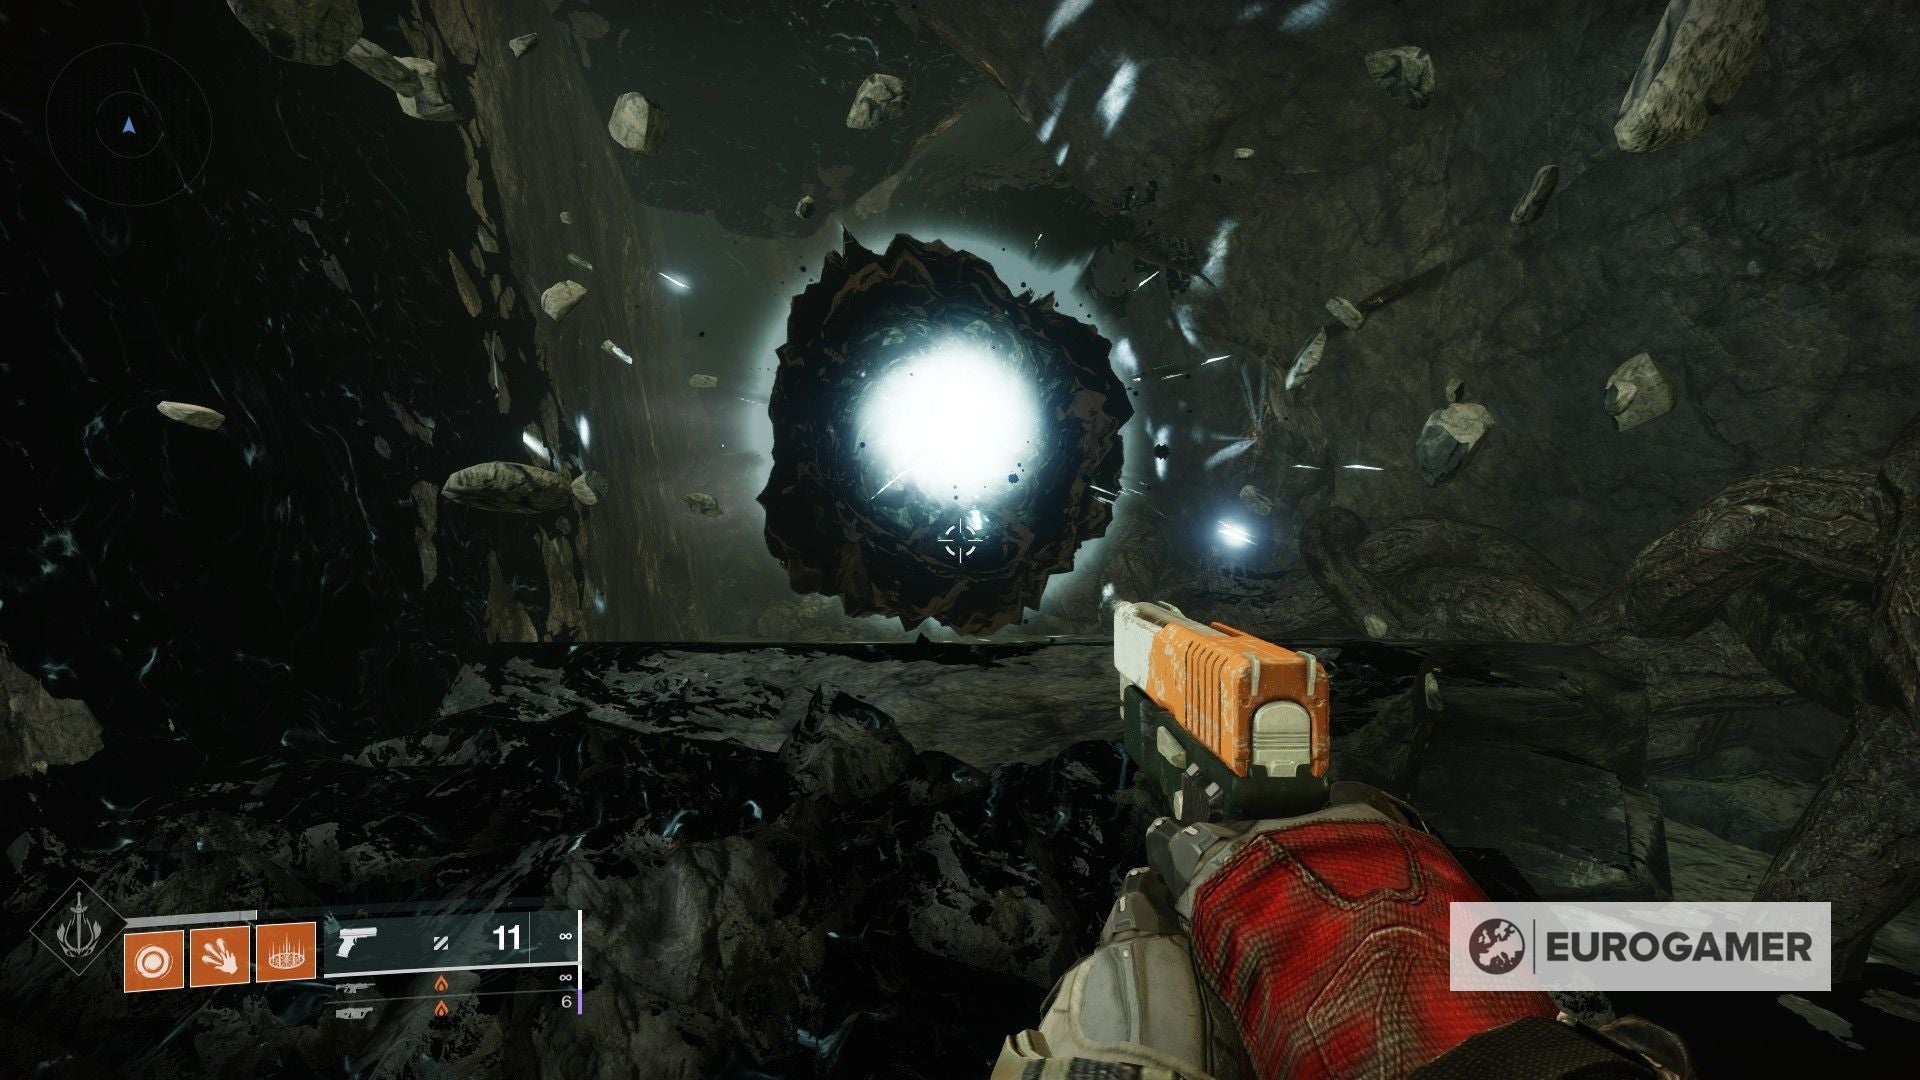
All that is left to practice is head inside the portal - welcome to The Confluence!
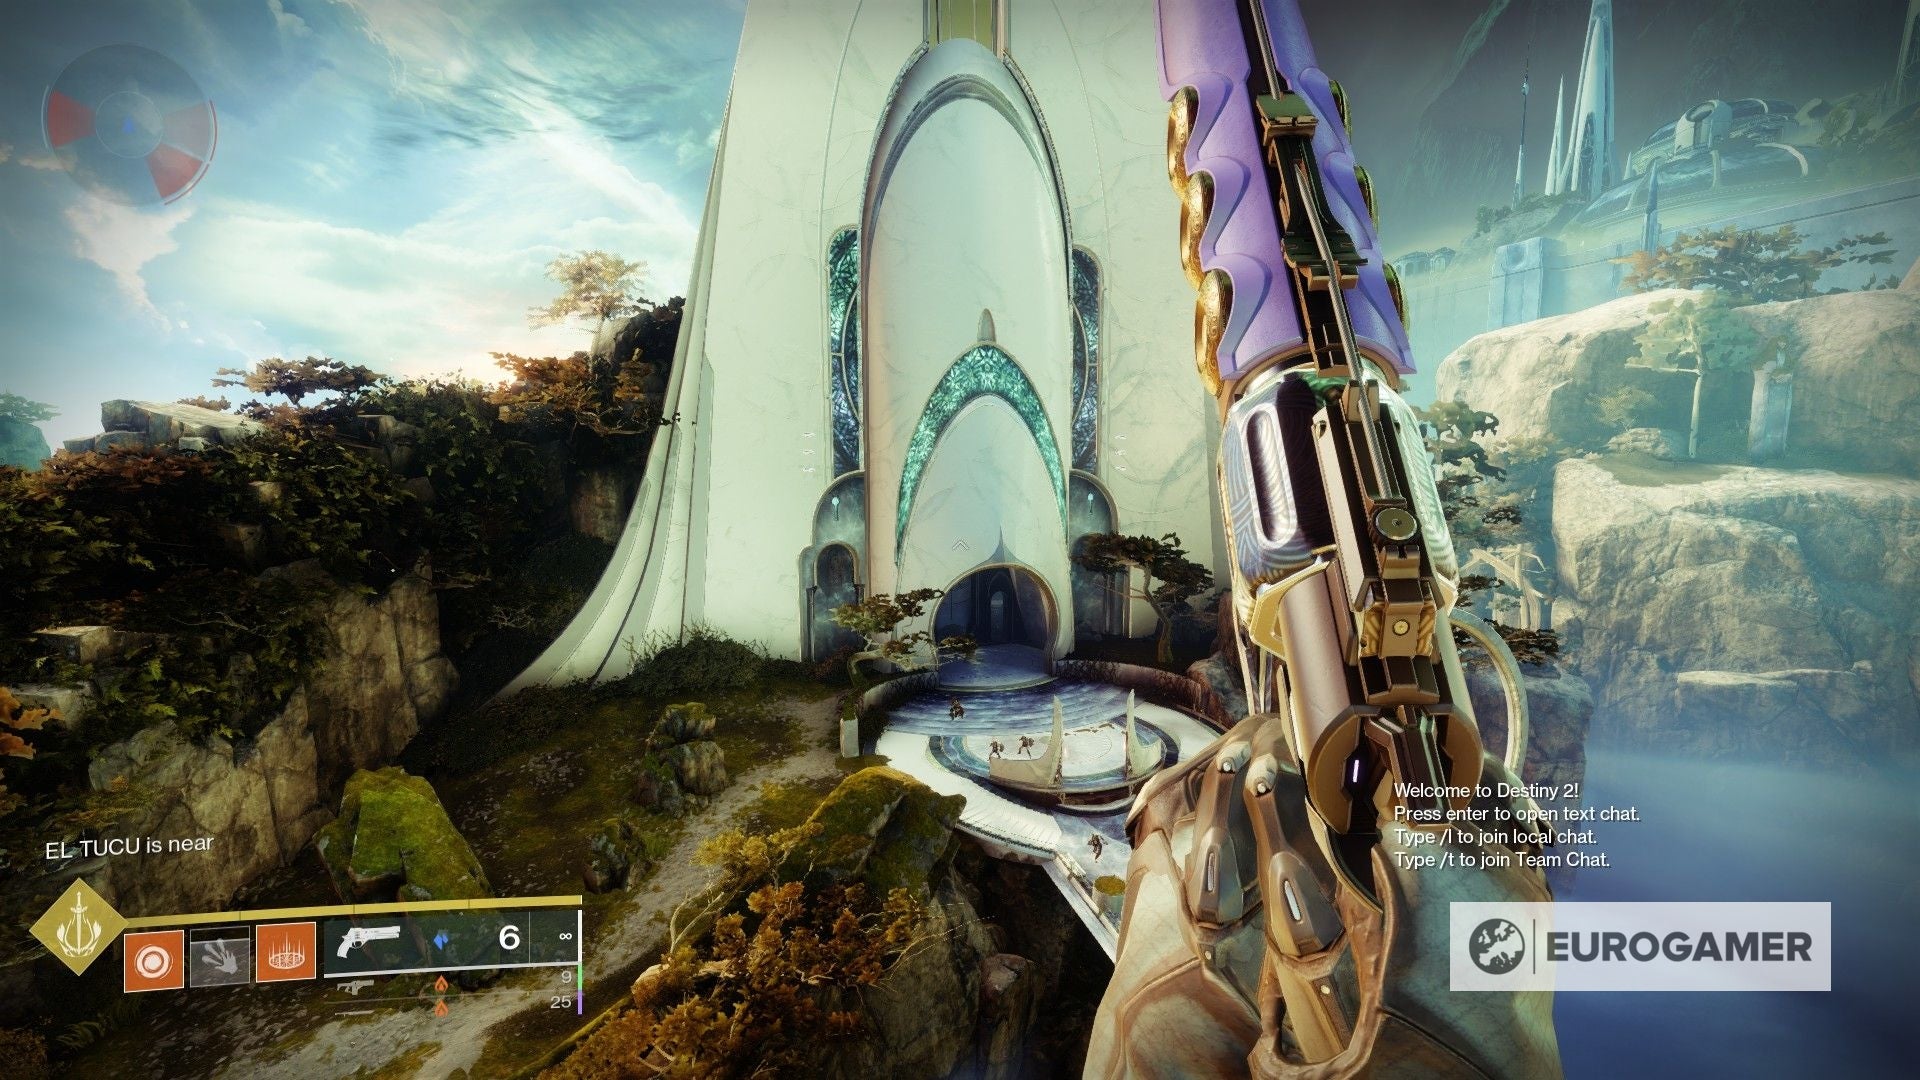
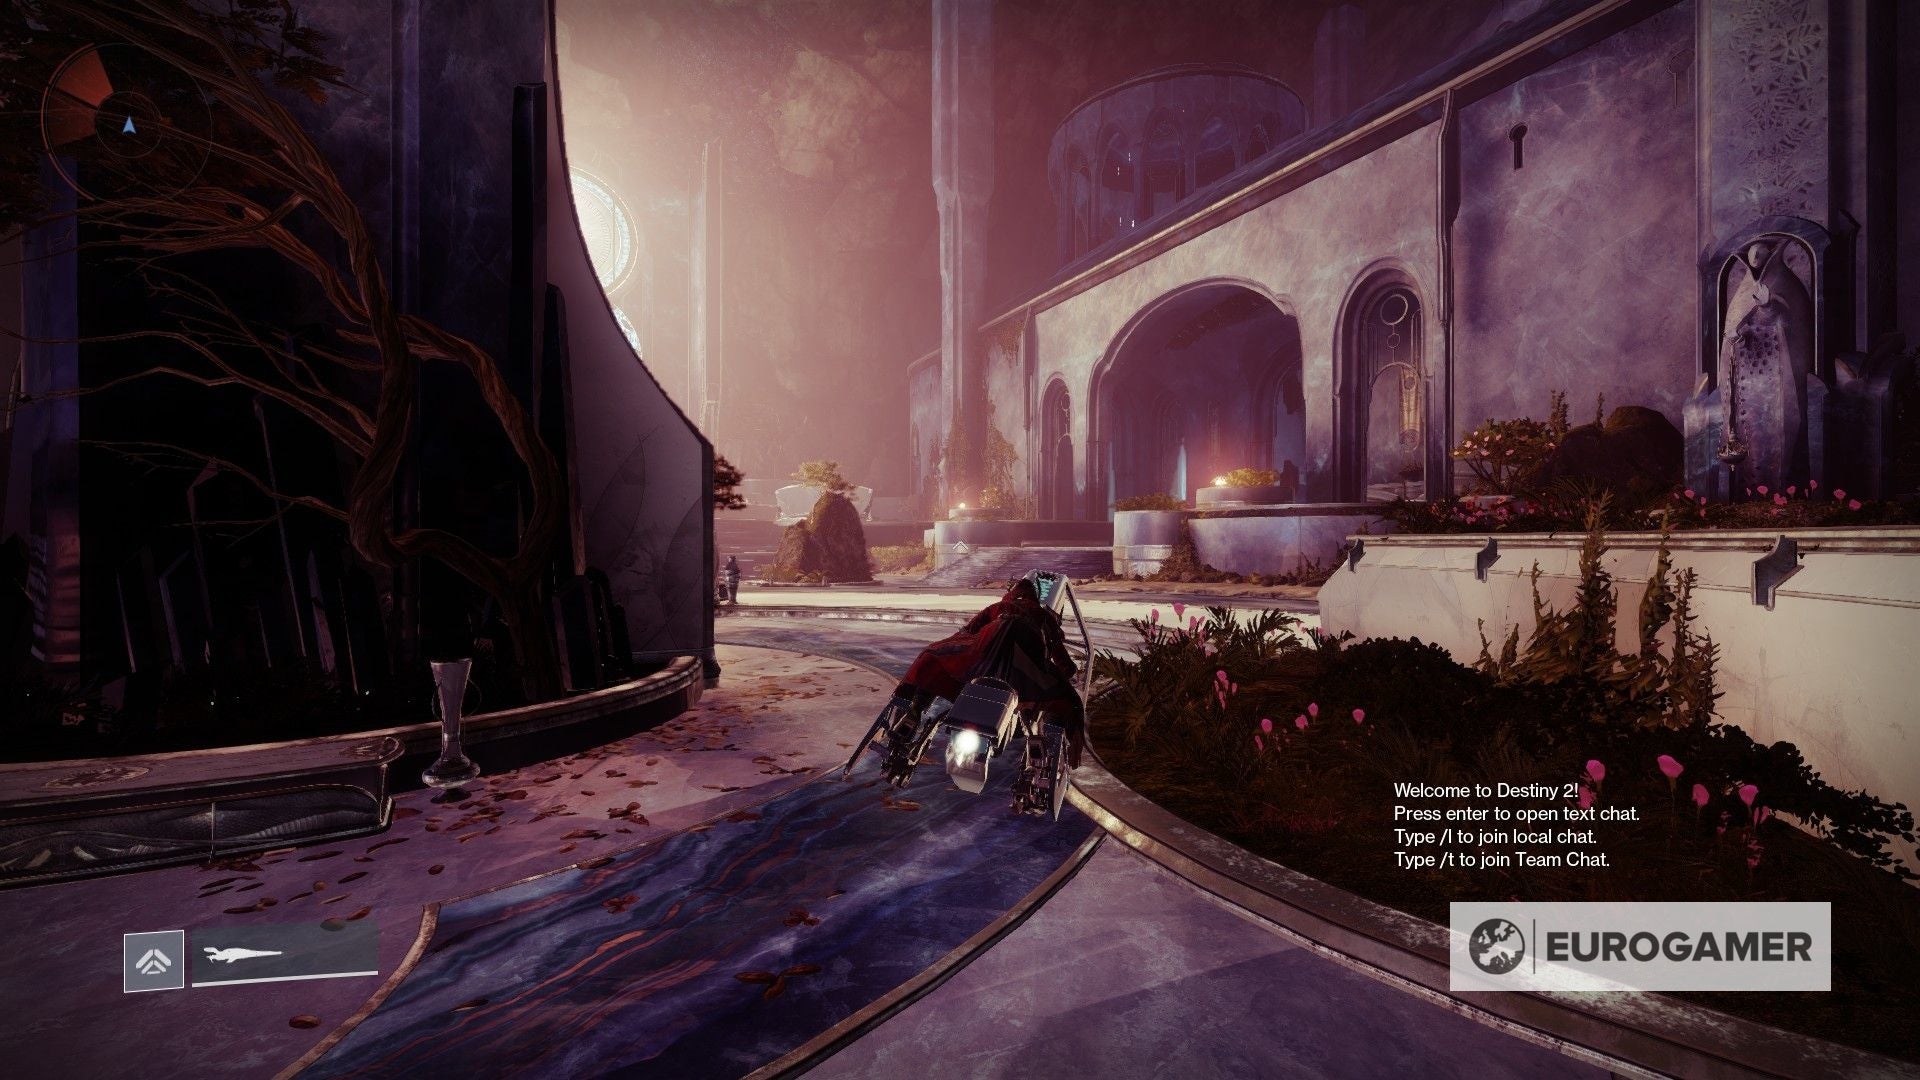
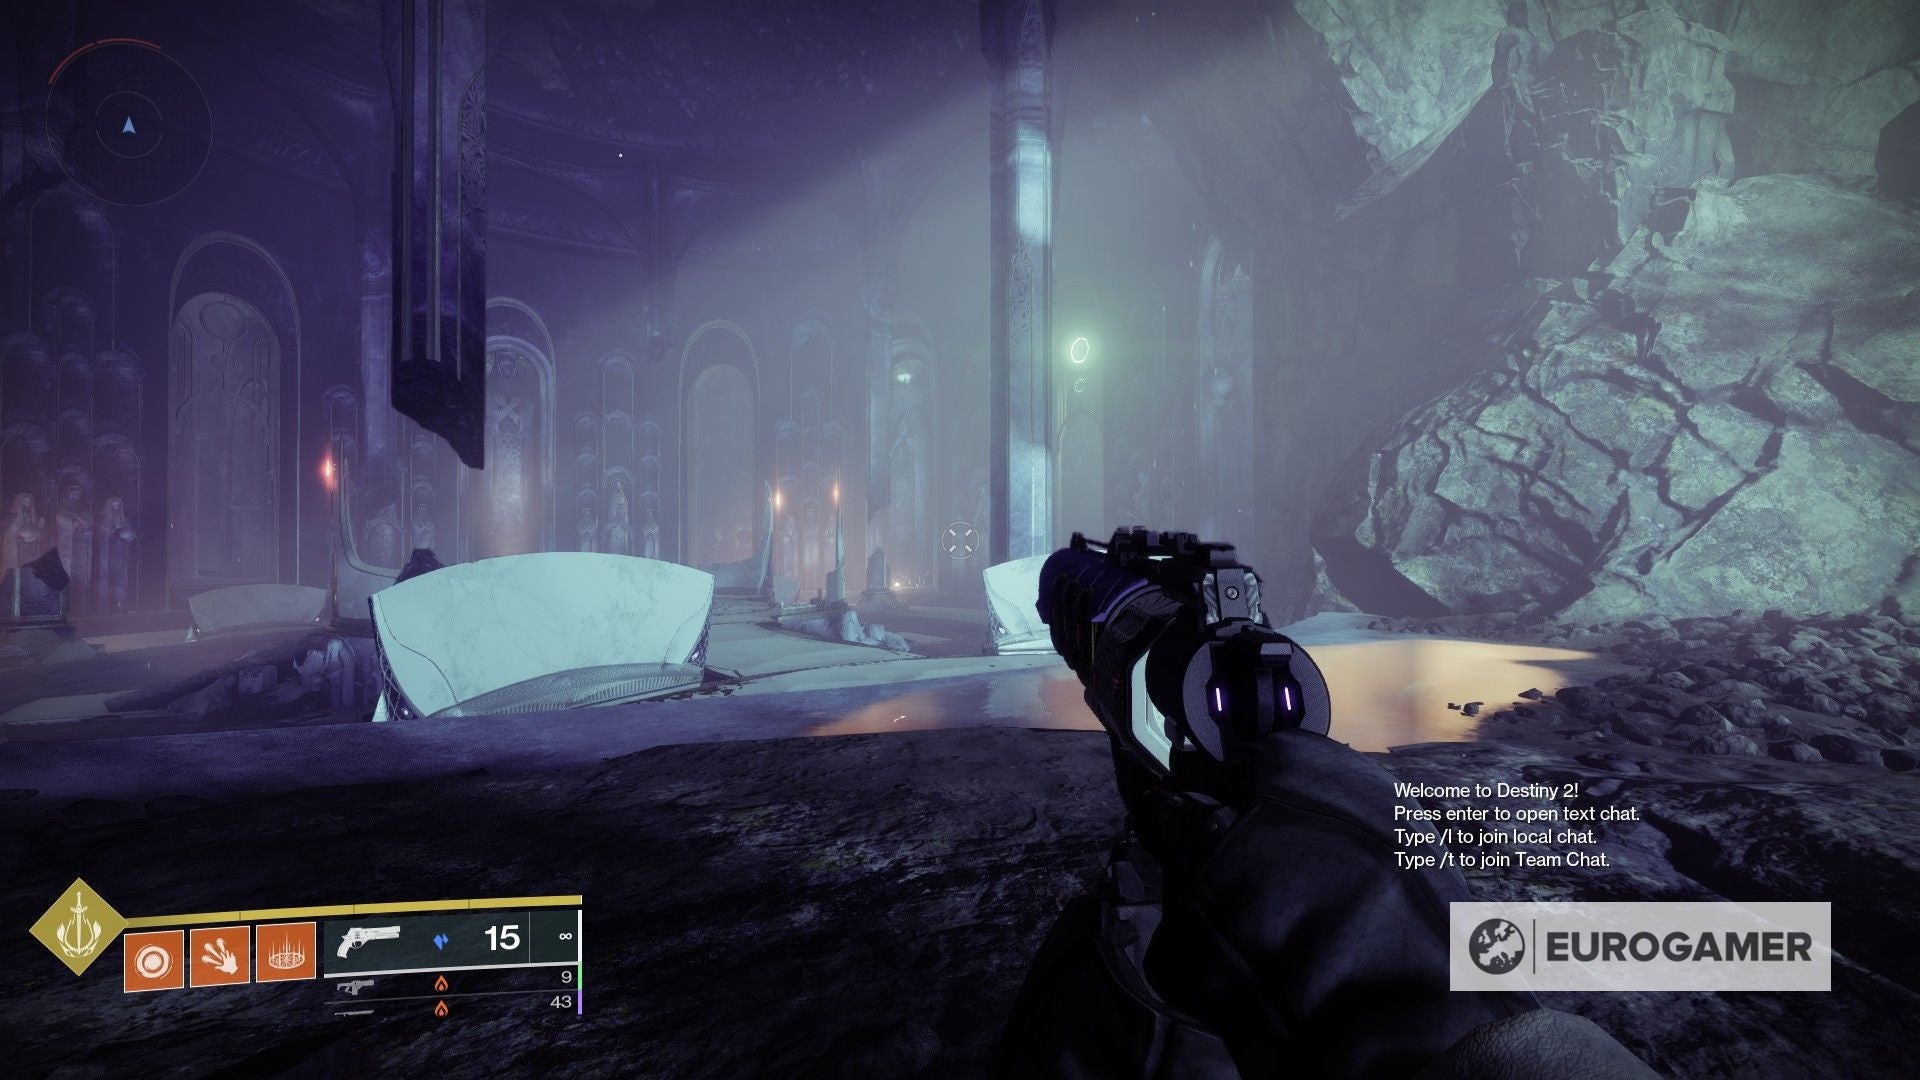
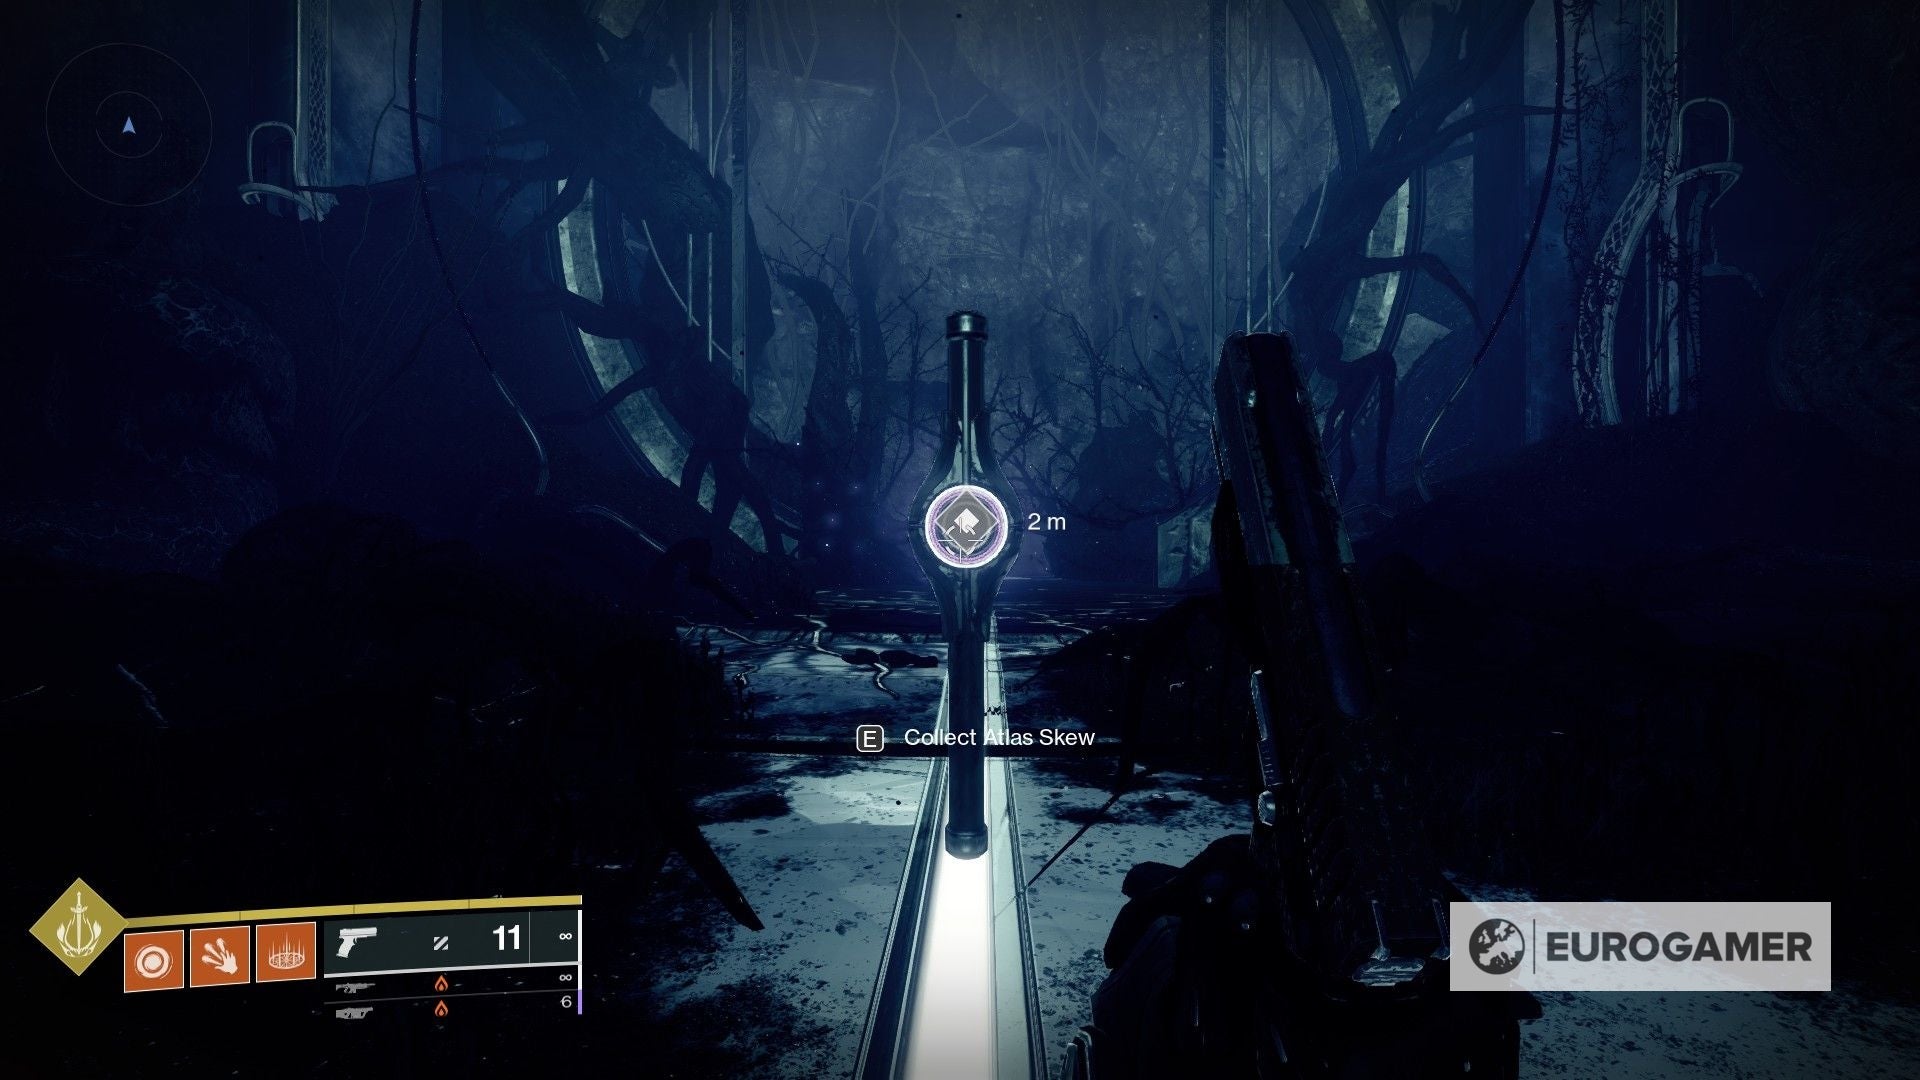
Harbinger Cathedral Atlas Skew location
The beginning Atlas Skew tin can be found in The Confluence, which is a hidden area within the Dreaming City.
Once you arrive to The Confluence from the Spine of Keres and offset moving through the corridors, y'all will stumble upon a room with a massive crystal almost right abroad.
Afterward the crystal, proceed moving forward to the next area. In that location are three pathways here - this is our master point of reference for the following Atlas Skews, so it's worth remembering it equally a starting point.
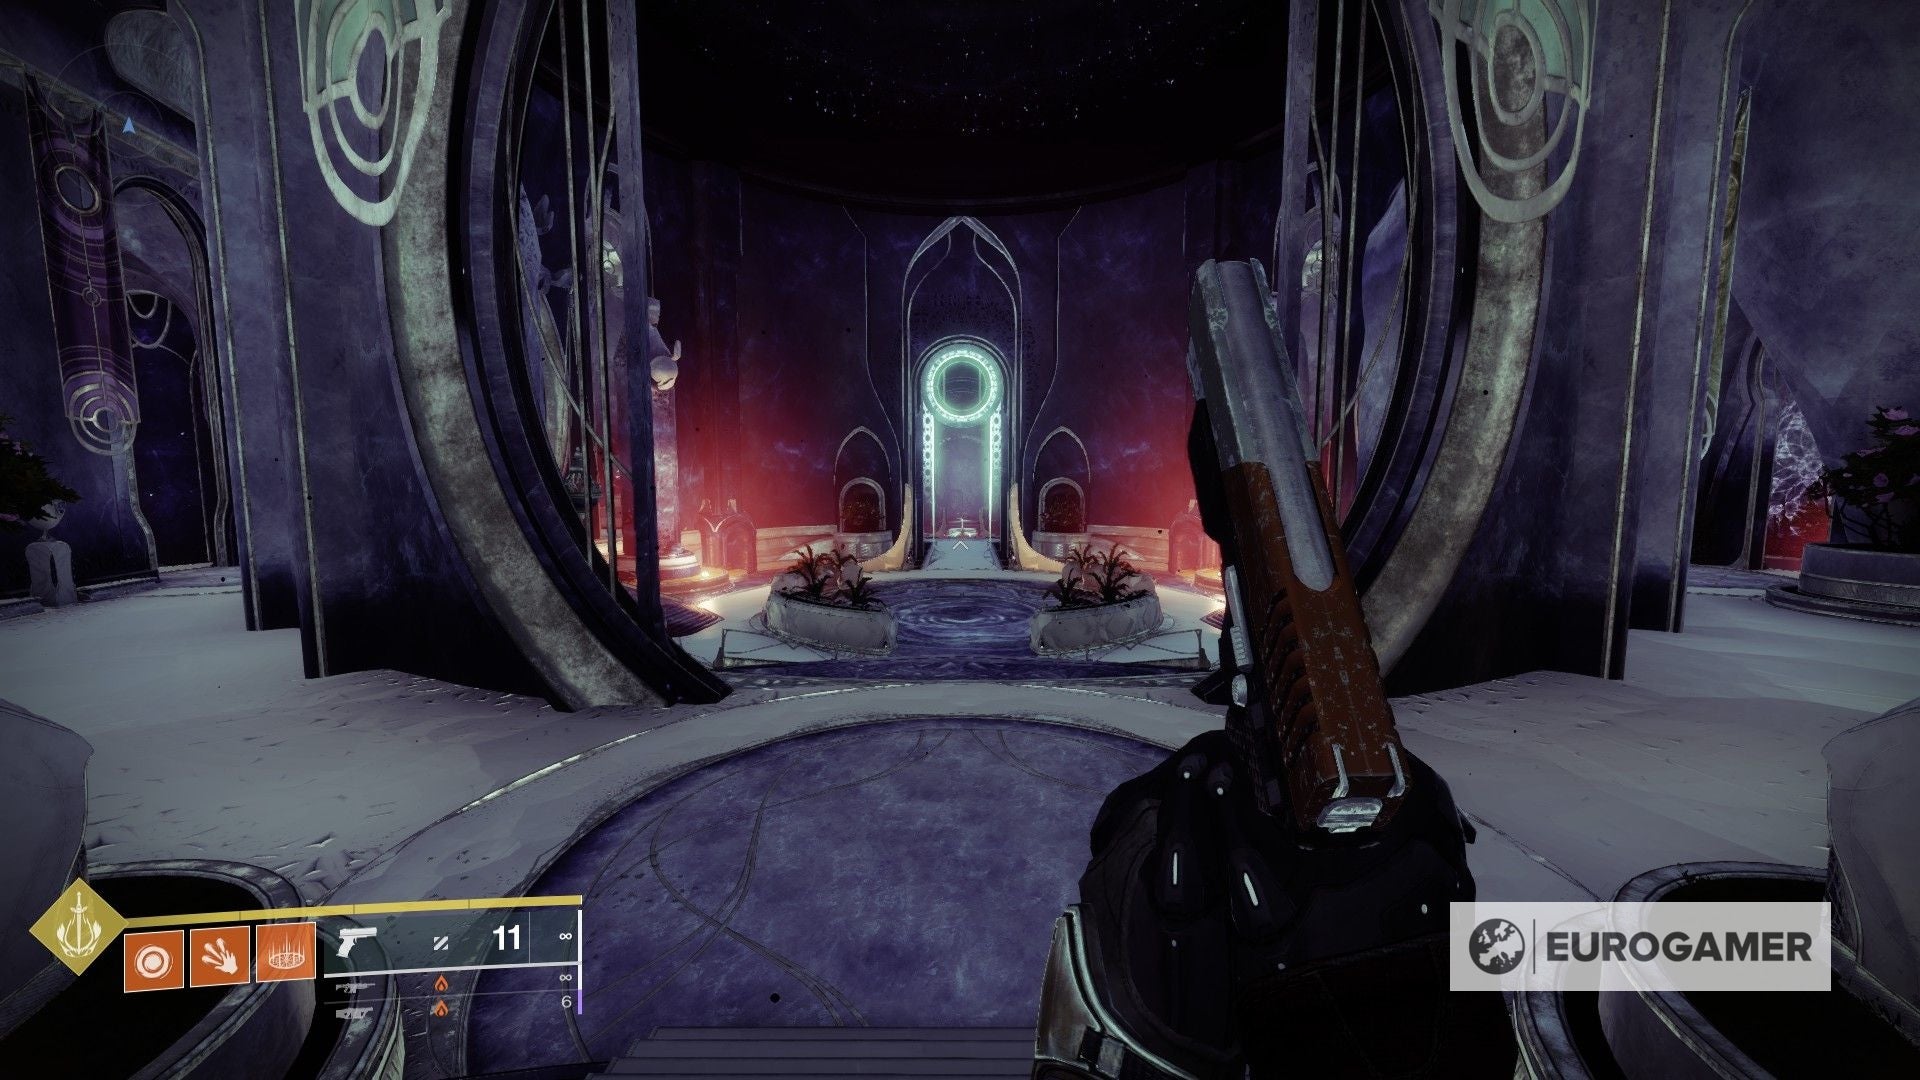
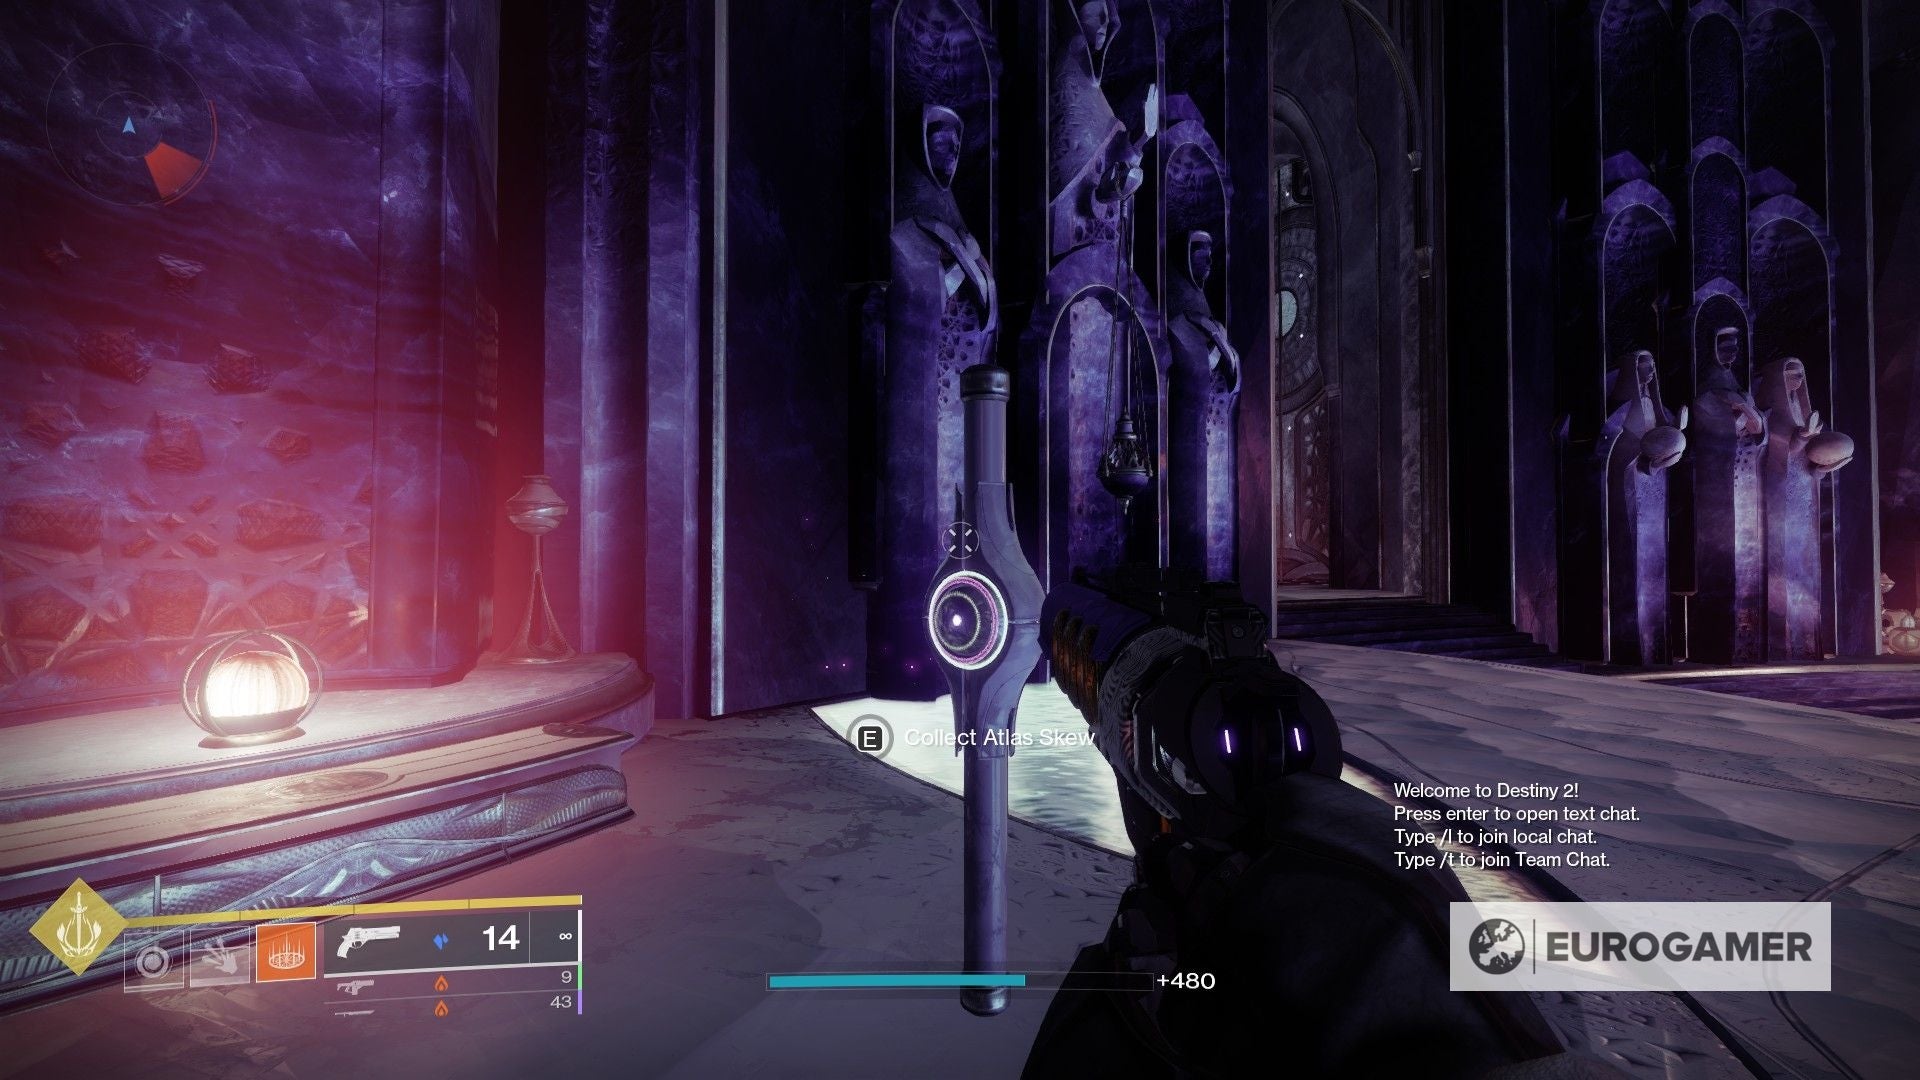
For this first Atlas Skew, nosotros're going to take the 1 to the left, through the door with the purple banners either side.
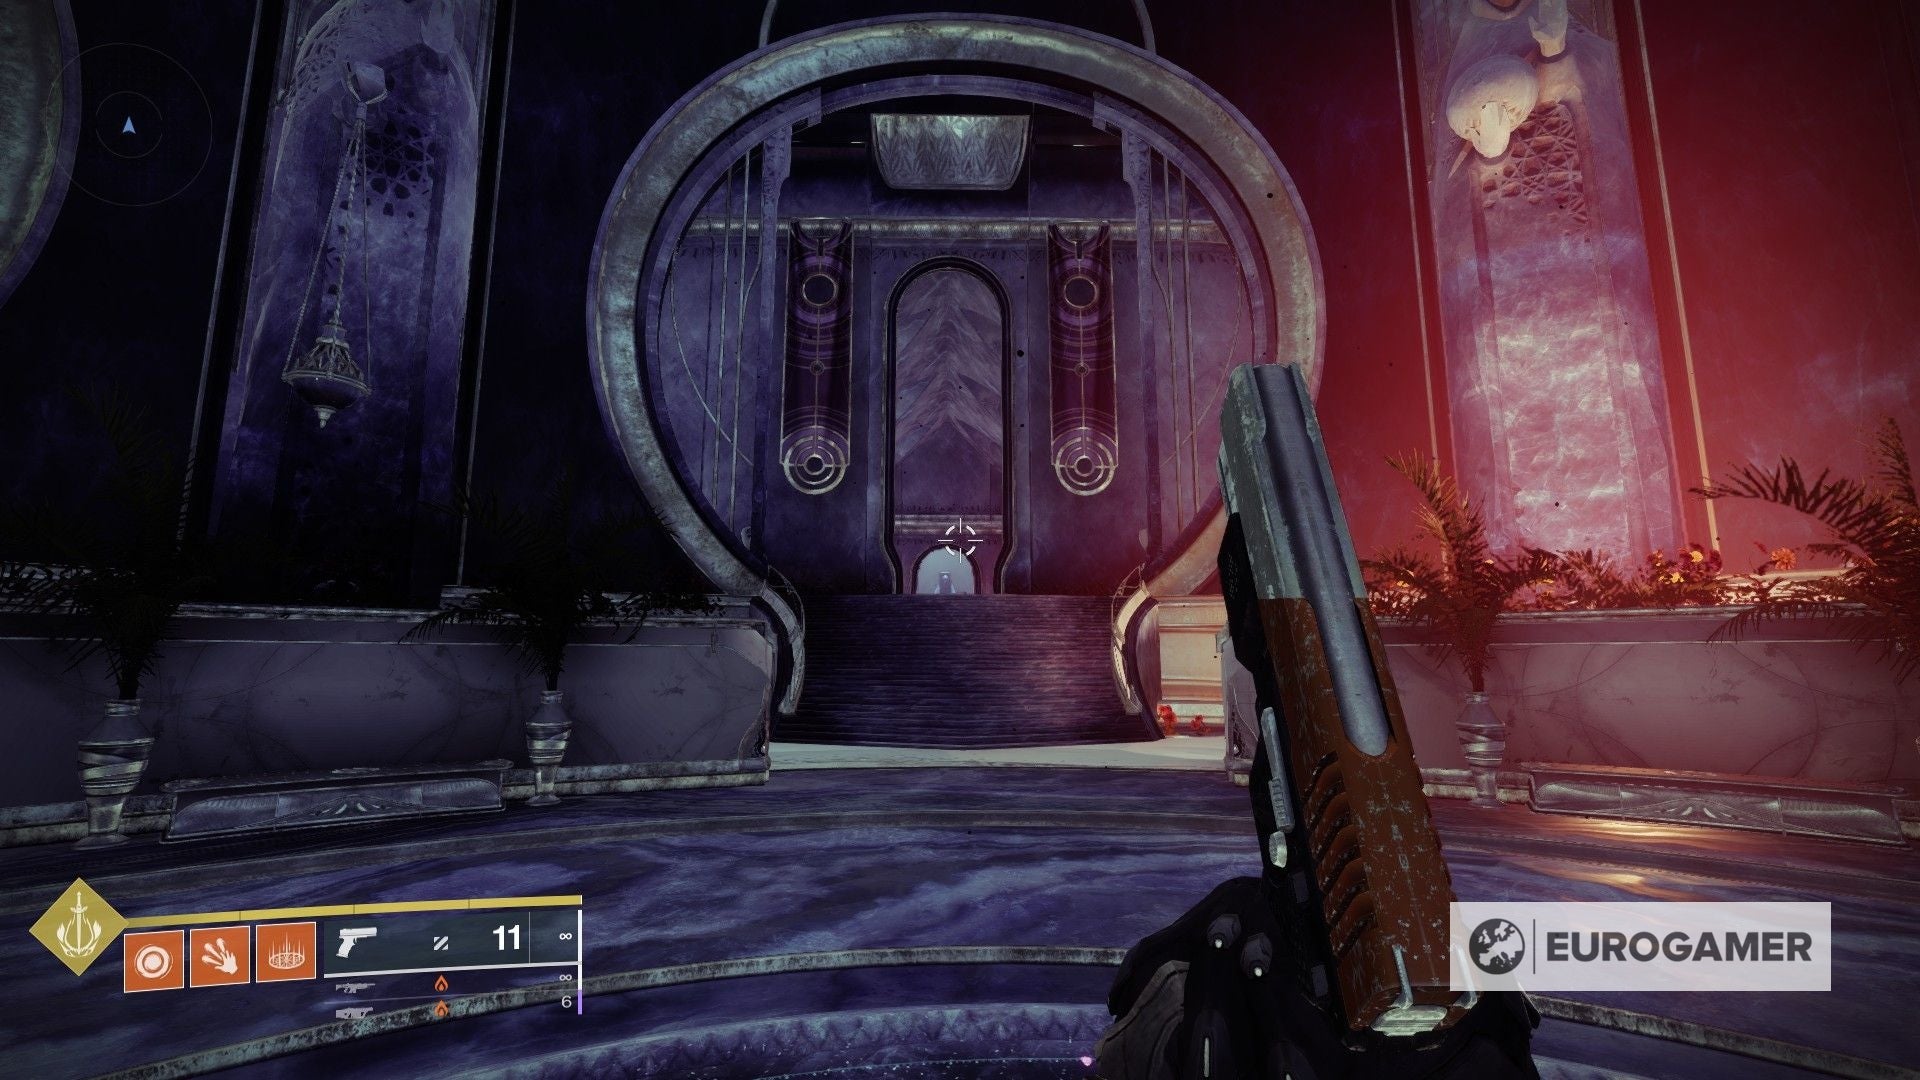
It'due south fairly straightforward from hither. All you have to do is continue moving through the corridor, get past the first statue, and run some more.
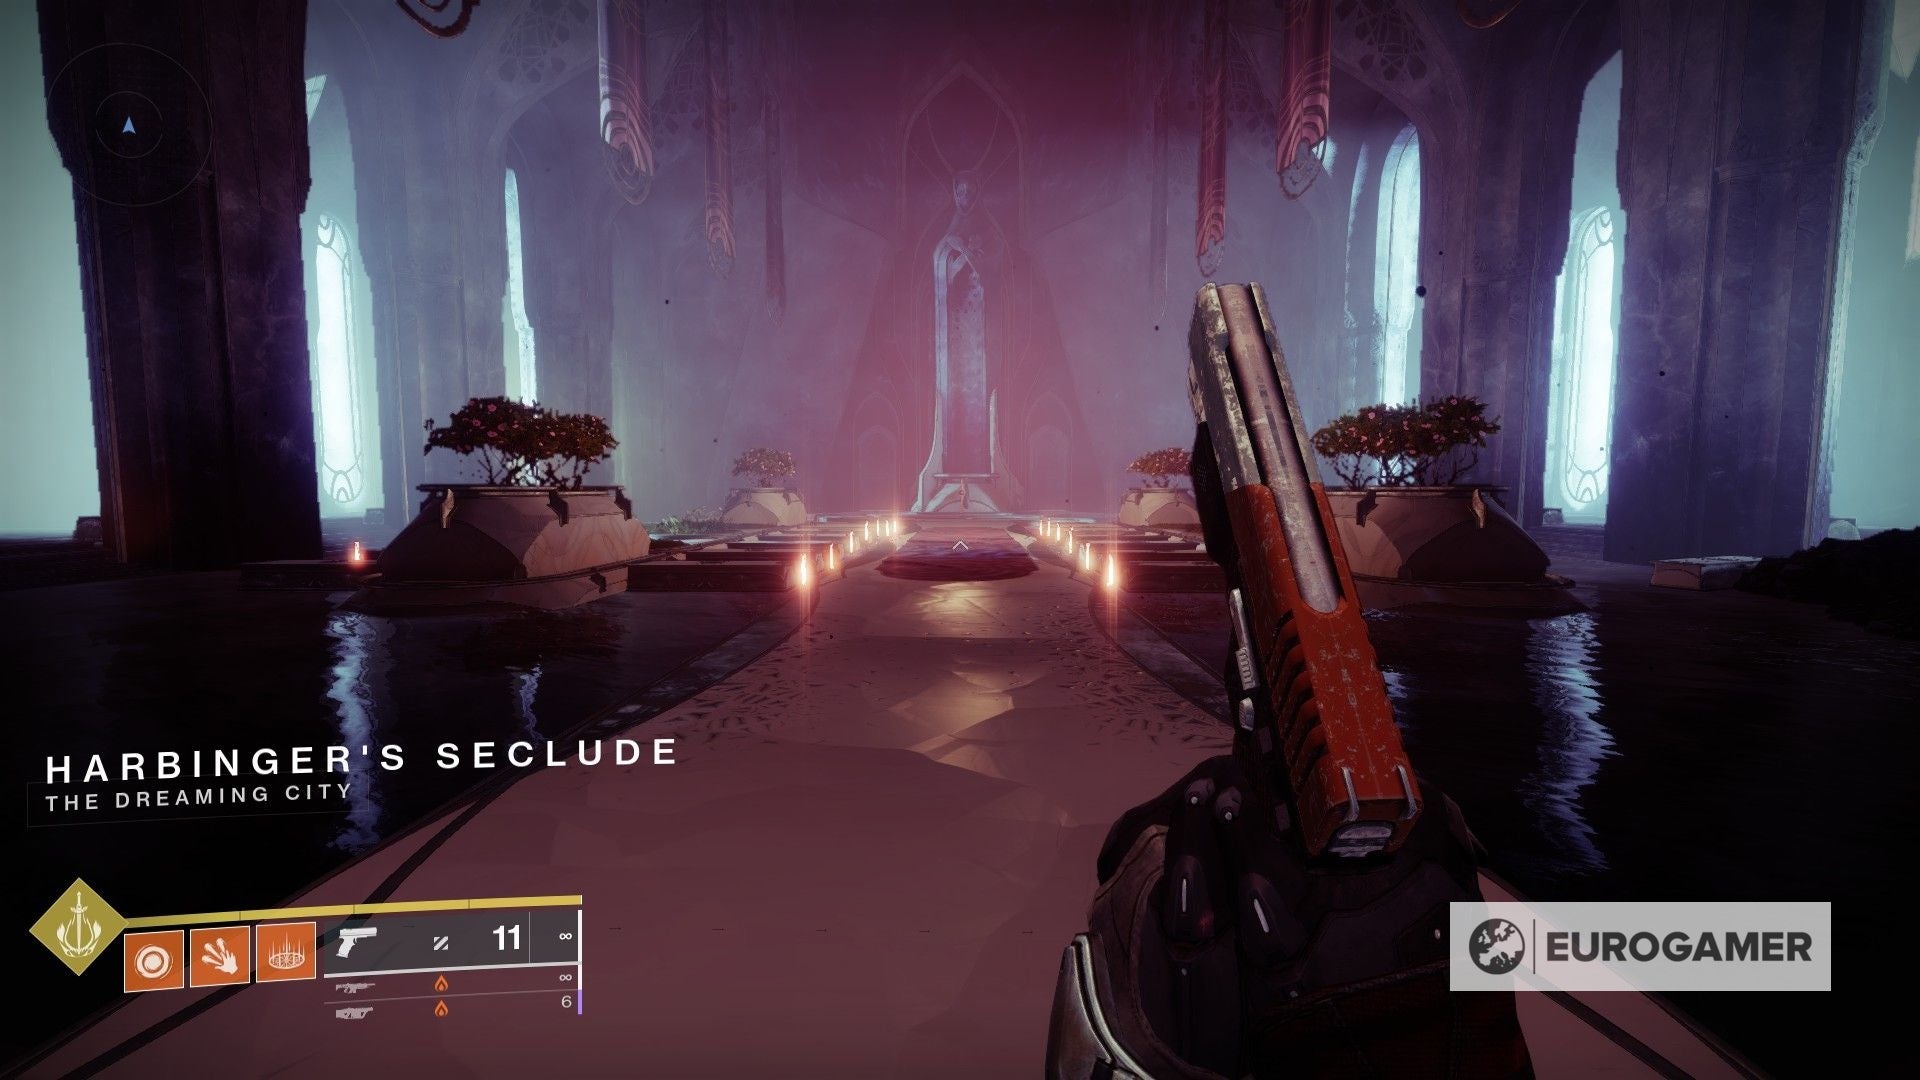
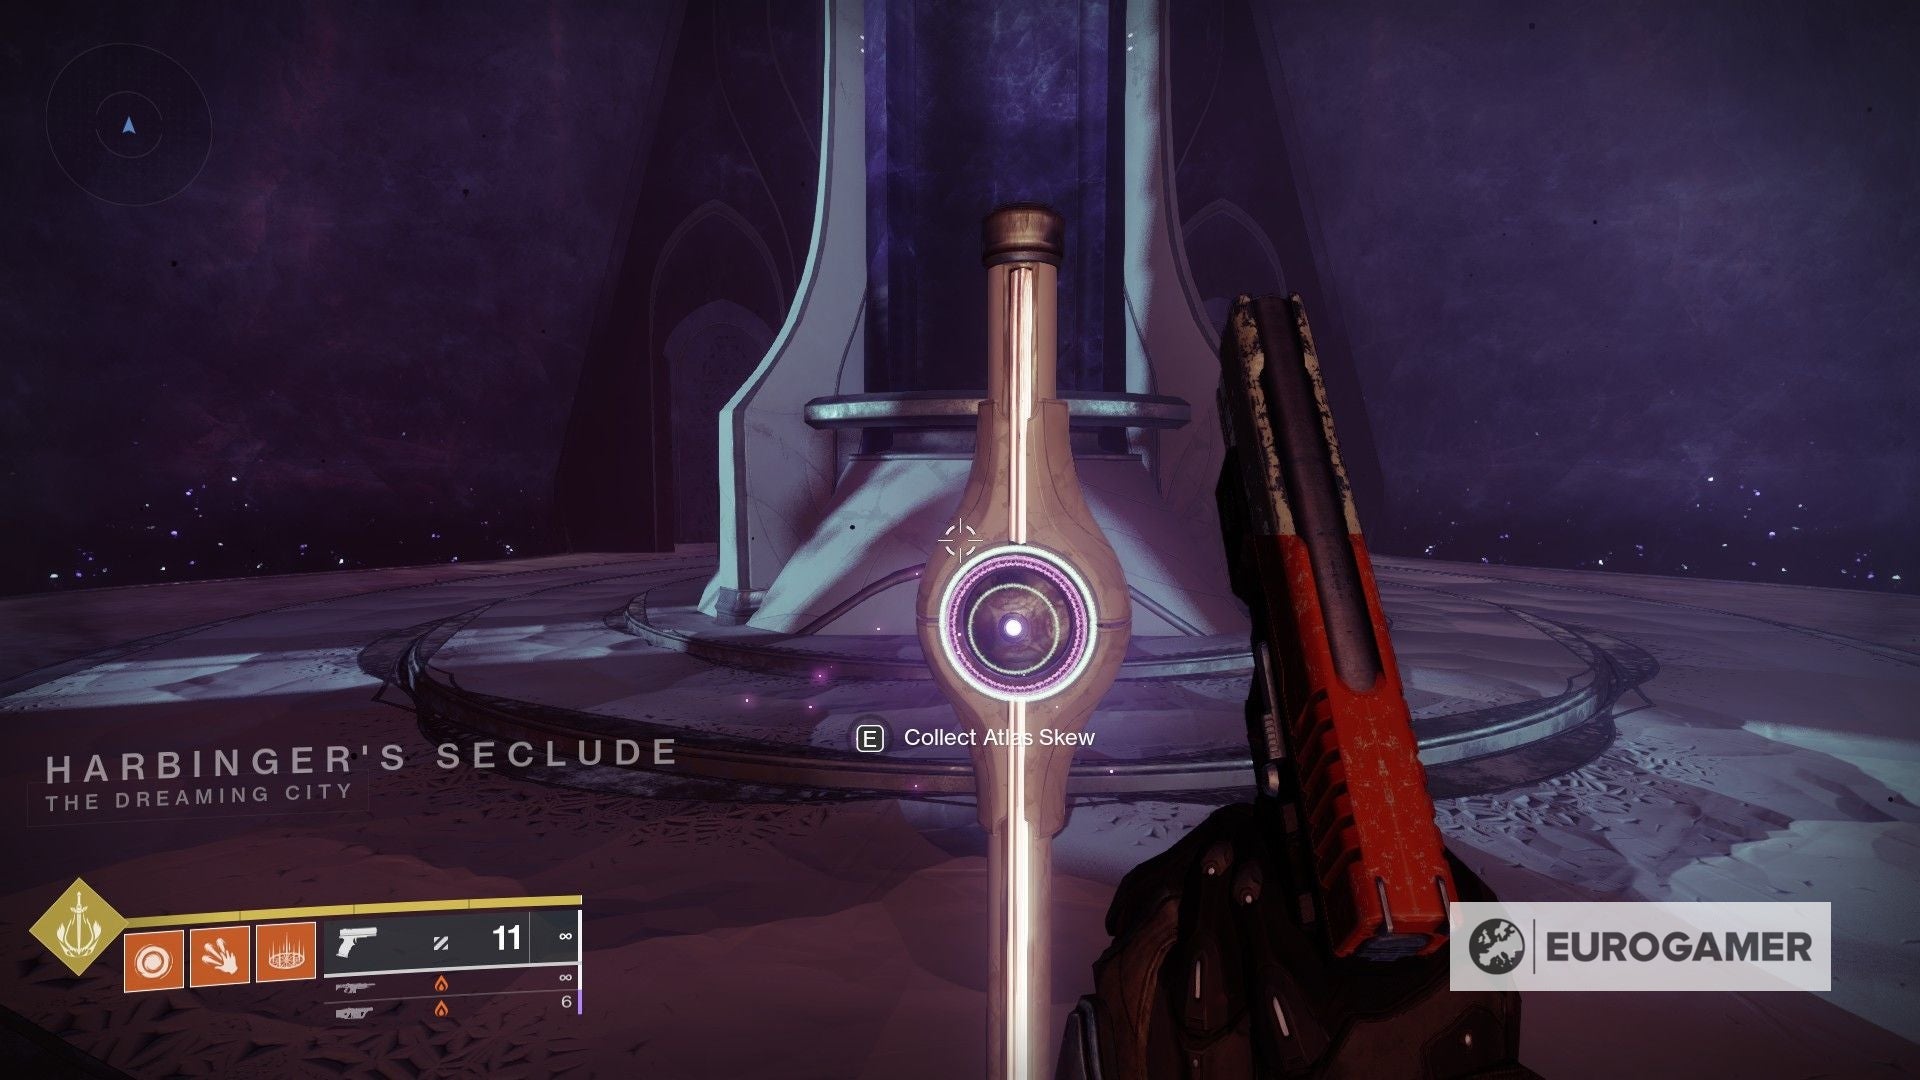
The end of the hall will lead y'all to the Straw Cathedral, where you lot'll find the Atlas Skew next to the statue.
Iv more than to go!
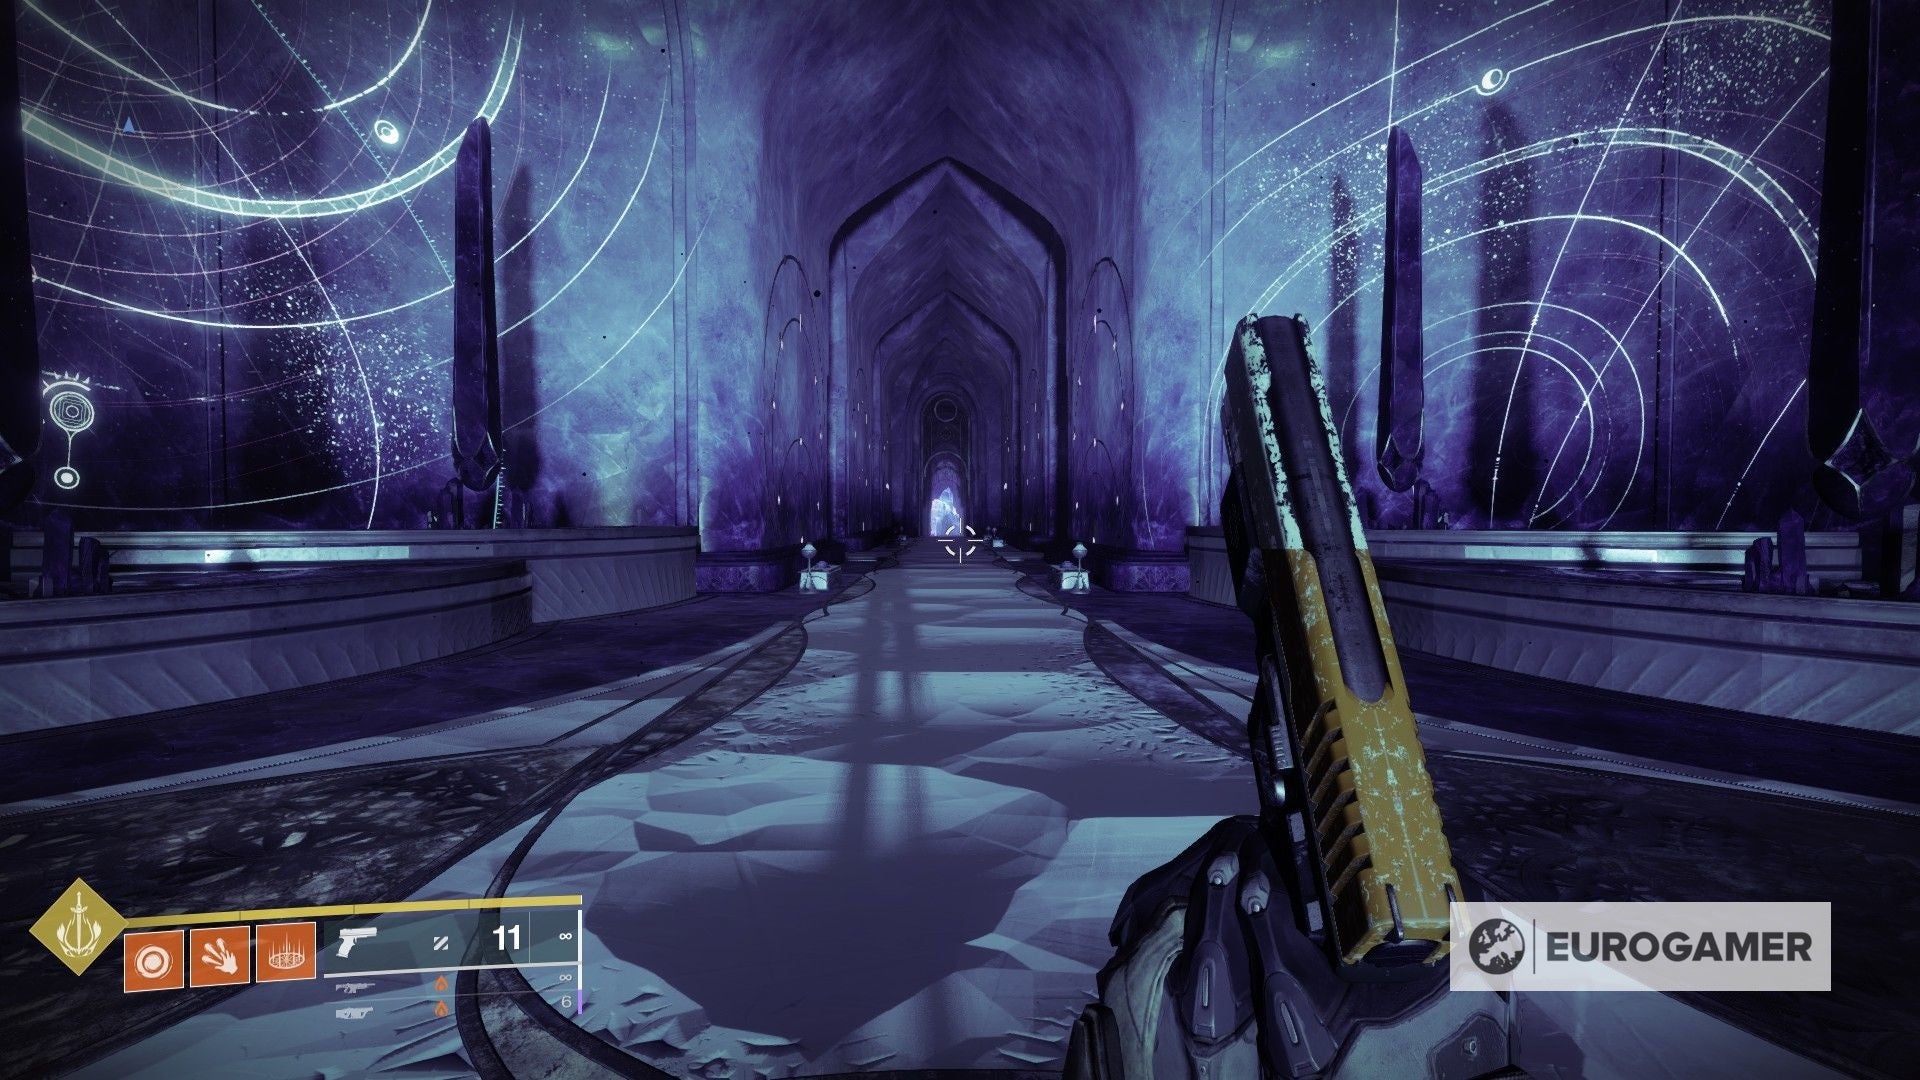
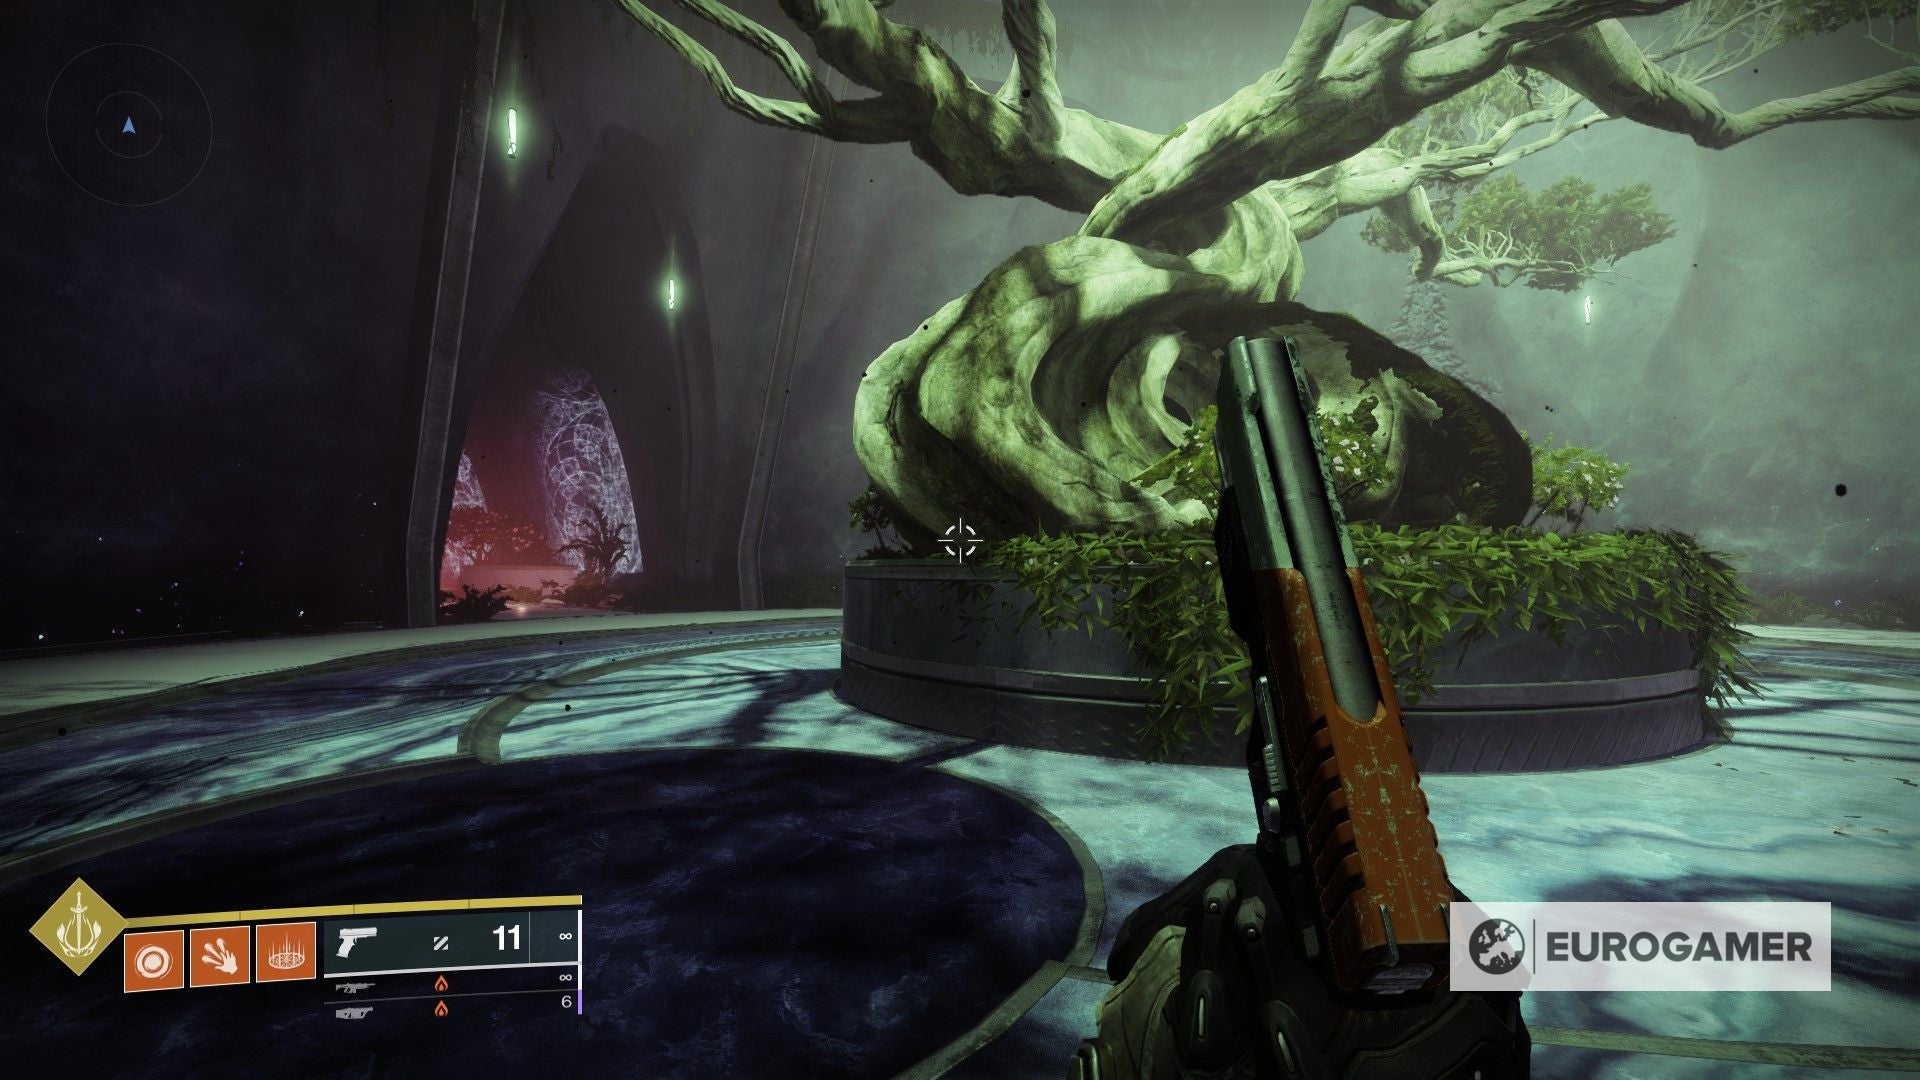
Confluence Tree Triad Atlas Skew location
The 2nd Atlas Skew tin can be found in The Confluence, which is a hidden expanse within the Dreaming City.
Now that we're familiarised with the layout of The Confluence, nosotros're taking the main room with the three passageways equally the starting bespeak.
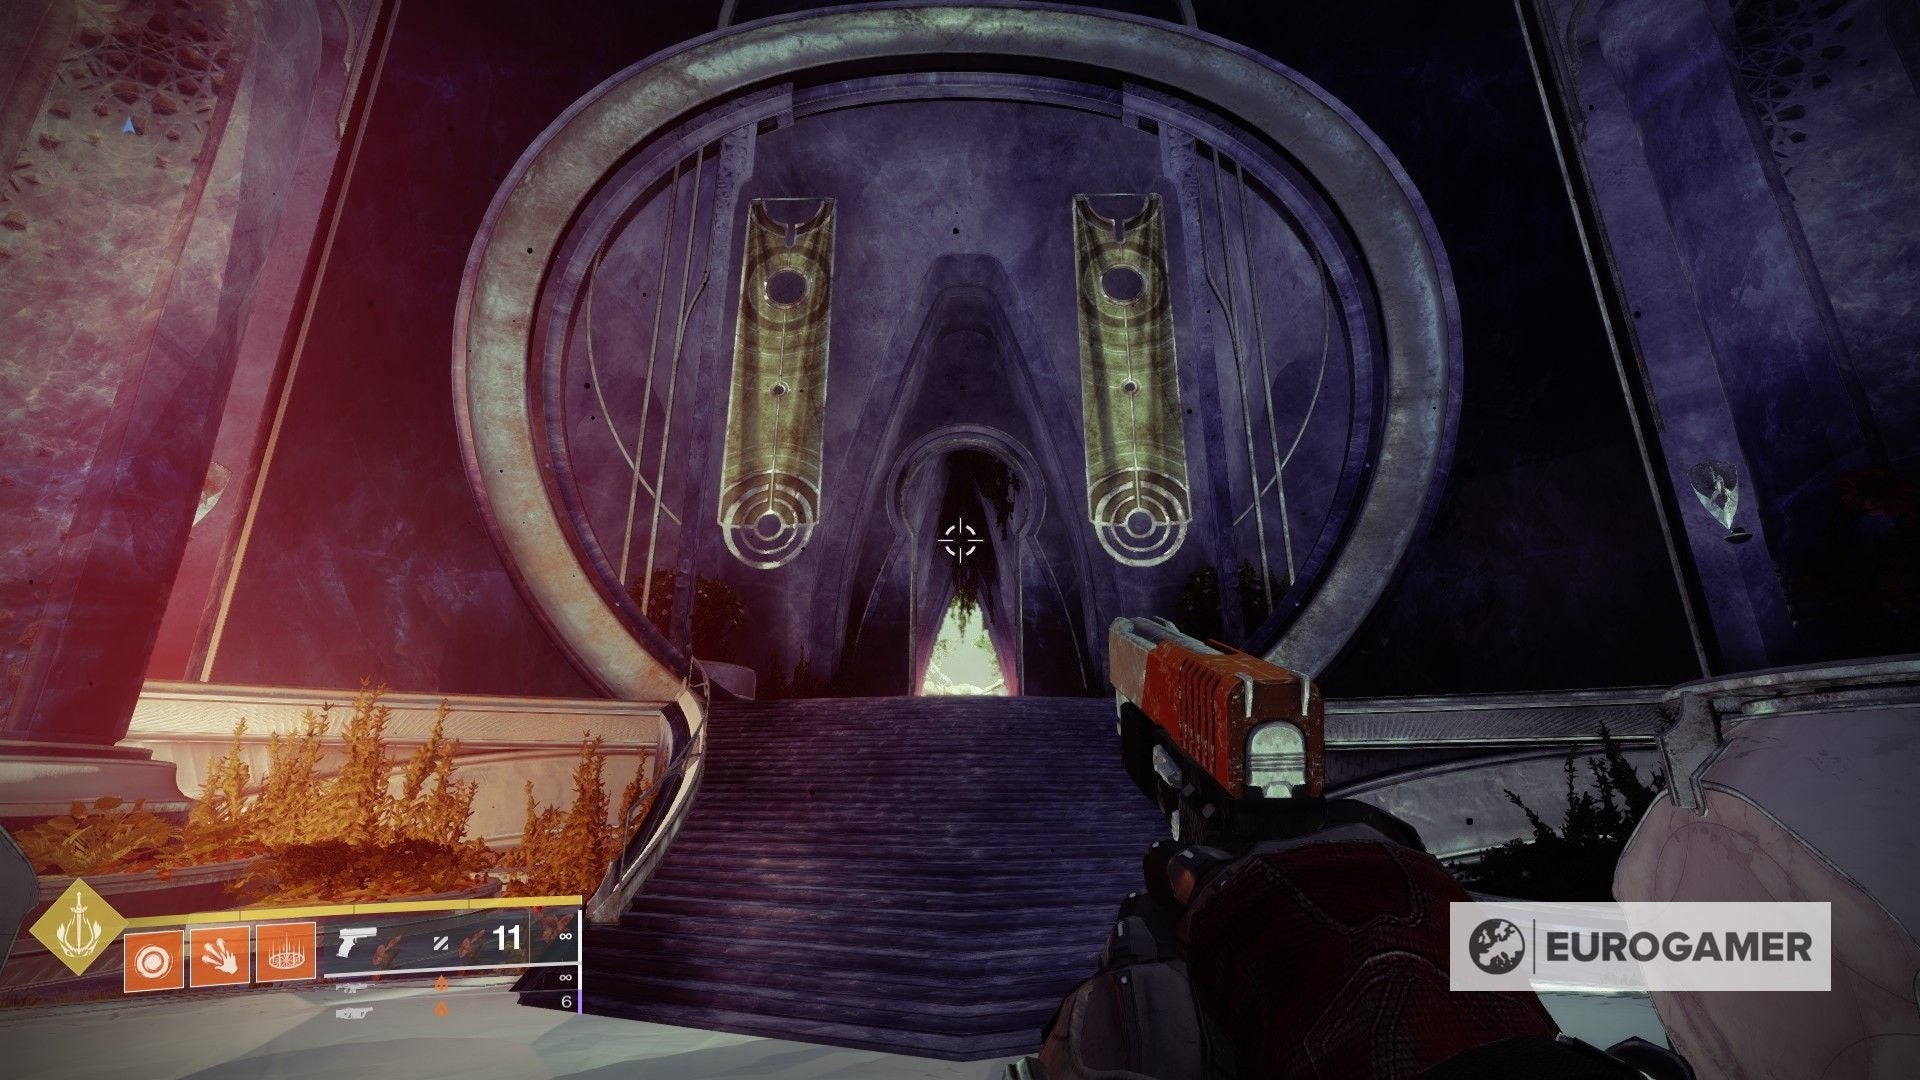
From this spot, head within the large door with the xanthous banners on each side.

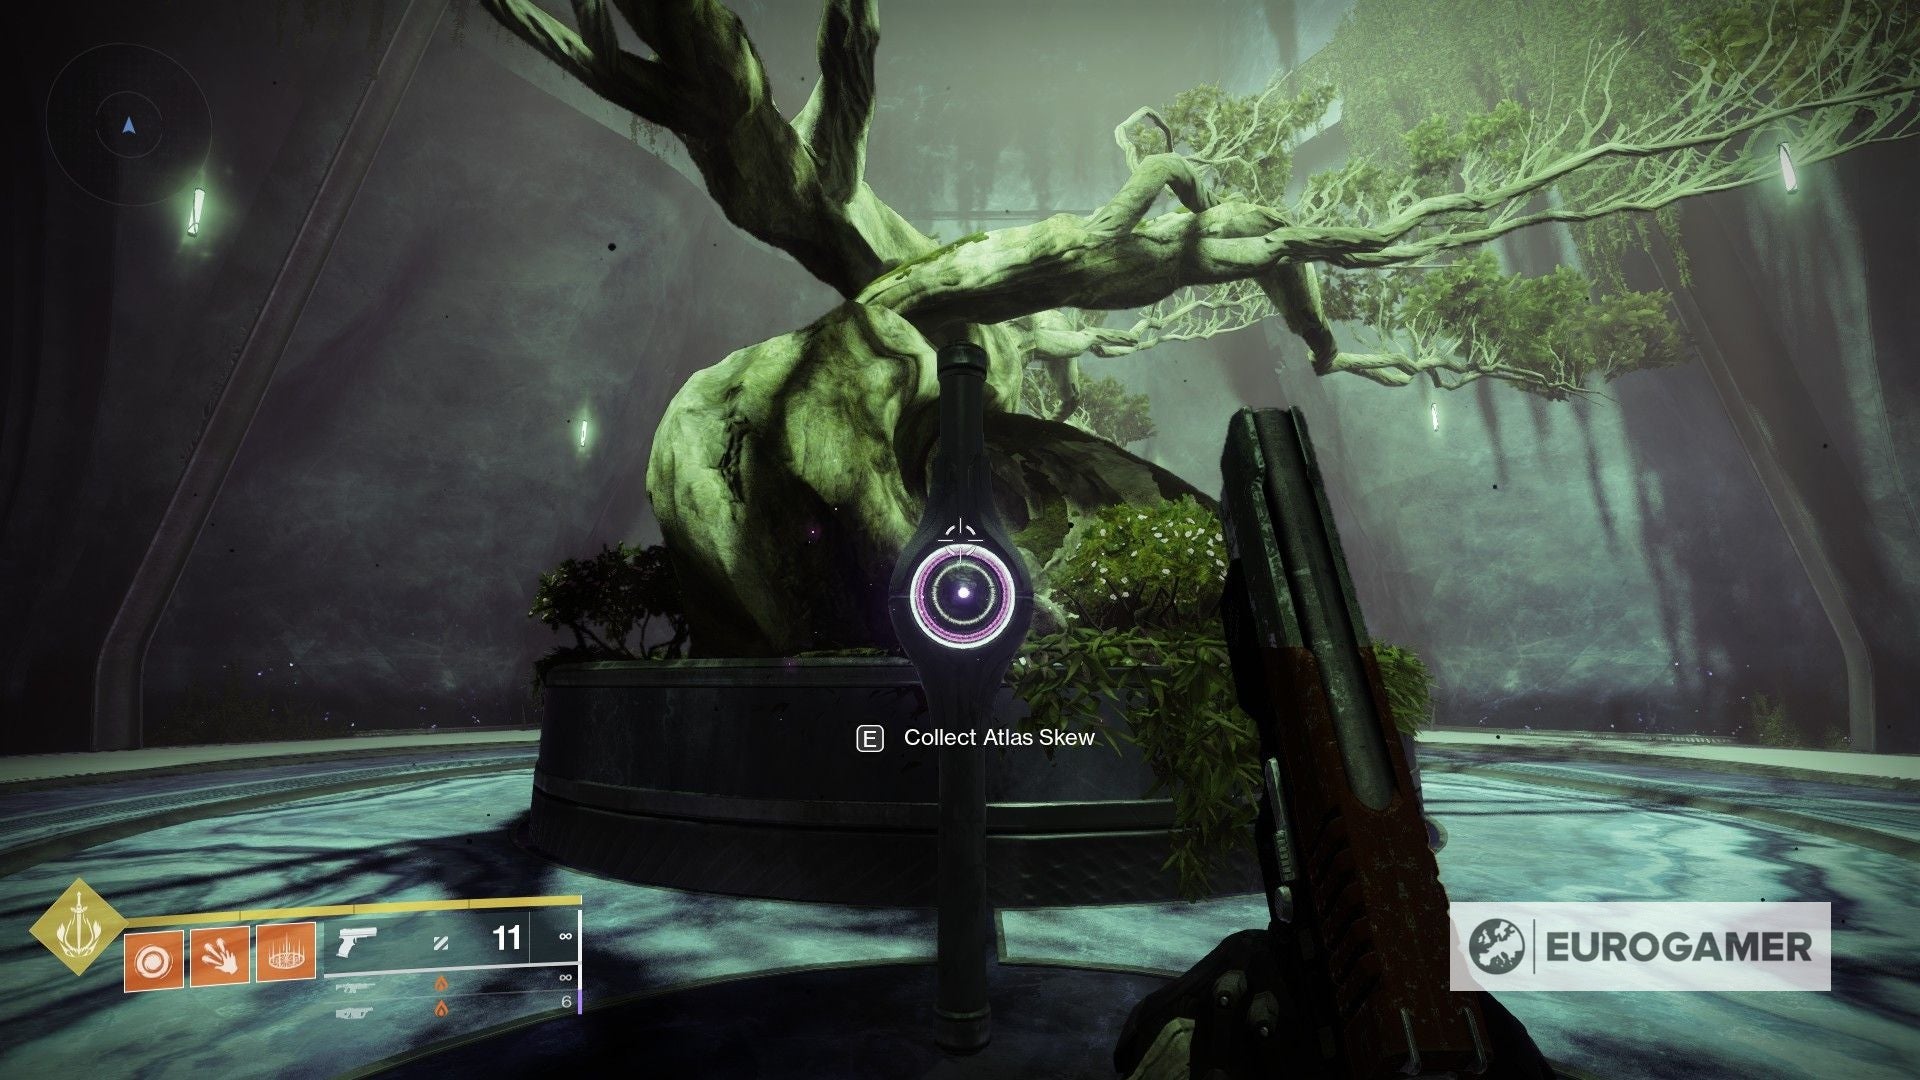
All you have to do is head move through the corridor until you're in the room with the tree. Then, grab the Atlas Skew and yous'll be set.
Three more to get!
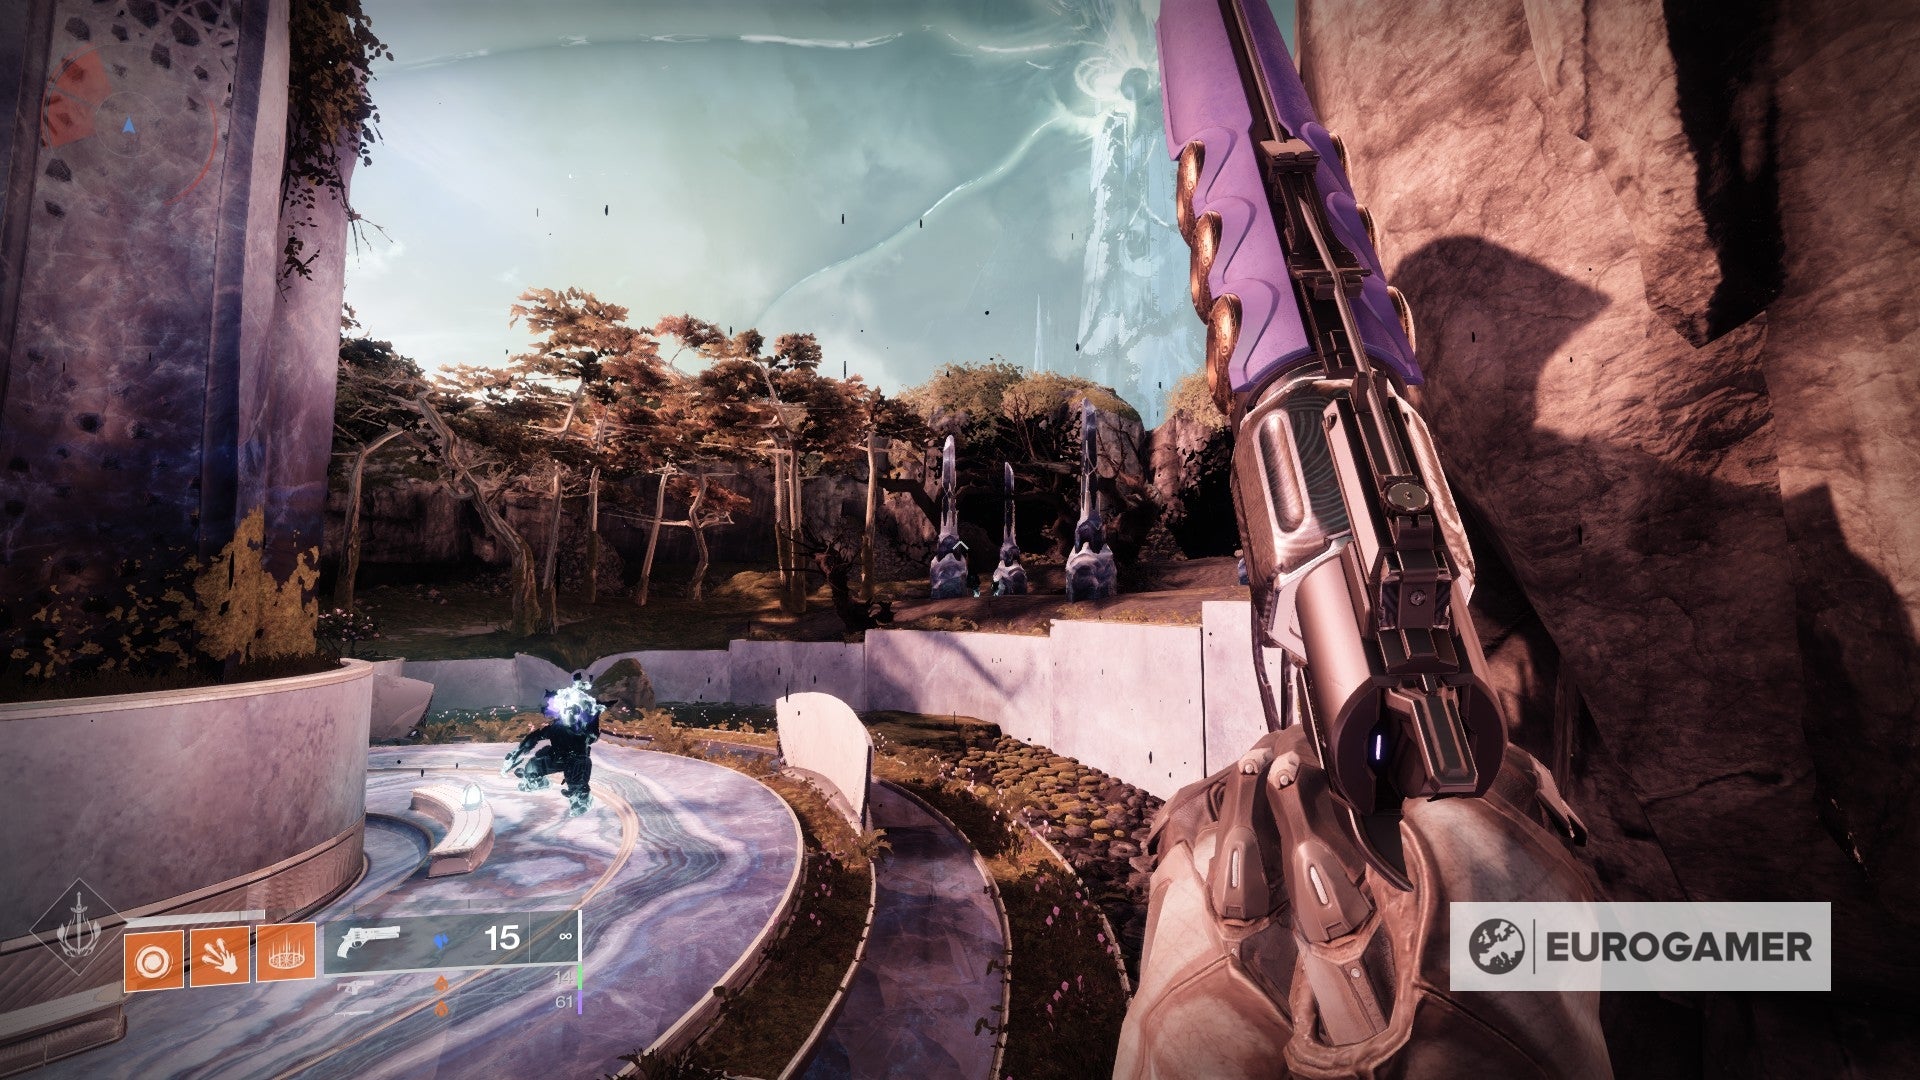
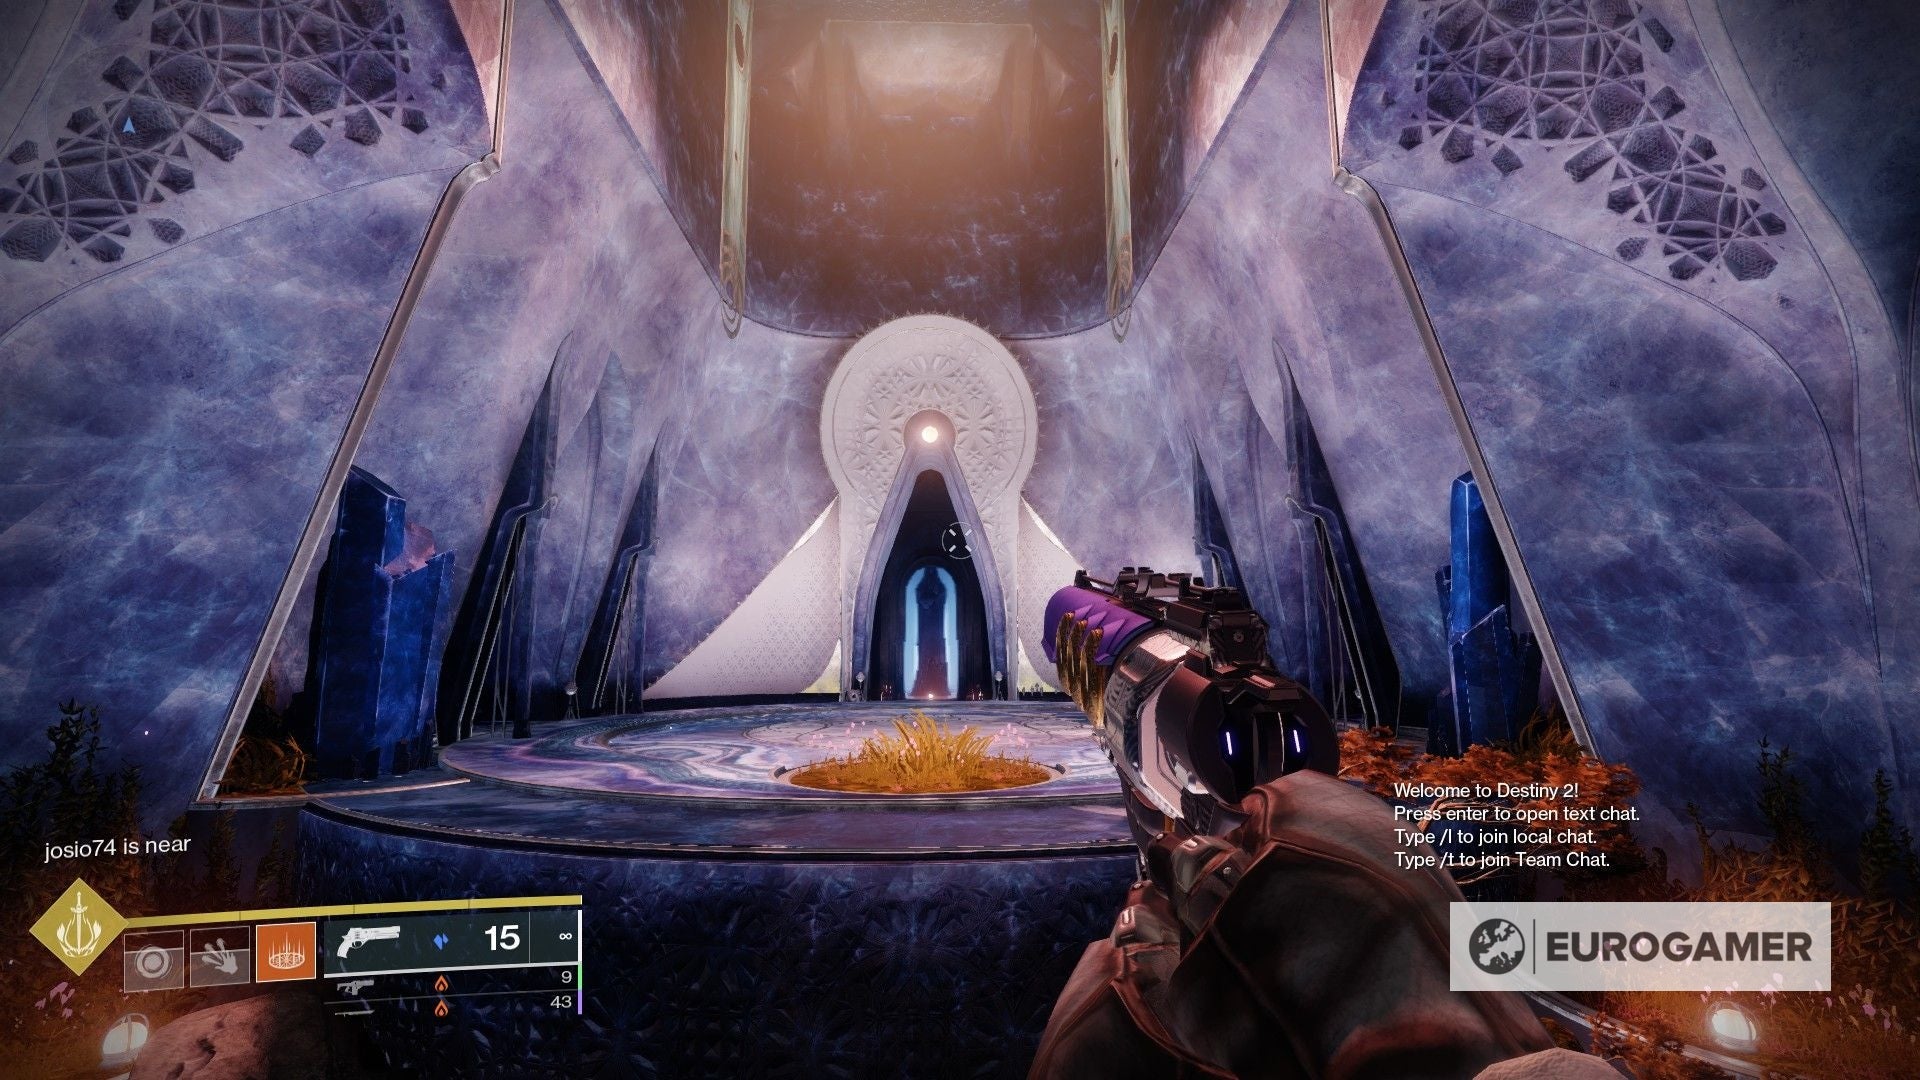
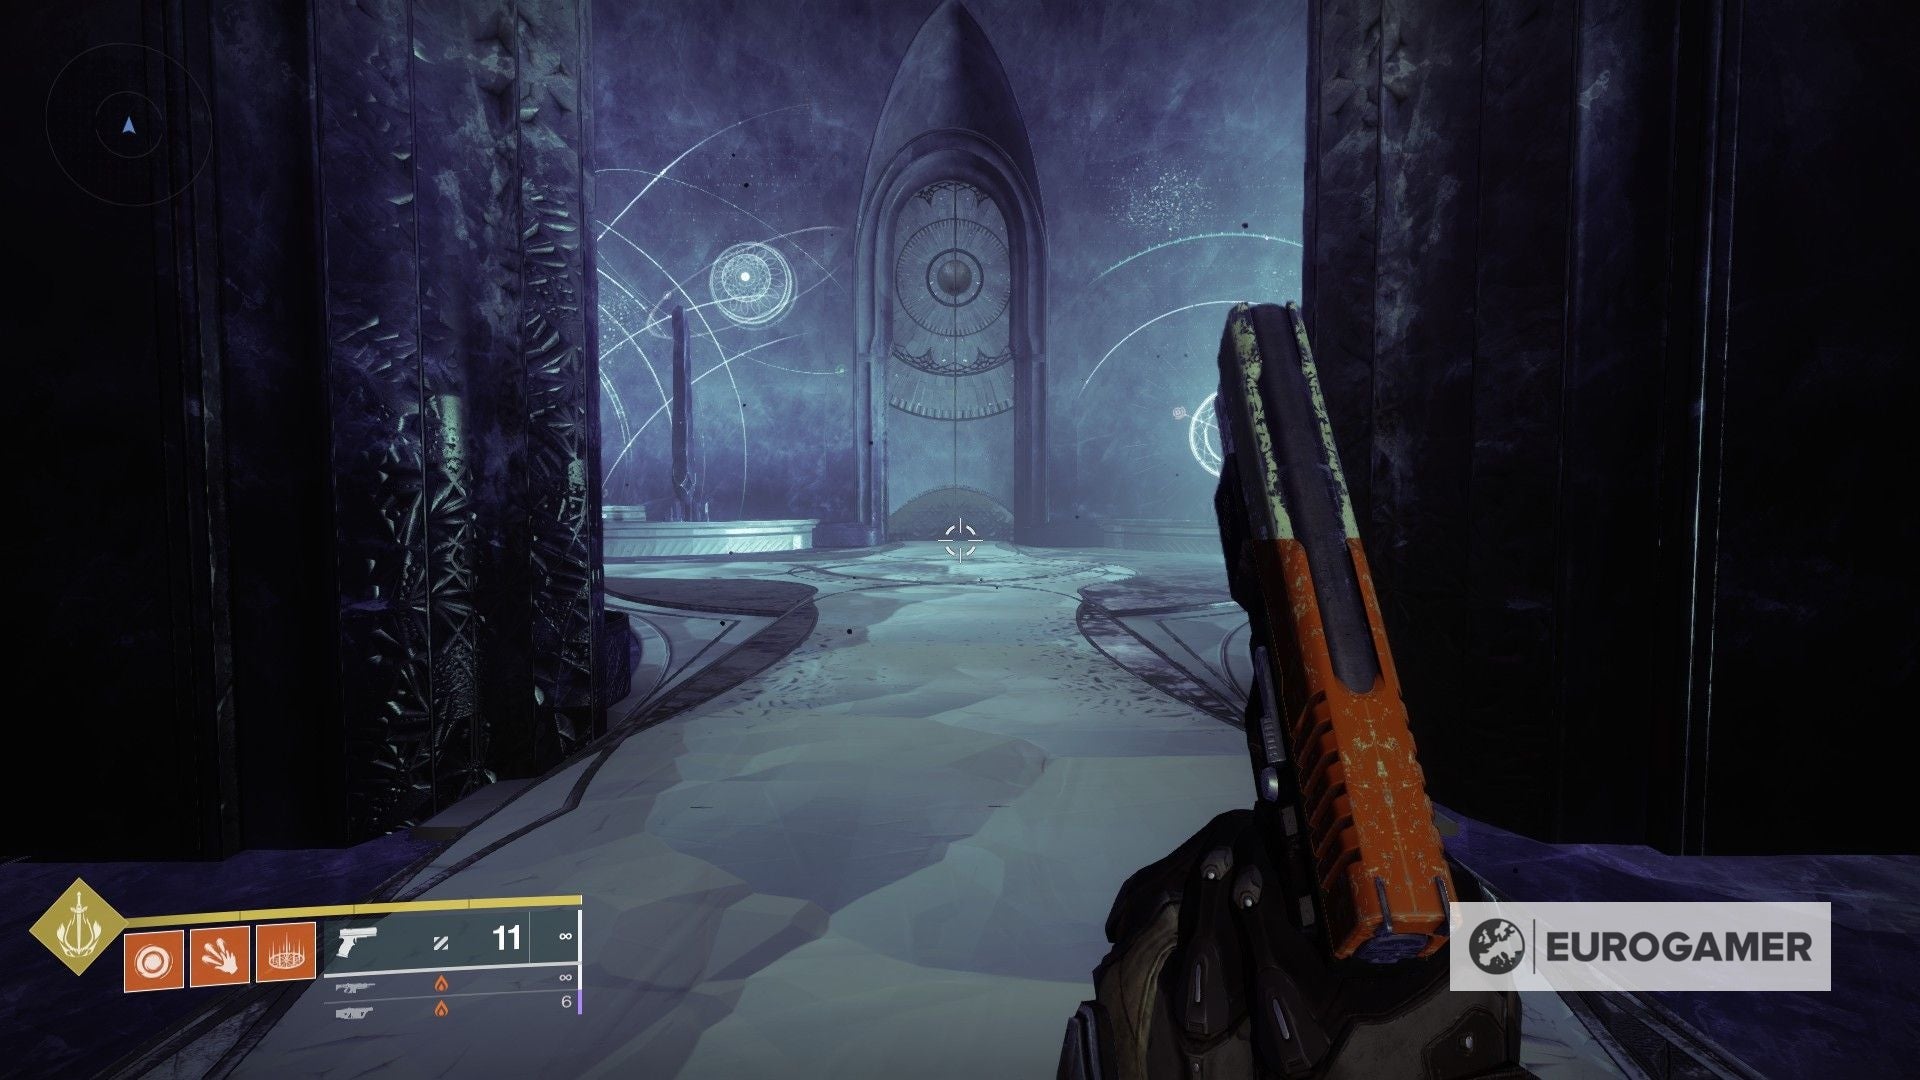
Confluence Throne Portal Atlas Skew location
The third Atlas Skew can be found in The Confluence, which is a hidden area within the Dreaming Metropolis.
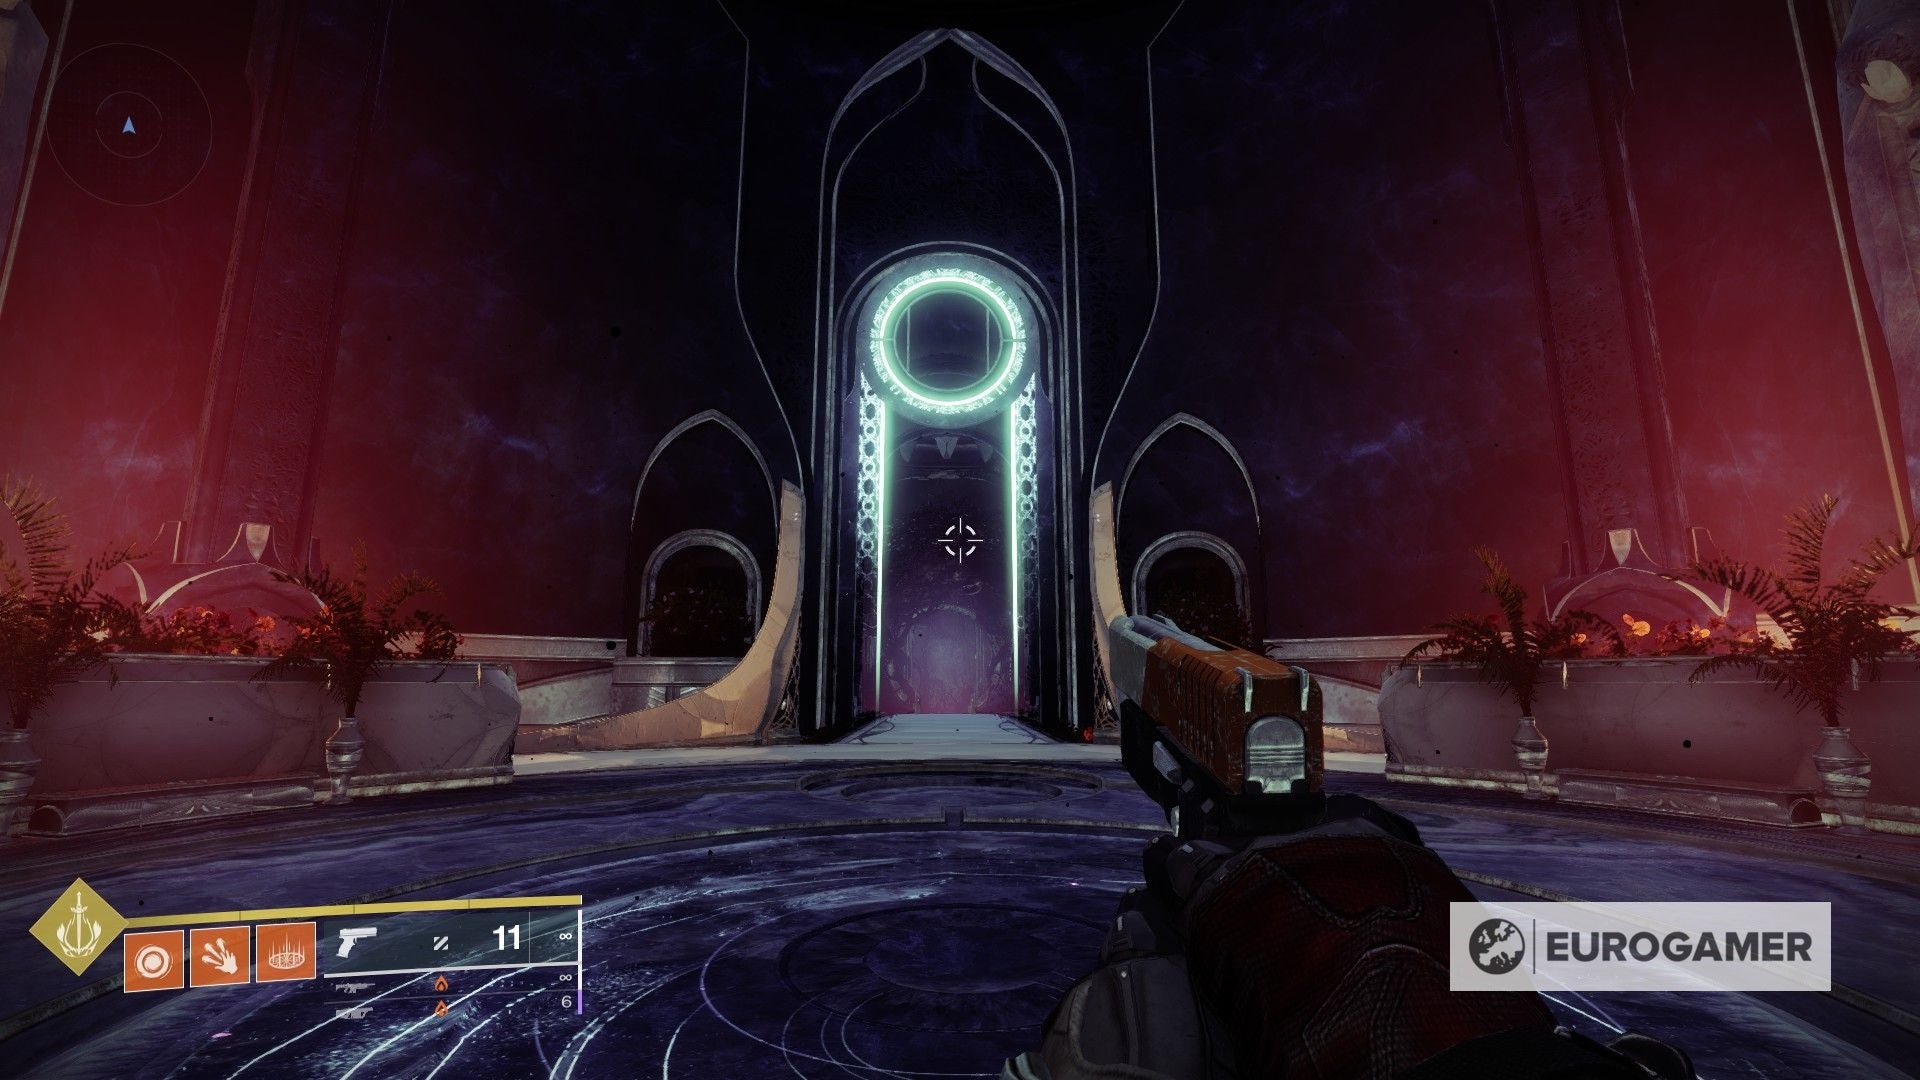
Now that we're familiarised with the layout of The Confluence, we're taking the principal room with the three passageways as the starting bespeak.
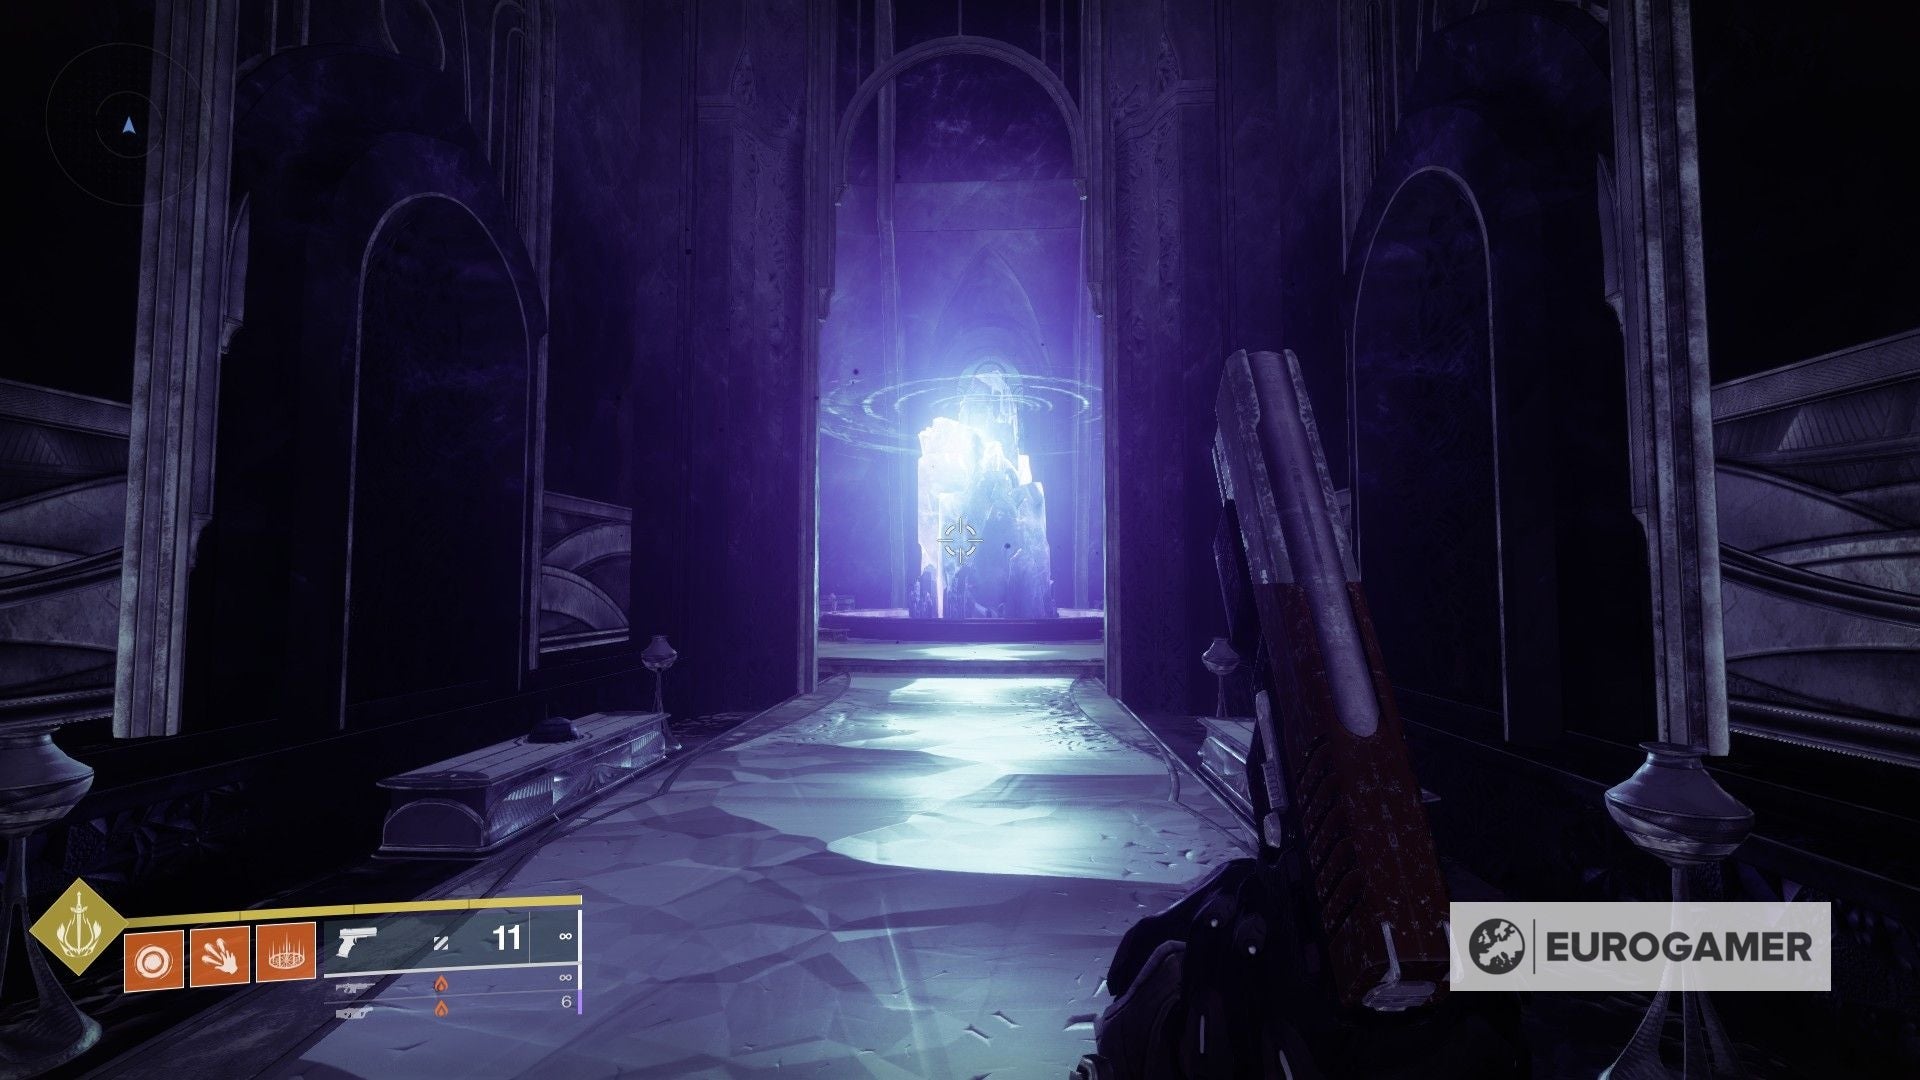
From this spot, head within the large door with the glowing blue symbol.
The starting time room y'all'll see is quite a vast 1, simply at that place is nothing of interest here. Instead, you're going to desire to continue heading straight onto the other side of the pit in the eye.
Grab the Atlas Skew and y'all'll exist set up.
2 more to go!
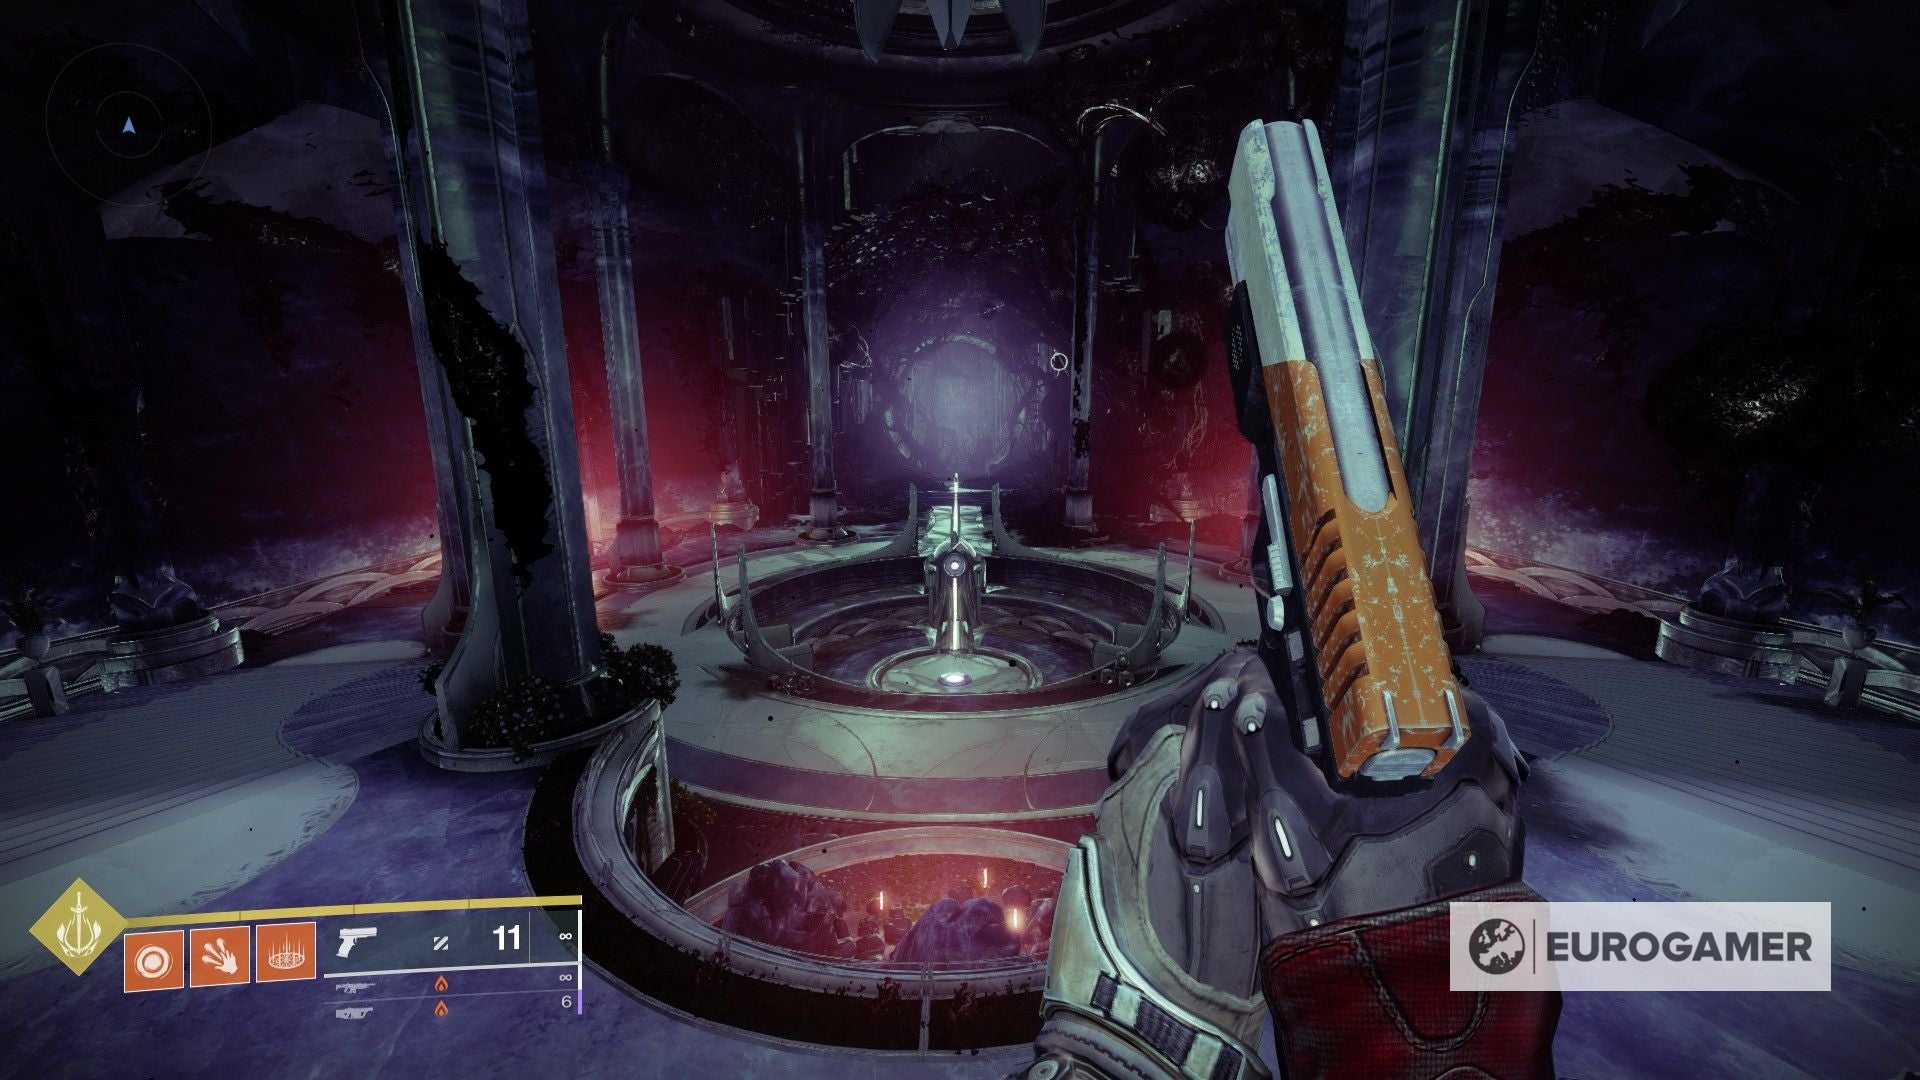
Confluence Giant Crystal Atlas Skew location
The fourth Atlas Skew can be found in The Confluence, which is a hidden area within the Dreaming City.
This i is super straightforward - if you took the same portal on Spine of Keres, yous will stumble upon it only past moving through the first few rooms.
Move through the corridors and you will eventually see the crystal in the vicinity. All you have to do is get effectually it and take hold of the Atlas Skew.
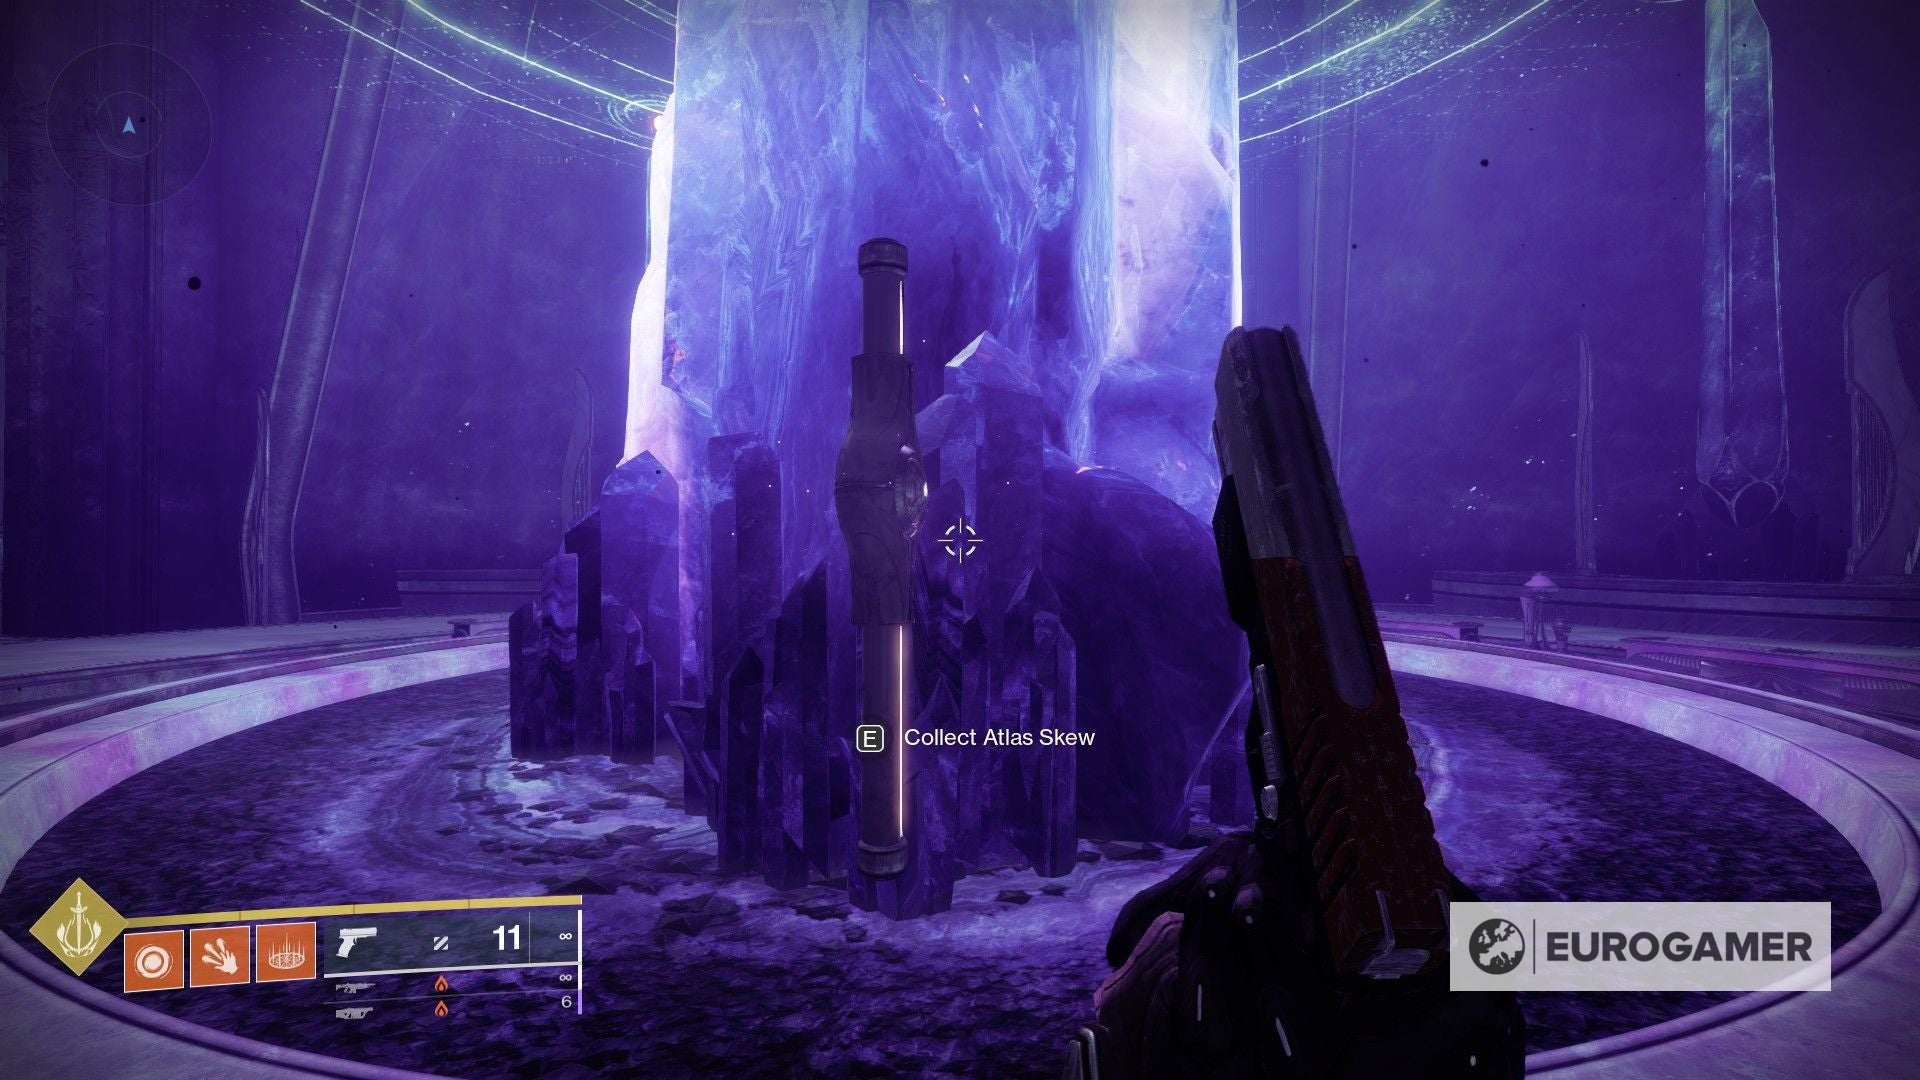
Just one left!
Garden Entry Statue Atlas Skew location
The fifth Atlas Skew tin exist found in The Confluence, which is a subconscious expanse within the Dreaming City.
Now that we're familiarised with the layout of The Confluence, we're taking the main room with the three passageways as the starting signal.
From this spot, head inside the large door with the yellow banners on each side. After y'all've entered the room with the tree, head to the left and into the corridor.
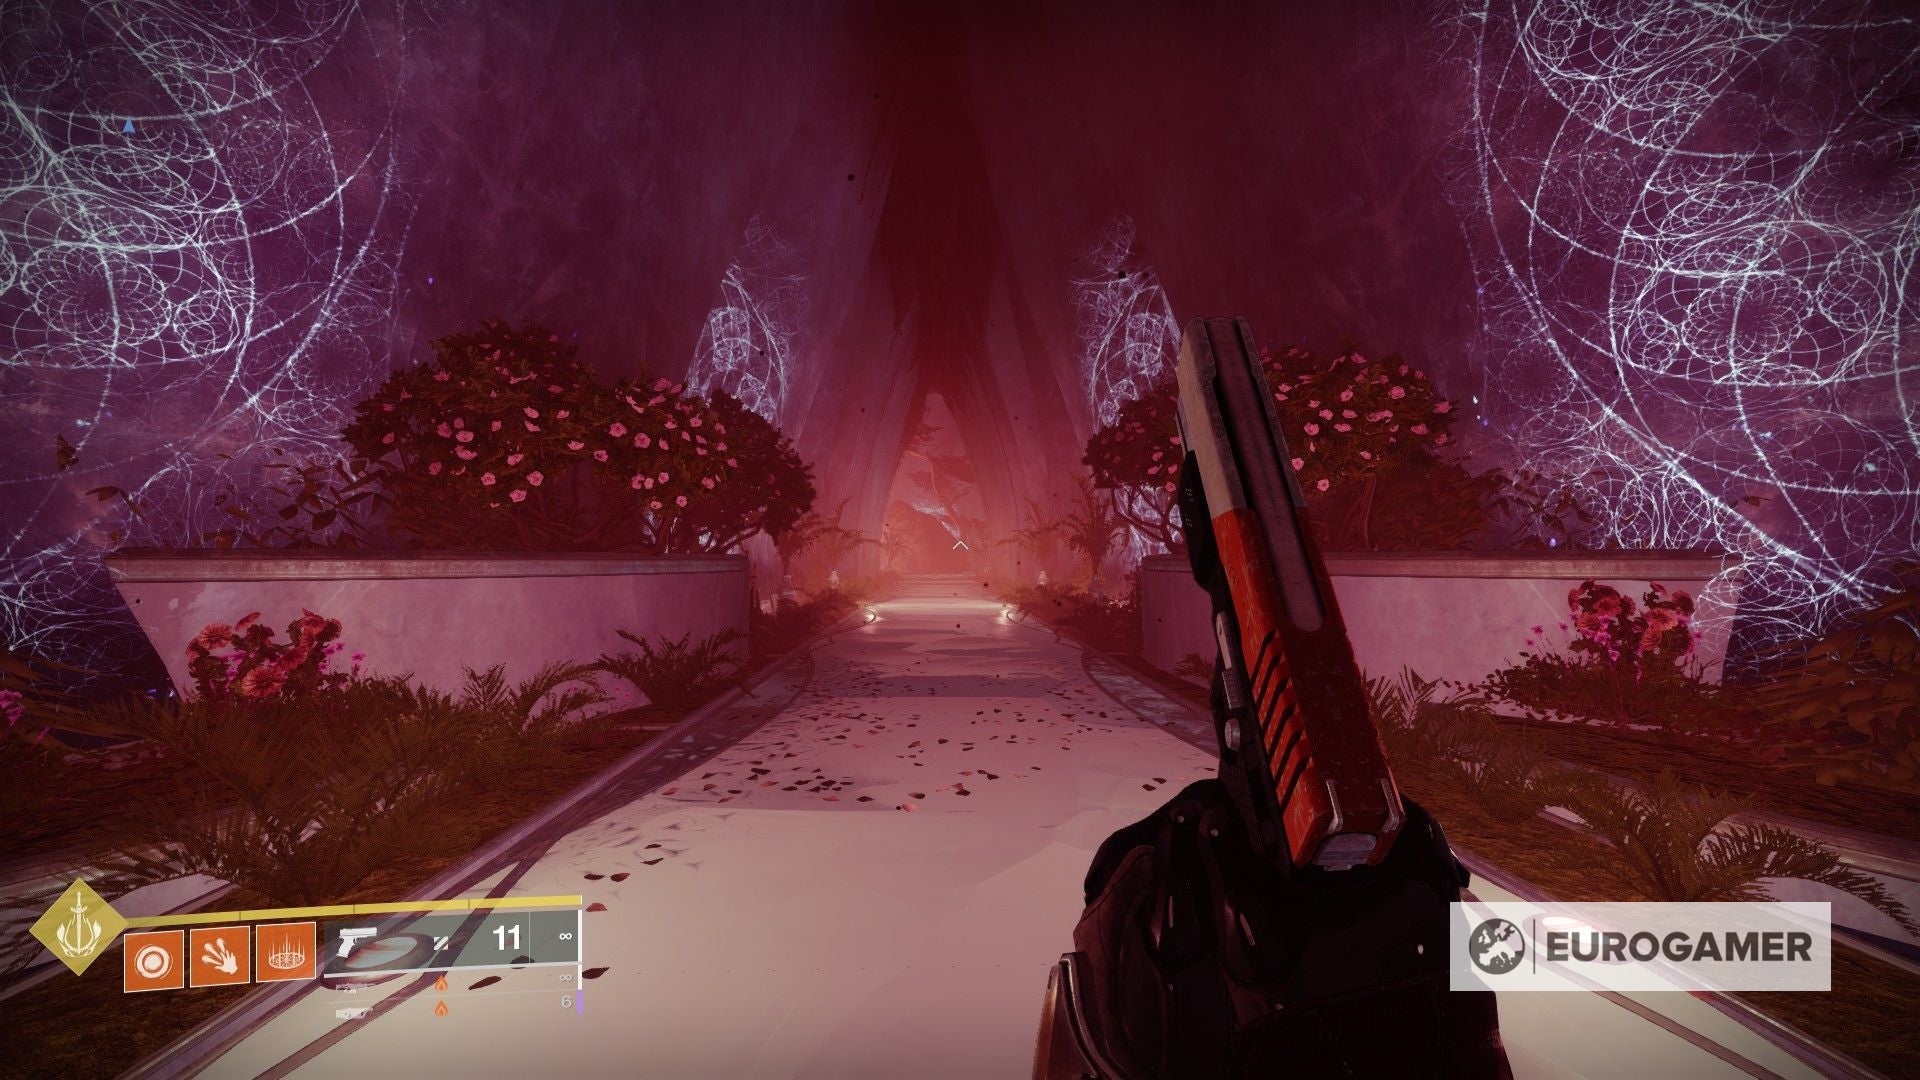
This corridor will take you to the Gardens of Esila. One time in there, turn left once more and into another room.
From there you can't miss it. Grab the Atlas Skew and you'll exist all set.
Congratulations on collecting all Atlas Skews in The Confluence! At present to complete the residual of A Hollow Coronation to unlock Ager'due south Scepter.

Atlas Screws Locations Destiny 2,
Source: https://www.eurogamer.net/destiny-2-atlas-skew-locations-tracing-the-stars-8005
Posted by: doweclowed.blogspot.com
0 Response to "Atlas Screws Locations Destiny 2"
Post a Comment